Pal Effigies in Palworld
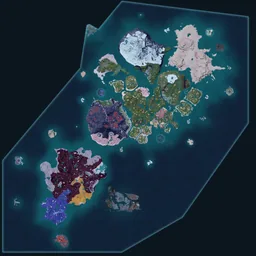
360 pal effigies mapped on the Palpagos Islands across 12 regions. Most concentrated in Outlying Isles (62). A further 47 sit on the World Tree, which the game draws as a separate map — see them there.
Interactive pal effigies map
Your progress: 0 of 407 pal effigies found
0%Click a pin on the map, then "Mark as found". Progress stays in this browser, and syncs to your account when you are signed in.
Showing 200 of 360
View all on the map →How Capture Power upgrades work
Carry Lifmunk Effigies to any of the 4 Statues of Power scattered across Palpagos. Each offer permanently raises your Capture Power tier. The other eleven effigy types go to the same statues but feed different tracks — Relaxaurus raises EXP gain, Yakumo the odds of better passive skills, Herbil flight, Pengullet swimming, and so on. Higher tiers significantly boost the catch-rate multiplier for every Pal sphere throw — the difference between catching an Alpha at 30% versus 60% probability. Costs ramp per tier; later upgrades demand bulk offerings.
Every effigy type, and where it is
Eleven Pal variants share one collectible. Which one you need decides where you go — most variants sit almost entirely in a single region. Pick a type to open the map filtered to just those.
 Lifmunk Effigy39%140 pal effigiesThe common one — spread across all 11 regions, so you pick these up as you go.
 Depresso Effigy8%30 pal effigiesEvery single one is on the outlying isles. Nowhere else.
 Herbil Effigy8%30 pal effigies93% on Sakurajima.
 Lamball Effigy8%30 pal effigiesHalf of them in Verdant Brook, the rest scattered nearby.
 Munchill Effigy8%30 pal effigiesTwo thirds in Twilight Dunes.
 Pengullet Effigy8%30 pal effigies80% on Mt. Obsidian.
 Rooby Effigy8%30 pal effigies83% in the Astral Mountains — pack cold gear.
 Tanzee Effigy8%30 pal effigiesAll 30 on Feybreak — one island run clears every one of them.
 Lunaris Effigy1%4 pal effigiesOnly four exist, spread over three regions.
 Relaxaurus Effigy1%4 pal effigiesFour in total, one per region — full walkthrough in the guide.
 Yakumo Effigy1%2 pal effigiesThe rarest: two on the whole map. Guide has both.
Densest regions
Distribution by region
- Outlying Isles62 · 17%
- Feybreak49 · 14%
- Sakurajima47 · 13%
- Verdant Brook45 · 13%
- Mt. Obsidian44 · 12%
- Astral Mountains39 · 11%
- Twilight Dunes35 · 10%
- Windswept Hills17 · 5%
- Bamboo Grove15 · 4%
- Sea Breeze Archipelago4 · 1%
- Marsh Island2 · 1%
- Isle of Silence1 · 0%
All locations by region
Outlying Isles(62)
- Rooby Effigy #1 — Isle of the Glacial Core140, 440
- Lifmunk Effigy #1 — Isle of the Glacial Core222, 646
- Munchill Effigy #2 — Isle of the Glacial Core268, 657
- Munchill Effigy #1 — Isle of the Glacial Core277, 605
- Munchill Effigy #3 — Isle of the Glacial Core315, 742
- Munchill Effigy #1 — Scouring Islet454, -745
- Pengullet Effigy #1 — Flamepulse Islet773, 447
- Lifmunk Effigy #1 — Oasis Isle855, 191
- Lifmunk Effigy #1 — Islet of Circular Ruins907, -97
- Lifmunk Effigy #1 — Phantom Isle-789, -292
- Depresso Effigy #9 — Enchanted Firmament-208, -1500
- Lifmunk Effigy #1 — Azure Woodland-220, -1423
- Depresso Effigy #5 — Enchanted Firmament-222, -1550
- Lifmunk Effigy #1 — Enchanted Firmament-231, -1537
- Depresso Effigy #12 — Enchanted Firmament-235, -1463
- Depresso Effigy #11 — Enchanted Firmament-244, -1489
- Depresso Effigy #8 — Enchanted Firmament-253, -1501
- Depresso Effigy #1 — Azure Woodland-254, -1421
- Lifmunk Effigy #2 — Azure Woodland-268, -1393
- Yakumo Effigy #1 — Enchanted Firmament-281, -1459
- Lifmunk Effigy #3 — Enchanted Firmament-281, -1473
- Depresso Effigy #6 — Enchanted Firmament-296, -1546
- Depresso Effigy #13 — Enchanted Firmament-326, -1452
- Depresso Effigy #2 — Azure Woodland-333, -1391
- Depresso Effigy #2 — Enchanted Firmament-333, -1560
- Lifmunk Effigy #4 — Enchanted Firmament-335, -1458
- Depresso Effigy #3 — Azure Woodland-348, -1362
- Depresso Effigy #7 — Enchanted Firmament-349, -1509
- Depresso Effigy #14 — Enchanted Firmament-352, -1423
- Depresso Effigy #4 — Enchanted Firmament-363, -1556
Feybreak(49)
- Tanzee Effigy #1 — Stone Pillar Cave-981, -994
- Yakumo Effigy #1 — The Oculus Gate, Tower in Sight-1123, -1388
- Tanzee Effigy #2 — The Oculus Gate, Tower in Sight-1205, -1361
- Tanzee Effigy #2 — Frozen Coral Hill-1363, -1672
- Lifmunk Effigy #1 — Hidden Passage to the Oculus Gate-1187, -1265
- Tanzee Effigy #1 — Crystalized Ancient Tree-978, -1167
- Lifmunk Effigy #1 — Deserted Ash Plateau-1354, -1159
- Lifmunk Effigy #2 — Withered Seaside-714, -1021
- Tanzee Effigy #1 — Loess Plains-1009, -1407
- Tanzee Effigy #2 — Hidden Passage to the Oculus Gate-1051, -1254
- Lifmunk Effigy #1 — The Oculus Gate, Tower in Sight-1085, -1390
- Lifmunk Effigy #1 — Scorched Hill-1098, -1121
- Tanzee Effigy #1 — Scorched Hill-1114, -1079
- Lifmunk Effigy #2 — The Oculus Gate, Tower in Sight-1122, -1319
- Tanzee Effigy #1 — Hidden Passage to the Oculus Gate-1127, -1300
- Tanzee Effigy #3 — Hidden Passage to the Oculus Gate-1128, -1249
- Tanzee Effigy #2 — Scorched Hill-1134, -949
- Tanzee Effigy #3 — Frozen Coral Hill-1159, -1630
- Pengullet Effigy #1 — Bicornis Islet-1165, -1920
- Tanzee Effigy #6 — Frozen Coral Hill-1179, -1504
- Tanzee Effigy #2 — Sandstone Gate Islet-1181, -824
- Tanzee Effigy #1 — Sandstone Gate Islet-1183, -844
- Tanzee Effigy #1 — The Oculus Gate, Tower in Sight-1210, -1412
- Tanzee Effigy #3 — Deserted Ash Plateau-1215, -976
- Lifmunk Effigy #1 — Bicornis Islet-1223, -1749
- Tanzee Effigy #4 — Frozen Coral Hill-1245, -1625
- Tanzee Effigy #1 — Frozen Coral Hill-1246, -1698
- Tanzee Effigy #5 — Frozen Coral Hill-1287, -1575
- Munchill Effigy #1 — Sandstone Gate Islet-1289, -596
- Lifmunk Effigy #1 — Frozen Coral Hill-1296, -1553
Sakurajima(47)
- Herbil Effigy #2 — Sakurajima - Mushroom Wetlands-334, 127
- Herbil Effigy #7 — Sakurajima - Mushroom Wetlands-369, 150
- Rooby Effigy #1 — Sakurajima - Mushroom Wetlands-370, 297
- Herbil Effigy #3 — Sakurajima - Mushroom Wetlands-382, 128
- Herbil Effigy #9 — Sakurajima - Mushroom Wetlands-387, 180
- Herbil Effigy #13 — Sakurajima - Mushroom Wetlands-405, 187
- Lifmunk Effigy #3 — Sakurajima - Northern Rock Field-405, 444
- Rooby Effigy #1 — Sakurajima - Northern Rock Field-423, 481
- Herbil Effigy #6 — Sakurajima - Mushroom Wetlands-447, 149
- Herbil Effigy #11 — Sakurajima - Mushroom Wetlands-447, 183
- Herbil Effigy #12 — Sakurajima - Mushroom Wetlands-483, 186
- Herbil Effigy #1 — Sakurajima - Mushroom Wetlands-493, 102
- Herbil Effigy #14 — Sakurajima - Mushroom Wetlands-497, 190
- Herbil Effigy #10 — Sakurajima - Mushroom Wetlands-516, 181
- Herbil Effigy #2 — Sakurajima - Northern Rock Field-534, 342
- Herbil Effigy #8 — Sakurajima - Mushroom Wetlands-535, 158
- Lifmunk Effigy #4 — Dancing Sakura Shrine-538, 213
- Lifmunk Effigy #1 — Sakurajima - Northern Rock Field-561, 265
- Lifmunk Effigy #1 — Dancing Sakura Shrine-570, 152
- Herbil Effigy #1 — Sakurajima - Northern Rock Field-582, 334
- Herbil Effigy #1 — Dancing Sakura Shrine-584, 162
- Herbil Effigy #5 — Dancing Sakura Shrine-594, 233
- Herbil Effigy #7 — Dancing Sakura Shrine-615, 282
- Herbil Effigy #3 — Dancing Sakura Shrine-628, 190
- Herbil Effigy #2 — Sakurajima - Southern Sandbar-634, 104
- Lifmunk Effigy #2 — Sakurajima - Southern Sandbar-660, 169
- Herbil Effigy #2 — Dancing Sakura Shrine-671, 183
- Herbil Effigy #3 — Sakurajima - Southern Sandbar-687, 180
- Herbil Effigy #1 — Sakurajima - Southern Sandbar-694, 86
- Herbil Effigy #4 — Sakurajima - Southern Sandbar-707, 184
Verdant Brook(45)
- Lifmunk Effigy #2 — Frostbound Mountains110, 223
- Lamball Effigy #1 — Verdant Brook127, -34
- Lifmunk Effigy #1 — Frostbound Mountains141, 176
- Lifmunk Effigy #6 — Verdant Brook166, 13
- Lifmunk Effigy #5 — Verdant Brook181, 2
- Lifmunk Effigy #1 — Gobfin's Turf188, -96
- Munchill Effigy #1 — Frostbound Mountains196, 234
- Lamball Effigy #3 — Gobfin's Turf203, -142
- Lifmunk Effigy #3 — Verdant Brook234, -4
- Lamball Effigy #5 — Frostbound Mountains241, 135
- Lunaris Effigy #1 — Frostbound Mountains245, 75
- Lamball Effigy #2 — Gobfin's Turf281, -173
- Lifmunk Effigy #4 — Crescent Moon Shore29, -110
- Lamball Effigy #2 — Frostbound Mountains291, 38
- Lifmunk Effigy #1 — Scars of War307, -23
- Lunaris Effigy #1 — Scars of War362, 29
- Lamball Effigy #2 — Scars of War392, 52
- Munchill Effigy #3 — Scars of War418, 140
- Munchill Effigy #1 — Scars of War452, 64
- Munchill Effigy #2 — Scars of War465, 137
- Lifmunk Effigy #2 — Scars of War473, 13
- Lifmunk Effigy #3 — Scars of War474, 76
- Lamball Effigy #4 — Frostbound Mountains73, 118
- Lamball Effigy #1 — Frostbound Mountains24, 11
- Lifmunk Effigy #7 — Verdant Brook210, 19
- Lifmunk Effigy #5 — Ancient Ritual Site-118, -278
- Lifmunk Effigy #6 — Ancient Ritual Site-95, -263
- Lamball Effigy #1 — Gobfin's Turf172, -202
- Lifmunk Effigy #1 — Crescent Moon Shore-58, -208
- Lifmunk Effigy #2 — Crescent Moon Shore-94, -193
Mt. Obsidian(44)
- Lifmunk Effigy #3 — Foot of the Volcano-333, -312
- Lifmunk Effigy #2 — Foot of the Volcano-277, -408
- Lifmunk Effigy #2 — No. 2 Wildlife Sanctuary-612, -17
- Lifmunk Effigy #1 — Dry Sandy Beach-579, -710
- Lifmunk Effigy #4 — Fisherman's Point-421, -691
- Pengullet Effigy #2 — Fisherman's Point-481, -679
- Lifmunk Effigy #1 — Fisherman's Point-521, -758
- Lifmunk Effigy #1 — Foot of the Volcano-360, -492
- Lifmunk Effigy #1 — Ruined Fortress City-613, -269
- Lifmunk Effigy #2 — Ruined Fortress City-569, -221
- Pengullet Effigy #5 — Ruined Fortress City-611, -225
- Lifmunk Effigy #1 — No. 2 Wildlife Sanctuary-749, -212
- Lifmunk Effigy #2 — Fisherman's Point-464, -742
- Pengullet Effigy #1 — Foot of the Volcano-333, -431
- Pengullet Effigy #3 — Foot of the Volcano-362, -380
- Lamball Effigy #1 — Foot of the Volcano-376, -256
- Pengullet Effigy #3 — Fisherman's Point-376, -657
- Pengullet Effigy #4 — Fisherman's Point-411, -593
- Pengullet Effigy #1 — Mount Obsidian-452, -536
- Pengullet Effigy #2 — Foot of the Volcano-456, -406
- Lifmunk Effigy #3 — Ruined Fortress City-457, -217
- Pengullet Effigy #4 — Foot of the Volcano-475, -298
- Pengullet Effigy #3 — Ruined Fortress City-486, -262
- Lifmunk Effigy #3 — Fisherman's Point-500, -714
- Lifmunk Effigy #2 — Mount Obsidian-515, -449
- Pengullet Effigy #6 — Ruined Fortress City-521, -190
- Pengullet Effigy #1 — Fisherman's Point-531, -733
- Pengullet Effigy #4 — Ruined Fortress City-537, -238
- Lifmunk Effigy #2 — Dry Sandy Beach-538, -599
- Pengullet Effigy #3 — Mount Obsidian-542, -474
Astral Mountains(39)
- Lifmunk Effigy #4 — Foot of the Astral Mountains19, 267
- Rooby Effigy #8 — Foot of the Astral Mountains26, 206
- Rooby Effigy #9 — Foot of the Astral Mountains47, 278
- Rooby Effigy #10 — Foot of the Astral Mountains91, 366
- Rooby Effigy #1 — Foot of the Astral Mountains-21, 42
- Rooby Effigy #6 — Foot of the Astral Mountains-100, 123
- Rooby Effigy #6 — Abandoned Ruins-102, 325
- Rooby Effigy #4 — Foot of the Astral Mountains-122, 104
- Rooby Effigy #7 — Astral Mountains-130, 571
- Lifmunk Effigy #2 — Foot of the Astral Mountains-136, 130
- Rooby Effigy #5 — Abandoned Ruins-140, 320
- Rooby Effigy #2 — Astral Mountains-176, 459
- Lifmunk Effigy #5 — Astral Mountains-176, 484
- Lifmunk Effigy #2 — Astral Mountains-188, 453
- Rooby Effigy #3 — Astral Mountains-196, 465
- Rooby Effigy #2 — Abandoned Ruins-200, 249
- Rooby Effigy #6 — Astral Mountains-206, 555
- Lifmunk Effigy #3 — Astral Mountains-208, 460
- Rooby Effigy #9 — Astral Mountains-244, 612
- Rooby Effigy #1 — Astral Mountains-247, 385
- Rooby Effigy #5 — Astral Mountains-249, 543
- Lifmunk Effigy #1 — Abandoned Ruins-266, 299
- Rooby Effigy #1 — Abandoned Ruins-267, 230
- Lifmunk Effigy #1 — Astral Mountains-270, 408
- Lifmunk Effigy #4 — Astral Mountains-327, 474
- Rooby Effigy #4 — Astral Mountains-392, 520
- Lifmunk Effigy #3 — Foot of the Astral Mountains-68, 193
- Rooby Effigy #5 — Foot of the Astral Mountains-70, 113
- Rooby Effigy #3 — Abandoned Ruins-76, 290
- Lifmunk Effigy #1 — Foot of the Astral Mountains-79, 55
Twilight Dunes(35)
- Lifmunk Effigy #2 — Duneshelter221, 454
- Munchill Effigy #3 — Duneshelter246, 350
- Munchill Effigy #4 — Duneshelter274, 449
- Munchill Effigy #1 — Duneshelter279, 215
- Munchill Effigy #5 — Duneshelter288, 500
- Munchill Effigy #2 — Duneshelter291, 249
- Lifmunk Effigy #3 — Duneshelter298, 480
- Lifmunk Effigy #1 — Duneshelter301, 315
- Munchill Effigy #6 — Duneshelter347, 557
- Munchill Effigy #6 — Desiccated Dunes392, 567
- Munchill Effigy #4 — Desiccated Dunes428, 460
- Lifmunk Effigy #2 — No. 3 Wildlife Sanctuary458, 712
- Munchill Effigy #2 — No. 3 Wildlife Sanctuary495, 663
- Munchill Effigy #1 — Desiccated Dunes502, 278
- Munchill Effigy #2 — Desiccated Dunes529, 328
- Munchill Effigy #1 — No. 3 Wildlife Sanctuary546, 529
- Munchill Effigy #4 — Arena555, 152
- Munchill Effigy #2 — Arena559, 65
- Munchill Effigy #5 — Arena611, 172
- Munchill Effigy #3 — Desiccated Dunes611, 411
- Lifmunk Effigy #2 — Arena621, 188
- Munchill Effigy #3 — Arena626, 135
- Munchill Effigy #6 — Arena660, 243
- Munchill Effigy #1 — Arena737, 32
- Lamball Effigy #3 — Twilight Dunes-11, -82
- Lunaris Effigy #1 — Twilight Dunes-149, -46
- Lamball Effigy #2 — Twilight Dunes-4, -85
- Rooby Effigy #2 — Twilight Dunes-52, 30
- Rooby Effigy #1 — Twilight Dunes-66, 12
- Lamball Effigy #1 — Twilight Dunes-89, -133
Windswept Hills(17)
- Lifmunk Effigy #1 — Flying Fish Coast169, -595
- Lamball Effigy #1 — Rayne Syndicate Test Drilling Rig224, -269
- Lifmunk Effigy #2 — Small Settlement57, -469
- Lamball Effigy #1 — Autumn Rocks62, -300
- Lunaris Effigy #1 — Autumn Rocks59, -291
- Lifmunk Effigy #3 — Flying Fish Coast250, -522
- Lifmunk Effigy #4 — Flying Fish Coast266, -484
- Lifmunk Effigy #2 — Flying Fish Coast243, -557
- Lifmunk Effigy #1 — Windswept Island156, -465
- Lifmunk Effigy #1 — Golden Hills-6, -460
- Lifmunk Effigy #1 — Desolate Church24, -419
- Lifmunk Effigy #2 — Windswept Island126, -412
- Lifmunk Effigy #2 — Desolate Church66, -409
- Lifmunk Effigy #2 — Golden Hills-14, -401
- Lifmunk Effigy #1 — Autumn Rocks119, -372
- Lifmunk Effigy #1 — Fortress Ruins169, -349
- Lifmunk Effigy #1 — Small Settlement52, -518
Bamboo Grove(15)
- Lifmunk Effigy #5 — Bamboo Groves-227, -311
- Lifmunk Effigy #6 — Bamboo Groves-232, -277
- Lamball Effigy #3 — Bamboo Groves-182, -263
- Lifmunk Effigy #7 — Bamboo Groves-183, -230
- Lifmunk Effigy #2 — Deep Bamboo Thicket-234, -102
- Lamball Effigy #3 — Deep Bamboo Thicket-267, -97
- Lifmunk Effigy #2 — Bamboo Groves-207, -411
- Lamball Effigy #2 — Bamboo Groves-263, -395
- Lifmunk Effigy #4 — Bamboo Groves-200, -319
- Lifmunk Effigy #1 — Bamboo Groves-143, -434
- Lifmunk Effigy #3 — Bamboo Groves-150, -387
- Lamball Effigy #1 — Bamboo Groves-247, -426
- Lamball Effigy #1 — Deep Bamboo Thicket-325, -233
- Lifmunk Effigy #1 — Deep Bamboo Thicket-368, -191
- Lamball Effigy #2 — Deep Bamboo Thicket-393, -115
Sea Breeze Archipelago(4)
- Pengullet Effigy #1 — Sea Breeze Archipelago-302, -530
- Lamball Effigy #2 — Sea Breeze Archipelago-148, -505
- Lamball Effigy #1 — Sea Breeze Archipelago-276, -508
- Lifmunk Effigy #1 — Sea Breeze Archipelago Church-33, -483
Marsh Island(2)
- Lifmunk Effigy #2 — Marsh Island270, -231
- Lifmunk Effigy #1 — Marsh Island367, -323
Isle of Silence(1)
- Herbil Effigy #1 — Isle of Silence-554, 101
On the World Tree (47)
Palworld 1.0 draws the World Tree as its own map rather than a corner of the Palpagos Islands, so these 47 pal effigies have no Palpagos region and are listed on their own.
- Cattiva Effigy #1 — Shinespore Root-1930, 1151
- Lifmunk Effigy #1 — Shinespore Root-1961, 1158
- Lifmunk Effigy #1 — Spore Cloister-1852, 1233
- Cattiva Effigy #1 — Lacrymal Shoal-1954, 1241
- Lifmunk Effigy #2 — Spore Cloister-1763, 1299
- Lifmunk Effigy #1 — Lacrymal Shoal-1922, 1307
- Cattiva Effigy #1 — Spore Cloister-1816, 1308
- Cattiva Effigy #1 — Alluvion Lakefront-1610, 1328
- Cattiva Effigy #1 — Within the Seal-1968, 1331
- Lifmunk Effigy #1 — Alluvion Lakefront-1613, 1331
- Cattiva Effigy #2 — Spore Cloister-1799, 1332
- Cattiva Effigy #2 — Alluvion Lakefront-1643, 1344
- Lifmunk Effigy #2 — Lacrymal Shoal-1892, 1349
- Lifmunk Effigy #3 — Spore Cloister-1755, 1353
- Cattiva Effigy #3 — Alluvion Lakefront-1656, 1356
- Yakumo Effigy #1 — Lacrymal Shoal-1910, 1363
- Cattiva Effigy #2 — Within the Seal-1970, 1367
- Lifmunk Effigy #1 — Whimsical Wisteria Grove-1564, 1369
- Cattiva Effigy #4 — Alluvion Lakefront-1640, 1376
- Cattiva Effigy #1 — The Verdant Rootpath-1454, 1384
- Lifmunk Effigy #1 — The Verdant Rootpath-1488, 1385
- Lifmunk Effigy #1 — Gilded City Ruins-1854, 1389
- Cattiva Effigy #1 — Gilded City Ruins-1811, 1407
- Cattiva Effigy #3 — Within the Seal-1909, 1411
- Cattiva Effigy #2 — Gilded City Ruins-1703, 1433
- Lifmunk Effigy #1 — Within the Seal-1938, 1434
- Cattiva Effigy #3 — Gilded City Ruins-1899, 1446
- Cattiva Effigy #1 — Whimsical Wisteria Grove-1640, 1457
- Cattiva Effigy #1 — Remnant Riverside-1710, 1462
- Cattiva Effigy #4 — Within the Seal-1935, 1485
Strategy tips
- Pal Effigies glow at night — easier to spot during dusk/night cycles than at midday.
- Stack effigy runs with a region you're already visiting; don't make dedicated trips early-game when 360 spread across 12 Palpagos regions is overwhelming.
- The outlying isles host the densest Palpagos cluster — 62 effigies, 17% of that island's total — with Feybreak second on 49 and Sakurajima on 47. Endgame players can bulk-collect in any of the three for the final Capture Power tiers.
- Capture Power is a permanent upgrade and applies to every throw — prioritise the first 3-4 tiers before grinding rare-Pal catches.