Pal Eggs in Palworld
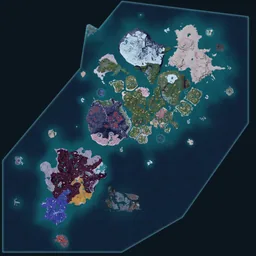
All 1786 pal eggs are spread across 13 regions of the Palpagos Islands. The densest cluster is in Feybreak with 567 markers. A further 29 sit on the World Tree, which the game draws as a separate map — see them there.
Interactive pal eggs map
+1586 more on the map
View all on the map →How world eggs work
An egg spawn is fixed in one way only: the place. What you pick up is not. Every nest in paldb's dump points at a weighted table rather than an item, and across the 1,747 nests whose table is published, only about one in six hands over the type the pin is named after. The names on this map — and the same names on every other Palworld map — label the biome layer a nest belongs to, not the egg in it. Size varies too: the same nest can give a standard, Large or Huge egg, and bigger eggs hatch rarer, higher-star Pals. Take whatever you get to an Egg Incubator and set the room temperature to match the egg in your hands — Heaters for Frozen, Coolers for Scorching. The wrong temperature only slows hatching, it never ruins the egg. Incubation runs on a real-world clock and keeps counting while you play elsewhere.
Every egg type on the map
On Palpagos the map groups nests into six biome layers, and these are those six — 1,786 nests between them. The layer is not the egg: a nest rolls from a weighted table, so a pin in this list can hand you a type that has no layer of its own — Dark eggs turn up this way. The World Tree's 29 nests are outside this breakdown entirely; they carry no layer. Pick a layer to open the map filtered to its nests.
 Damp Nest34%606 pal eggs94% sit on Feybreak, the rest on the outlying isles.
 Verdant Nest25%441 pal eggsHalf are in Verdant Brook — the easiest early sweep.
 Scorching Nest17%310 pal eggs90% on Mt. Obsidian.
 Frozen Nest15%271 pal eggs89% in the Astral Mountains.
 Rocky Nest7%122 pal eggs74% in Twilight Dunes.
 Dragon Nest2%36 pal eggsAll 36 are on Sakurajima — the rarest by far.
Densest regions
Distribution by region
- Feybreak567 · 32%
- Mt. Obsidian286 · 16%
- Astral Mountains250 · 14%
- Verdant Brook234 · 13%
- Twilight Dunes126 · 7%
- Windswept Hills88 · 5%
- Outlying Isles88 · 5%
- Sakurajima45 · 3%
- Bamboo Grove44 · 2%
- Sea Breeze Archipelago24 · 1%
- Marsh Island16 · 1%
- Isle of Silence11 · 1%
- Eastern Wild Island7 · 0%
All locations by region
Feybreak(567)
- Damp Nest #1 — Bicornis Islet-1224, -1746
- Damp Nest #9 — Frozen Coral Hill-1152, -1715
- Damp Nest #9 — The Oculus Gate, Tower in Sight-1063, -1449
- Damp Nest #13 — Loess Plains-945, -1449
- Damp Nest #10 — The Oculus Gate, Tower in Sight-1156, -1446
- Damp Nest #11 — The Oculus Gate, Tower in Sight-1053, -1440
- Damp Nest #12 — The Oculus Gate, Tower in Sight-1052, -1439
- Damp Nest #14 — Loess Plains-918, -1439
- Damp Nest #15 — Loess Plains-933, -1438
- Damp Nest #12 — Feybreak Shipwreck-1350, -1433
- Damp Nest #13 — The Oculus Gate, Tower in Sight-1047, -1433
- Damp Nest #13 — Feybreak Shipwreck-1311, -1430
- Damp Nest #10 — Frozen Coral Hill-1222, -1700
- Damp Nest #16 — Loess Plains-870, -1430
- Damp Nest #17 — Loess Plains-961, -1429
- Damp Nest #14 — Feybreak Shipwreck-1353, -1426
- Damp Nest #18 — Loess Plains-821, -1423
- Damp Nest #14 — The Oculus Gate, Tower in Sight-1137, -1420
- Damp Nest #19 — Loess Plains-1005, -1419
- Damp Nest #20 — Loess Plains-897, -1419
- Damp Nest #15 — The Oculus Gate, Tower in Sight-1042, -1417
- Damp Nest #16 — The Oculus Gate, Tower in Sight-1084, -1416
- Damp Nest #21 — Loess Plains-832, -1416
- Damp Nest #11 — Frozen Coral Hill-1151, -1695
- Damp Nest #22 — Loess Plains-958, -1415
- Damp Nest #15 — Feybreak Shipwreck-1333, -1414
- Damp Nest #23 — Loess Plains-857, -1411
- Damp Nest #16 — Feybreak Shipwreck-1295, -1408
- Damp Nest #24 — Loess Plains-931, -1408
- Damp Nest #25 — Loess Plains-917, -1408
Mt. Obsidian(286)
- Verdant Nest #5 — Foot of the Volcano-341, -309
- Verdant Nest #6 — Foot of the Volcano-346, -247
- Scorching Nest #3 — Foot of the Volcano-338, -531
- Scorching Nest #10 — Fisherman's Point-344, -680
- Scorching Nest #5 — Foot of the Volcano-297, -510
- Scorching Nest #6 — Foot of the Volcano-345, -508
- Scorching Nest #8 — Foot of the Volcano-313, -496
- Scorching Nest #9 — Foot of the Volcano-332, -492
- Verdant Nest #1 — Foot of the Volcano-251, -477
- Scorching Nest #13 — Foot of the Volcano-325, -466
- Scorching Nest #16 — Foot of the Volcano-344, -459
- Verdant Nest #2 — Foot of the Volcano-278, -443
- Scorching Nest #23 — Foot of the Volcano-329, -432
- Scorching Nest #25 — Foot of the Volcano-312, -425
- Scorching Nest #27 — Foot of the Volcano-342, -418
- Verdant Nest #3 — Foot of the Volcano-268, -411
- Verdant Nest #4 — Foot of the Volcano-282, -384
- Scorching Nest #37 — Foot of the Volcano-331, -372
- Scorching Nest #1 — Fisherman's Point-514, -756
- Scorching Nest #7 — Dry Sandy Beach-679, -727
- Scorching Nest #35 — Mount Obsidian-650, -514
- Scorching Nest #4 — Foot of the Volcano-387, -512
- Scorching Nest #36 — Mount Obsidian-575, -510
- Scorching Nest #37 — Mount Obsidian-761, -506
- Scorching Nest #38 — Mount Obsidian-658, -501
- Scorching Nest #39 — Mount Obsidian-617, -501
- Scorching Nest #40 — Mount Obsidian-484, -499
- Scorching Nest #7 — Foot of the Volcano-358, -496
- Scorching Nest #41 — Mount Obsidian-563, -495
- Scorching Nest #42 — Mount Obsidian-553, -494
Astral Mountains(250)
- Verdant Nest #1 — Isle of Murmurs-278, -50
- Verdant Nest #3 — Isle of Murmurs-265, -42
- Verdant Nest #4 — Isle of Murmurs-256, -35
- Verdant Nest #7 — Isle of Murmurs-261, -13
- Verdant Nest #8 — Isle of Murmurs-290, 2
- Frozen Nest #1 — Foot of the Astral Mountains-12, 47
- Frozen Nest #2 — Foot of the Astral Mountains-74, 49
- Verdant Nest #5 — Isle of Murmurs-334, -24
- Verdant Nest #6 — Isle of Murmurs-364, -18
- Verdant Nest #2 — Isle of Murmurs-306, -47
- Frozen Nest #93 — Foot of the Astral Mountains-63, 253
- Frozen Nest #94 — Foot of the Astral Mountains-36, 260
- Frozen Nest #95 — Foot of the Astral Mountains-5, 268
- Frozen Nest #96 — Foot of the Astral Mountains19, 268
- Frozen Nest #97 — Foot of the Astral Mountains-63, 274
- Frozen Nest #12 — Abandoned Ruins-85, 275
- Frozen Nest #98 — Foot of the Astral Mountains-16, 285
- Frozen Nest #99 — Foot of the Astral Mountains59, 292
- Frozen Nest #18 — Abandoned Ruins-57, 293
- Frozen Nest #100 — Foot of the Astral Mountains-4, 295
- Frozen Nest #105 — Foot of the Astral Mountains72, 332
- Frozen Nest #107 — Foot of the Astral Mountains83, 338
- Frozen Nest #108 — Foot of the Astral Mountains86, 339
- Frozen Nest #37 — Abandoned Ruins68, 387
- Frozen Nest #21 — Astral Mountains-337, 429
- Frozen Nest #22 — Astral Mountains-271, 430
- Frozen Nest #23 — Astral Mountains-196, 432
- Frozen Nest #24 — Astral Mountains-111, 434
- Frozen Nest #25 — Astral Mountains-155, 435
- Frozen Nest #26 — Astral Mountains-180, 439
Verdant Brook(234)
- Verdant Nest #63 — Frostbound Mountains165, 156
- Verdant Nest #12 — Ancient Ritual Site16, -284
- Verdant Nest #30 — Crescent Moon Shore-24, -113
- Verdant Nest #31 — Crescent Moon Shore55, -110
- Verdant Nest #25 — Gobfin's Turf156, -107
- Verdant Nest #32 — Crescent Moon Shore-13, -105
- Verdant Nest #27 — Gobfin's Turf128, -105
- Verdant Nest #28 — Gobfin's Turf117, -104
- Verdant Nest #33 — Crescent Moon Shore19, -102
- Verdant Nest #29 — Gobfin's Turf73, -101
- Verdant Nest #30 — Gobfin's Turf163, -97
- Verdant Nest #31 — Gobfin's Turf105, -93
- Verdant Nest #34 — Crescent Moon Shore-6, -92
- Verdant Nest #35 — Crescent Moon Shore51, -92
- Verdant Nest #32 — Gobfin's Turf78, -91
- Verdant Nest #33 — Gobfin's Turf82, -80
- Verdant Nest #36 — Crescent Moon Shore22, -77
- Verdant Nest #34 — Gobfin's Turf67, -71
- Verdant Nest #10 — Verdant Brook139, -68
- Verdant Nest #37 — Crescent Moon Shore40, -60
- Verdant Nest #13 — Ancient Ritual Site-47, -275
- Verdant Nest #35 — Gobfin's Turf63, -59
- Verdant Nest #12 — Verdant Brook140, -52
- Verdant Nest #13 — Verdant Brook52, -48
- Verdant Nest #14 — Verdant Brook114, -47
- Verdant Nest #17 — Verdant Brook95, -37
- Verdant Nest #14 — Ancient Ritual Site-69, -272
- Verdant Nest #19 — Verdant Brook39, -36
- Verdant Nest #20 — Verdant Brook138, -33
- Verdant Nest #22 — Verdant Brook164, -29
Twilight Dunes(126)
- Verdant Nest #10 — Twilight Dunes-191, -115
- Verdant Nest #11 — Twilight Dunes-184, -99
- Verdant Nest #12 — Twilight Dunes-111, -96
- Verdant Nest #13 — Twilight Dunes-130, -90
- Verdant Nest #14 — Twilight Dunes-8, -87
- Verdant Nest #15 — Twilight Dunes-201, -84
- Verdant Nest #16 — Twilight Dunes-91, -80
- Verdant Nest #17 — Twilight Dunes-25, -73
- Verdant Nest #18 — Twilight Dunes-188, -55
- Verdant Nest #19 — Twilight Dunes0, -54
- Verdant Nest #20 — Twilight Dunes-143, -47
- Verdant Nest #21 — Twilight Dunes13, -30
- Frozen Nest #1 — Twilight Dunes-37, -3
- Frozen Nest #2 — Twilight Dunes-65, 7
- Frozen Nest #3 — Twilight Dunes-33, 15
- Frozen Nest #4 — Twilight Dunes-48, 16
- Frozen Nest #5 — Twilight Dunes-85, 18
- Frozen Nest #6 — Twilight Dunes-63, 32
- Frozen Nest #7 — Twilight Dunes-20, 33
- Frozen Nest #8 — Twilight Dunes-57, 38
- Frozen Nest #9 — Twilight Dunes-41, 38
- Verdant Nest #1 — Twilight Dunes-127, -216
- Verdant Nest #2 — Twilight Dunes-183, -195
- Verdant Nest #3 — Twilight Dunes-139, -178
- Verdant Nest #4 — Twilight Dunes-194, -163
- Verdant Nest #5 — Twilight Dunes-119, -135
- Verdant Nest #6 — Twilight Dunes-216, -134
- Verdant Nest #7 — Twilight Dunes-176, -134
- Verdant Nest #8 — Twilight Dunes-92, -119
- Verdant Nest #9 — Twilight Dunes-159, -118
Windswept Hills(88)
- Verdant Nest #9 — Flying Fish Coast164, -526
- Verdant Nest #7 — Autumn Rocks74, -284
- Verdant Nest #4 — Rayne Syndicate Test Drilling Rig126, -264
- Verdant Nest #6 — Autumn Rocks45, -306
- Verdant Nest #8 — Autumn Rocks99, -259
- Verdant Nest #9 — Autumn Rocks84, -234
- Verdant Nest #4 — Golden Hills-113, -499
- Verdant Nest #7 — Golden Hills-45, -468
- Verdant Nest #8 — Golden Hills-117, -466
- Verdant Nest #9 — Golden Hills-50, -463
- Verdant Nest #12 — Golden Hills-75, -448
- Verdant Nest #15 — Golden Hills-50, -410
- Verdant Nest #5 — Flying Fish Coast213, -549
- Verdant Nest #1 — Fortress Ruins199, -425
- Verdant Nest #3 — Fortress Ruins186, -404
- Verdant Nest #5 — Fortress Ruins198, -368
- Verdant Nest #6 — Fortress Ruins183, -339
- Verdant Nest #7 — Flying Fish Coast236, -527
- Verdant Nest #7 — Fortress Ruins262, -301
- Verdant Nest #1 — Rayne Syndicate Test Drilling Rig241, -279
- Verdant Nest #2 — Rayne Syndicate Test Drilling Rig235, -278
- Verdant Nest #3 — Rayne Syndicate Test Drilling Rig196, -265
- Verdant Nest #5 — Rayne Syndicate Test Drilling Rig222, -262
- Verdant Nest #6 — Rayne Syndicate Test Drilling Rig207, -256
- Verdant Nest #8 — Flying Fish Coast256, -527
- Verdant Nest #7 — Rayne Syndicate Test Drilling Rig187, -255
- Verdant Nest #8 — Rayne Syndicate Test Drilling Rig189, -254
- Verdant Nest #9 — Rayne Syndicate Test Drilling Rig195, -244
- Verdant Nest #10 — Rayne Syndicate Test Drilling Rig198, -236
- Verdant Nest #11 — Rayne Syndicate Test Drilling Rig262, -226
Outlying Isles(88)
- Scorching Nest #8 — Phantom Isle-803, -402
- Scorching Nest #11 — Phantom Isle-787, -373
- Scorching Nest #13 — Phantom Isle-801, -348
- Scorching Nest #15 — Phantom Isle-792, -333
- Scorching Nest #16 — Phantom Isle-812, -332
- Scorching Nest #18 — Phantom Isle-772, -311
- Scorching Nest #19 — Phantom Isle-804, -296
- Scorching Nest #20 — Phantom Isle-769, -292
- Scorching Nest #21 — Phantom Isle-775, -289
- Scorching Nest #22 — Phantom Isle-783, -288
- Scorching Nest #23 — Phantom Isle-765, -271
- Scorching Nest #24 — Phantom Isle-788, -260
- Scorching Nest #25 — Phantom Isle-766, -255
- Damp Nest #9 — Enchanted Firmament-227, -1483
- Damp Nest #10 — Enchanted Firmament-241, -1471
- Damp Nest #7 — Enchanted Firmament-247, -1511
- Damp Nest #5 — Azure Woodland-251, -1376
- Damp Nest #2 — Azure Woodland-265, -1406
- Damp Nest #6 — Enchanted Firmament-265, -1516
- Damp Nest #4 — Azure Woodland-274, -1376
- Damp Nest #6 — Azure Woodland-282, -1375
- Damp Nest #8 — Enchanted Firmament-298, -1495
- Damp Nest #2 — Enchanted Firmament-309, -1556
- Damp Nest #7 — Azure Woodland-311, -1366
- Damp Nest #1 — Azure Woodland-328, -1410
- Damp Nest #11 — Enchanted Firmament-339, -1438
- Damp Nest #4 — Enchanted Firmament-346, -1541
- Damp Nest #3 — Azure Woodland-350, -1377
- Damp Nest #5 — Enchanted Firmament-355, -1523
- Damp Nest #3 — Enchanted Firmament-363, -1552
Sakurajima(45)
- Dragon Nest #1 — Sakurajima - Southern Sandbar-652, 27
- Dragon Nest #6 — Sakurajima - Mushroom Wetlands-375, 123
- Frozen Nest #3 — Sakurajima - Northern Rock Field-406, 455
- Frozen Nest #4 — Sakurajima - Northern Rock Field-445, 467
- Frozen Nest #5 — Sakurajima - Northern Rock Field-427, 486
- Dragon Nest #7 — Sakurajima - Mushroom Wetlands-330, 131
- Dragon Nest #8 — Sakurajima - Mushroom Wetlands-514, 146
- Dragon Nest #9 — Sakurajima - Mushroom Wetlands-534, 150
- Dragon Nest #10 — Sakurajima - Mushroom Wetlands-407, 153
- Dragon Nest #4 — Sakurajima - Southern Sandbar-684, 154
- Dragon Nest #1 — Sakurajima - Mushroom Wetlands-511, 104
- Dragon Nest #11 — Sakurajima - Mushroom Wetlands-437, 156
- Dragon Nest #1 — Dancing Sakura Shrine-563, 160
- Dragon Nest #12 — Sakurajima - Mushroom Wetlands-471, 176
- Dragon Nest #5 — Sakurajima - Southern Sandbar-689, 177
- Dragon Nest #13 — Sakurajima - Mushroom Wetlands-518, 177
- Dragon Nest #14 — Sakurajima - Mushroom Wetlands-492, 181
- Dragon Nest #2 — Sakurajima - Southern Sandbar-634, 107
- Dragon Nest #15 — Sakurajima - Mushroom Wetlands-472, 185
- Dragon Nest #6 — Sakurajima - Southern Sandbar-710, 188
- Dragon Nest #16 — Sakurajima - Mushroom Wetlands-400, 190
- Dragon Nest #2 — Dancing Sakura Shrine-673, 201
- Dragon Nest #17 — Sakurajima - Mushroom Wetlands-487, 206
- Dragon Nest #2 — Sakurajima - Mushroom Wetlands-484, 107
- Dragon Nest #3 — Dancing Sakura Shrine-702, 208
- Dragon Nest #4 — Dancing Sakura Shrine-593, 218
- Dragon Nest #18 — Sakurajima - Mushroom Wetlands-483, 219
- Dragon Nest #3 — Sakurajima - Mushroom Wetlands-537, 110
- Dragon Nest #5 — Dancing Sakura Shrine-617, 236
- Dragon Nest #6 — Dancing Sakura Shrine-680, 238
Bamboo Grove(44)
- Verdant Nest #20 — Deep Bamboo Thicket-393, -110
- Verdant Nest #23 — Deep Bamboo Thicket-239, -96
- Verdant Nest #24 — Deep Bamboo Thicket-257, -95
- Verdant Nest #13 — Bamboo Groves-266, -275
- Verdant Nest #25 — Deep Bamboo Thicket-231, -89
- Verdant Nest #14 — Bamboo Groves-146, -258
- Verdant Nest #15 — Bamboo Groves-306, -247
- Verdant Nest #16 — Bamboo Groves-227, -213
- Verdant Nest #17 — Bamboo Groves-239, -208
- Verdant Nest #2 — Deep Bamboo Thicket-280, -207
- Verdant Nest #3 — Deep Bamboo Thicket-309, -202
- Verdant Nest #18 — Bamboo Groves-236, -200
- Verdant Nest #4 — Deep Bamboo Thicket-338, -189
- Verdant Nest #6 — Deep Bamboo Thicket-369, -178
- Verdant Nest #11 — Bamboo Groves-310, -293
- Verdant Nest #7 — Deep Bamboo Thicket-387, -156
- Verdant Nest #8 — Deep Bamboo Thicket-270, -155
- Verdant Nest #9 — Deep Bamboo Thicket-234, -155
- Verdant Nest #10 — Deep Bamboo Thicket-251, -154
- Verdant Nest #11 — Deep Bamboo Thicket-304, -150
- Verdant Nest #12 — Deep Bamboo Thicket-388, -148
- Verdant Nest #13 — Deep Bamboo Thicket-280, -143
- Verdant Nest #14 — Deep Bamboo Thicket-343, -138
- Verdant Nest #12 — Bamboo Groves-194, -284
- Verdant Nest #15 — Deep Bamboo Thicket-239, -128
- Verdant Nest #16 — Deep Bamboo Thicket-369, -126
- Verdant Nest #17 — Deep Bamboo Thicket-286, -124
- Verdant Nest #18 — Deep Bamboo Thicket-307, -115
- Verdant Nest #19 — Deep Bamboo Thicket-221, -115
- Verdant Nest #1 — Bamboo Groves-110, -412
Sea Breeze Archipelago(24)
- Verdant Nest #3 — Sea Breeze Archipelago-259, -687
- Verdant Nest #9 — Sea Breeze Archipelago-268, -601
- Verdant Nest #10 — Sea Breeze Archipelago-316, -593
- Verdant Nest #11 — Sea Breeze Archipelago-266, -571
- Scorching Nest #3 — Sea Breeze Archipelago-347, -568
- Verdant Nest #1 — Sea Breeze Archipelago Church-59, -559
- Scorching Nest #4 — Sea Breeze Archipelago-321, -549
- Verdant Nest #12 — Sea Breeze Archipelago-240, -548
- Scorching Nest #5 — Sea Breeze Archipelago-296, -532
- Verdant Nest #13 — Sea Breeze Archipelago-280, -529
- Verdant Nest #3 — Sea Breeze Archipelago Church-99, -523
- Verdant Nest #14 — Sea Breeze Archipelago-136, -508
- Verdant Nest #4 — Sea Breeze Archipelago Church-51, -506
- Verdant Nest #15 — Sea Breeze Archipelago-147, -505
- Scorching Nest #1 — Sea Breeze Archipelago-339, -660
- Verdant Nest #4 — Sea Breeze Archipelago-326, -653
- Verdant Nest #5 — Sea Breeze Archipelago-279, -652
- Scorching Nest #2 — Sea Breeze Archipelago-343, -640
- Verdant Nest #6 — Sea Breeze Archipelago-293, -622
- Verdant Nest #7 — Sea Breeze Archipelago-195, -622
- Verdant Nest #8 — Sea Breeze Archipelago-56, -616
- Verdant Nest #1 — Sea Breeze Archipelago-148, -730
- Verdant Nest #2 — Sea Breeze Archipelago-212, -722
- Verdant Nest #2 — Sea Breeze Archipelago Church-18, -528
Marsh Island(16)
- Verdant Nest #1 — Marsh Island308, -371
- Verdant Nest #2 — Marsh Island353, -329
- Verdant Nest #3 — Marsh Island374, -315
- Verdant Nest #4 — Marsh Island298, -313
- Verdant Nest #5 — Marsh Island285, -309
- Verdant Nest #6 — Marsh Island364, -306
- Verdant Nest #7 — Marsh Island330, -288
- Verdant Nest #1 — Marsh Island Church Ruins447, -285
- Verdant Nest #8 — Marsh Island274, -259
- Verdant Nest #9 — Marsh Island268, -256
- Verdant Nest #2 — Marsh Island Church Ruins447, -252
- Verdant Nest #10 — Marsh Island315, -247
- Verdant Nest #11 — Marsh Island286, -246
- Verdant Nest #12 — Marsh Island270, -245
- Verdant Nest #13 — Marsh Island275, -233
- Verdant Nest #14 — Marsh Island272, -219
Isle of Silence(11)
- Verdant Nest #3 — Isle of Silence Church Ruins-433, -19
- Verdant Nest #4 — Isle of Silence Church Ruins-461, -3
- Verdant Nest #4 — Isle of Silence-515, -2
- Verdant Nest #5 — Isle of Silence Church Ruins-410, 3
- Verdant Nest #6 — Isle of Silence Church Ruins-422, 19
- Verdant Nest #5 — Isle of Silence-492, 33
- Verdant Nest #1 — Isle of Silence-453, -95
- Verdant Nest #2 — Isle of Silence-467, -90
- Verdant Nest #3 — Isle of Silence-433, -78
- Verdant Nest #1 — Isle of Silence Church Ruins-453, -25
- Verdant Nest #2 — Isle of Silence Church Ruins-400, -25
Eastern Wild Island(7)
- Verdant Nest #5 — Eastern Wild Island418, -126
- Verdant Nest #1 — Eastern Wild Island512, -220
- Verdant Nest #2 — Eastern Wild Island527, -200
- Verdant Nest #3 — Eastern Wild Island365, -163
- Verdant Nest #4 — Eastern Wild Island444, -130
- Verdant Nest #6 — Eastern Wild Island535, -93
- Verdant Nest #7 — Eastern Wild Island491, -60
On the World Tree (29)
Palworld 1.0 draws the World Tree as its own map rather than a corner of the Palpagos Islands, so these 29 pal eggs have no Palpagos region and are listed on their own.
- Pal Egg #1 — Shinespore Root-1954, 1178
- Pal Egg #1 — Spore Cloister-1812, 1262
- Pal Egg #1 — Lacrymal Shoal-1909, 1297
- Pal Egg #2 — Spore Cloister-1728, 1303
- Pal Egg #2 — Lacrymal Shoal-1930, 1327
- Pal Egg #3 — Lacrymal Shoal-1928, 1345
- Pal Egg #4 — Lacrymal Shoal-1932, 1352
- Pal Egg #5 — Lacrymal Shoal-1929, 1354
- Pal Egg #6 — Lacrymal Shoal-1891, 1365
- Pal Egg #1 — Gilded City Ruins-1885, 1385
- Pal Egg #1 — Whimsical Wisteria Grove-1608, 1387
- Pal Egg #2 — Gilded City Ruins-1866, 1401
- Pal Egg #1 — Alluvion Lakefront-1665, 1408
- Pal Egg #1 — Within the Seal-1934, 1412
- Pal Egg #2 — Whimsical Wisteria Grove-1536, 1420
- Pal Egg #2 — Within the Seal-1936, 1481
- Pal Egg #3 — Gilded City Ruins-1794, 1491
- Pal Egg #1 — Remnant Riverside-1709, 1497
- Pal Egg #2 — Remnant Riverside-1668, 1498
- Pal Egg #3 — Remnant Riverside-1678, 1506
- Pal Egg #1 — Boreal Summit-1796, 1524
- Pal Egg #4 — Remnant Riverside-1684, 1569
- Pal Egg #1 — Corroded Hollow-1643, 1571
- Pal Egg #2 — Corroded Hollow-1581, 1581
- Pal Egg #5 — Remnant Riverside-1743, 1583
- Pal Egg #1 — Forbidden Laboratory-1986, 1607
- Pal Egg #2 — Forbidden Laboratory-1984, 1624
- Pal Egg #1 — Abandoned Laboratory-1976, 1627
- Pal Egg #2 — Abandoned Laboratory-1934, 1636
Strategy tips
- The Dragon layer is the scarce one: 36 nests on the whole Palpagos map, every single one on Sakurajima. It is the only layer weighted towards Dragon eggs, though like every layer it can still hand you something else.
- The Damp layer is the biggest pool at 606 nests — a third of every Palpagos egg spawn — and 567 of them are in the Feybreak region, 550 of those on the island itself and 17 on its offshore islets. One island run beats any mainland route.
- Spawns refill about 180 minutes after you take them, so build one good loop and re-run it instead of scouting new ground each time.
- Set the incubator temperature before you leave on the next run — hatching is real-time, and a matched room turns the wait into something that finishes while you farm.
- Eggs are heavy. Check your weight limit before a long sweep, or you'll be walking the last stretch home.