Palworld 1.0 Tower Bosses — Order, Levels & Weaknesses

Boss towers in Palworld — every faction stronghold across Palpagos, the expansion islands and Sunreach, with their commanders

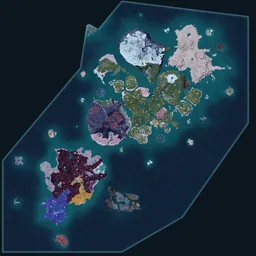
Boss Towers gate progression in Palworld. The five base-game towers belong to the Rayne Syndicate (Zoe and Grizzbolt), Free Pal Alliance (Lily and Lyleen), Brothers of the Eternal Pyre (Axel and Orserk), PIDF (Marcus and Faleris), and PAL Genetic Research Unit (Victor and Shadowbeak). The Sakurajima expansion adds the Moonflower Tower (Saya and Selyne), the Feybreak expansion adds the Feybreak Tower (Bjorn and Bastigor), and Palworld 1.0 added the Tower of the Azure Covenant on Sunreach (Auri and Shaolong) — eight faction towers, all of them in the table below. There is a ninth tower boss, Zenara and Astralym at Lv 80, but it is not one of the faction towers: its arena is the Sealed Sanctum in the World Tree (our map lists that tower as Within the Seal), which is why it is absent from this list.

Each fight has a 5-minute time limit — Palworld 1.0 cut it from 10 minutes and adjusted boss stats to match. The tower entrance is its own fast-travel point — unlock it on approach so you can respawn at the door if you wipe inside.

Source: palworld.wiki.gg/wiki/Tower.

17 mapped7 regionsVerified Palworld 1.0ByYurii Luzhko

Recommended completion order

Towers gate by boss level — the natural progression is Zoe & Grizzbolt (Lv 10) → Lily & Lyleen (Lv 20) → Axel & Orserk (Lv 30) → Marcus & Faleris (Lv 40) → Victor & Shadowbeak (Lv 50) → Saya & Selyne (Lv 55) → Bjorn & Bastigor (Lv 60) → Auri & Shaolong (Lv 68). Don't skip ahead more than one tier without an upgraded weapon and a counter Pal — the 5-minute clock punishes under-leveled attempts.

All 8 towers — boss + counter cheat-sheet

Faction names come from the tower markers in our seed data; the region column and boss-Pal elements are written into this table, the elements checked against our Pal-stats file. Counter recommendations follow Palworld's type chart. Levels and HP were re-read on 17 August 2026 from paldb (v1.0.3), with every Normal level independently confirmed against game8 — the figures this table carried before then were pre-1.0 and wrong on all but one row.

Your progress: 0 of 8 towers cleared

0%

Tick them in the list below or mark them on the map. Progress stays in this browser, and syncs to your account when you are signed in.

ClearedFaction (Tower)LvHPBoss PalElementBring (counter)RegionMap
Tamer: Zoe
1012,900GrizzboltGrizzboltElectricGroundWindswept HillsMap
Tamer: Lily
2042,500LyleenLyleenGrassFireVerdant BrookMap
Tamer: Axel
3053,750OrserkOrserkDragonElectricIceGroundMt. ObsidianMap
Tamer: Marcus
4072,900FalerisFalerisFireWaterTwilight DunesMap
Tamer: Victor
50105,000ShadowbeakShadowbeakDarkDragonAstral MountainsMap
Tamer: Saya
55234,900SelyneSelyneDarkNeutralDragonSakurajimaMap
Tamer: Bjorn
60310,000BastigorBastigorIceFireFeybreakMap
Tamer: Auri
68327,600ShaolongShaolongDragonWaterElectricIceSunreachMap

Each tower, fight by fight

Per-tower notes — boss HP, element + counter, and a short strategy paragraph. Anchor links match the faction names in the cheat-sheet above.

Grizzbolt — Rayne Syndicate tower boss

Zoe & Grizzbolt — Rayne Syndicate

Lv 10HP 12,900Element ElectricCounter Ground

First tower in the natural progression. Grizzbolt's Electric kit hits hard but its HP pool is the smallest of the eight tower bosses, so even a Ground-typed mid-tier Pal clears the fight in under 5 minutes if you keep close enough to interrupt the lightning casts.

→ Grizzbolt full stat sheet · Windswept Hills region

Lyleen — Free Pal Alliance tower boss

Lily & Lyleen — Free Pal Alliance

Lv 20HP 42,500Element GrassCounter Fire

Lyleen heals over the fight, so DPS-race matters — open with a Fire-typed Pal and stack burn damage to outpace the heal. Lily herself uses ranged weapons; close the gap while your Pal pressures Lyleen, then split focus on the Tamer once the boss is past half HP.

→ Lyleen full stat sheet · Verdant Brook region

Orserk — Brothers of the Eternal Pyre tower boss

Axel & Orserk — Brothers of the Eternal Pyre

Lv 30HP 53,750Element Dragon · ElectricCounter Ice, Ground

Dual-typed Dragon + Electric means both Ice and Ground counter Orserk — Frostallion or Anubis both work, with Frostallion winning on damage output. Axel's Tamer kit deals Fire damage so cold-resist gear helps both sides of the fight.

→ Orserk full stat sheet · Mt. Obsidian region

Faleris — PIDF tower boss

Marcus & Faleris — PIDF

Lv 40HP 72,900Element FireCounter Water

Faleris is a flying Fire boss — bring a Water-typed Pal (Jormuntide or Suzaku Aqua) and stay mobile to avoid the ground-pound AOE. Marcus's mech pet adds chip damage at range, so don't ignore him while your Pal pressures Faleris.

→ Faleris full stat sheet · Twilight Dunes region

Shadowbeak — PAL Genetic Research Unit tower boss

Victor & Shadowbeak — PAL Genetic Research Unit

Lv 50HP 105,000Element DarkCounter Dragon

Shadowbeak's Dark kit dodges between melee swings — Dragon-typed counters like Jormuntide Ignis land cleanest. Victor uses long-range tech weapons; keep moving and let your Pal soak the boss's burst between his volleys.

→ Shadowbeak full stat sheet · Astral Mountains region

Selyne — Moonflower Tower (Sakurajima expansion) tower boss

Saya & Selyne — Moonflower Tower (Sakurajima expansion)

Lv 55HP 234,900Element Dark · NeutralCounter Dragon

Selyne is a Dark legendary — Dragon-typed Pals counter it. Saya's kit uses lunar AOE patterns; stay clear of the moonlit ground tells and burst Selyne first.

→ Selyne full stat sheet · Sakurajima region

Bastigor — Feybreak Tower (Feybreak expansion) tower boss

Bjorn & Bastigor — Feybreak Tower (Feybreak expansion)

Lv 60HP 310,000Element IceCounter Fire

A Fire-weak Ice boss that needs full endgame gear plus a Fire Pal such as Faleris or Suzaku. Bjorn requires you to clear Dazzi Noct / Caprity Noct / Omascul field bosses for bounty tokens before he'll fight — don't fast-travel up the Feybreak peak without that gate cleared first.

→ Bastigor full stat sheet · Feybreak region

Shaolong — Azure Covenant Tower (Sunreach) tower boss

Auri & Shaolong — Azure Covenant Tower (Sunreach)

Lv 68HP 327,600Element Dragon · WaterCounter Electric, Ice

Clearing Bjorn on Feybreak is what opens Sunreach, so this is the tower you reach last. Shaolong is Dragon and Water at once, which means Electric and Ice both bite — an Electric carry is the cleaner pick because it covers the Water half without feeding the Dragon half.

→ Shaolong full stat sheet · Sunreach region

Hard Mode towers — unlock, levels, and per-fight twists

Hard Mode unlocks once you defeat the boss in the Azure Covenant Tower — Palworld 1.0 changed that requirement from clearing six Faction Leaders on Normal. In line with the player level cap rising to 80, 1.0 also reviewed and adjusted the levels and difficulty of high-difficulty content including Tower Boss Hard Mode, and the table below lists each fight's 1.0 level and HP from paldb, with the HP growth in the last column. Most fights introduce additional adds or a mid-fight mechanic twist. The 5-minute timer and one-attempt-per-cooldown rules carry over unchanged.

Rewards are not cosmetic only. paldb's Hard Mode drop tables give a Training Crystal on every clear and a chance at Lotus (L) and a Schematic 4 beside the hat, and wiki.gg's 1.0 notes say Hard clears open expeditions whose rewards include Kinship Peach.

BossElementCounterNormal LvNormal HPHard LvHard HP× HP scale
GrizzboltZoe & GrizzboltElectricGround1012,90072464,000×36.0
LyleenLily & LyleenGrassFire2042,50074494,000×11.6
OrserkAxel & OrserkDragonElectricIceGround3053,75076514,800×9.6
FalerisMarcus & FalerisFireWater4072,90078526,900×7.2
ShadowbeakVictor & ShadowbeakDarkDragon50105,00080570,000×5.4
SelyneSaya & SelyneDarkNeutralDragon55234,90080567,300×2.4
BastigorBjorn & BastigorIceFire60310,00080487,500×1.6
ShaolongAuri & ShaolongDragonWaterElectricIce68327,60080501,600×1.5

Levels and HP: paldb.cc/en/Tower and each boss's paldb page, re-read 17 August 2026. wiki.gg's per-boss pages still carry older HP for several bosses, so they are not used for these numbers.

Per-tower Hard Mode twists

Recommended approach: clear all 8 towers on Normal first — Hard Mode opens only after the Azure Covenant Tower — then come back with end-game gear and a counter-element team you trust. Cooldowns and the 5-minute timer apply the same way as Normal — no quality-of-life concessions.

How tower fights work

  • •Each tower fight has a hard 5-minute timer. Run the clock out and you fail the encounter — it does not pause for menus or dialogue.
  • •The tower entrance is its own fast-travel point. Unlock it on first approach so a wipe sends you straight back to the door instead of the nearest open-world statue.
  • •You fight the human Pal Tamer alongside their partner Pal — the table above lists the partner Pal with the elements that matter for damage planning.
  • •Dropping the boss Pal does not capture it directly — story-bound rewards (technology points, progression flags) are what you walk away with.
  • •Recommended Pal level: scale roughly with each tower's region — the regions on the right of the table sit later in the level curve. We don't list per-tower minimums because the game doesn't enforce them.

Frequently asked questions

Can I retry a tower fight if I lose?
Yes — wiping or running out the clock just kicks you out. Walk back through the door and the encounter restarts. Bring more healing items and a Pal that counters the table's 'Element' column.
Do I need to buy anything to fight the Sakurajima and Feybreak towers?
No. Sakurajima and Feybreak both arrived as free updates, so every owner of the base game already has them — you unlock each region in-game rather than buying it. Moonflower Tower (Saya / Selyne) sits on Sakurajima and Feybreak Tower (Bjorn / Bastigor) on Feybreak; of the other six, five are on the original Palpagos map and the Azure Covenant Tower is on Sunreach.
Are tower bosses related to Sealed Realms?
They're separate systems. Towers are timed faction fights gated by story; Sealed Realms are open-world boss arenas, each holding one Alpha Pal. Tower bosses cannot be captured.
What's the recommended level for each tower boss?
Match the tower's listed level or run a few levels above: Lv 10 Grizzbolt, Lv 20 Lyleen, Lv 30 Orserk, Lv 40 Faleris, Lv 50 Shadowbeak, Lv 55 Selyne, Lv 60 Bastigor, Lv 68 Shaolong. Hard Mode is a different ladder entirely — it starts at Lv 72 and tops out at Lv 80, so clearing a tower on Normal is not preparation for its Hard rematch.
Do tower bosses drop Ancient Civilization Parts?
Yes — every tower clear awards a fixed stack of Ancient Civilization Parts (also called Cores), the crafting ingredient for late-game gear like the Hyper Shield and Mega Grappling Gun. See our dedicated guide on how to farm them efficiently.
Can I retry tower fights to grind rewards?
Yes — towers can be re-challenged after their cooldown resets. A rotation of all 8 faction towers is a repeatable source of Ancient Civilization Parts (see our farming guide). The story rewards only fire once but the loot keeps coming.
Is there a Hard Mode for tower bosses?
Yes — but it does not unlock per-tower. Hard Mode opens for all previously cleared towers at once, and Palworld 1.0 changed the requirement to defeating the boss in the Azure Covenant Tower — it is no longer six Faction Leader clears on Normal. 1.0 also reviewed and adjusted the levels and difficulty of Tower Boss Hard Mode alongside the player level cap rising to 80; the Hard Mode table on this page lists each fight's 1.0 level and HP. Most fights add a mob or a mid-fight mechanic (a Syndicate Crusher joins Zoe; Shadowbeak spawns a clone at ~30% HP; Lyleen leans on Water moves; Orserk gains Grass moves). Rewards are not cosmetic only: paldb's Hard Mode drop tables add a Training Crystal on every clear and a chance at Lotus (L) and a Schematic 4.
How do you unlock Hard Mode towers in Palworld?
Defeat the boss in the Azure Covenant Tower. Palworld 1.0 changed the Hard Mode unlock requirement — it is no longer six Faction Leader clears on Normal. Once that clear lands, every previously cleared tower opens its Hard Mode option from the same fight prompt at the tower base. The unlock is account-wide for that save — you don't have to repeat earlier fights in any particular order.
How this guide was built · Sources

Tower → faction + region mapping comes from our marker-seed descriptions (paldb.cc extraction), which is also where the eighth tower came from. Boss-Pal element data joins from pal-stats.json. Normal and Hard levels and HP come from paldb.cc/en/Tower at version v1.0.3, cross-checked against game8's tower-boss list. The 5-minute time limit comes from the official Palworld 1.0 patch notes, which cut it from 10 minutes.

Sources

  • Tower factions: marker names in our seed (from paldb.cc map data); regions: the site's region labels.
  • Boss Pal elements: written into the table, checked against pal-stats.json.
  • Tamer-to-Pal pairings + 5-minute time limit: palworld.wiki.gg/wiki/Tower.

Last updated: