
Palworld 100% Checklist
1222 things to tick off in 9 groups. Tick a pin here and it is dimmed on the map too, and the other way round.
Done so far
0 / 1222 (0%)
Loading your ticks...
Map pins you tick here are the same marks the map keeps, on this device and on your account if you are signed in. Rows that are not pins stay on this device.
 Paldeck 0/287
Every released Pal with a Paldeck number. Tick a Pal when you have registered it in the game. These ticks stay on this device.
Paldeck 1 to 500/70
- Pal page
Lamball
Paldeck #001 · Neutral
 Pal page
Cattiva
Paldeck #002 · Neutral
 Pal page
Chikipi
Paldeck #003 · Neutral
 Pal page
Lifmunk
Paldeck #004 · Grass
 Pal page
Fuack
Paldeck #005 · Water
 Pal page
Fuack Ignis
Paldeck #005B · Water / Fire
 Pal page
Vixy
Paldeck #006 · Neutral
 Pal page
Celaray
Paldeck #007 · Water
 Pal page
Celaray Lux
Paldeck #007B · Water / Electric
 Pal page
Cremis
Paldeck #008 · Neutral
 Pal page
Croajiro
Paldeck #009 · Water
 Pal page
Croajiro Noct
Paldeck #009B · Water / Dark
 Pal page
Herbil
Paldeck #010 · Grass / Neutral
 Pal page
Teafant
Paldeck #011 · Water
 Pal page
Gumoss
Paldeck #012 · Grass / Ground
 Pal page
Pupperai
Paldeck #013 · Ground
 Pal page
Clovee
Paldeck #014 · Grass / Neutral
 Pal page
Jolthog
Paldeck #015 · Electric
 Pal page
Jolthog Cryst
Paldeck #015B · Ice
 Pal page
Depresso
Paldeck #016 · Dark
 Pal page
Pengullet
Paldeck #017 · Water / Ice
 Pal page
Pengullet Lux
Paldeck #017B · Water / Electric
 Pal page
Penking
Paldeck #018 · Water / Ice
 Pal page
Penking Lux
Paldeck #018B · Water / Electric
 Pal page
Hoocrates
Paldeck #019 · Dark
 Pal page
Melpaca
Paldeck #020 · Neutral
 Pal page
Kingpaca
Paldeck #021 · Neutral
 Pal page
Kingpaca Cryst
Paldeck #021B · Ice
 Pal page
Daedream
Paldeck #022 · Dark
 Pal page
Tanzee
Paldeck #023 · Grass
 Pal page
Tanzee Ignis
Paldeck #023B · Fire
 Pal page
Nox
Paldeck #024 · Dark
 Pal page
Flambelle
Paldeck #025 · Fire
 Pal page
Rooby
Paldeck #026 · Fire
 Pal page
Mau
Paldeck #027 · Dark
 Pal page
Mau Cryst
Paldeck #027B · Ice
 Pal page
Rushoar
Paldeck #028 · Ground
 Pal page
Foxparks
Paldeck #029 · Fire
 Pal page
Foxparks Cryst
Paldeck #029B · Ice
 Pal page
Killamari
Paldeck #030 · Dark / Water
 Pal page
Killamari Primo
Paldeck #030B · Neutral / Water
 Pal page
Fuddler
Paldeck #031 · Ground
 Pal page
Eikthyrdeer
Paldeck #032 · Neutral
 Pal page
Eikthyrdeer Terra
Paldeck #032B · Ground
 Pal page
Direhowl
Paldeck #033 · Neutral
 Pal page
Caprity
Paldeck #034 · Grass
 Pal page
Caprity Noct
Paldeck #034B · Dark
 Pal page
Swee
Paldeck #035 · Ice
 Pal page
Sweepa
Paldeck #036 · Ice
 Pal page
Turtacle
Paldeck #037 · Water
 Pal page
Turtacle Terra
Paldeck #037B · Water / Ground
 Pal page
Hangyu
Paldeck #038 · Ground
 Pal page
Hangyu Cryst
Paldeck #038B · Ice
 Pal page
Woolipop
Paldeck #039 · Neutral
 Pal page
Woolipop Terra
Paldeck #039B · Ground
 Pal page
Mozzarina
Paldeck #040 · Neutral
 Pal page
Azurobe
Paldeck #041 · Water / Dragon
 Pal page
Azurobe Cryst
Paldeck #041B · Ice / Dragon
 Pal page
Sparkit
Paldeck #042 · Electric
 Pal page
Kelpsea
Paldeck #043 · Water
 Pal page
Kelpsea Ignis
Paldeck #043B · Fire
 Pal page
Ribbuny
Paldeck #044 · Neutral
 Pal page
Ribbuny Botan
Paldeck #044B · Grass
 Pal page
Jelliette
Paldeck #045 · Water
 Pal page
Jellroy
Paldeck #046 · Water / Dark
 Pal page
Amione
Paldeck #047 · Water
 Pal page
Gloopie
Paldeck #048 · Water / Dark
 Pal page
Gloopie Primo
Paldeck #048B · Water / Neutral
 Pal page
Galeclaw
Paldeck #049 · Neutral
 Pal page
Wispaw
Paldeck #050 · Dark
Paldeck 51 to 1000/79
 Pal page
Nitewing
Paldeck #051 · Neutral
 Pal page
Tombat
Paldeck #052 · Dark
 Pal page
Tocotoco
Paldeck #053 · Neutral
 Pal page
Univolt
Paldeck #054 · Electric
 Pal page
Univolt Cryst
Paldeck #054B · Ice
 Pal page
Gobfin
Paldeck #055 · Water
 Pal page
Gobfin Ignis
Paldeck #055B · Fire
 Pal page
Loupmoon
Paldeck #056 · Dark
 Pal page
Loupmoon Cryst
Paldeck #056B · Ice
 Pal page
Cawgnito
Paldeck #057 · Dark
 Pal page
Arsox
Paldeck #058 · Fire
 Pal page
Muffly
Paldeck #059 · Ice
 Pal page
Bristla
Paldeck #060 · Grass
 Pal page
Cinnamoth
Paldeck #061 · Grass
 Pal page
Puffolt
Paldeck #062 · Electric
 Pal page
Elphidran
Paldeck #063 · Dragon
 Pal page
Elphidran Aqua
Paldeck #063B · Dragon / Water
 Pal page
Vanwyrm
Paldeck #064 · Fire / Dark
 Pal page
Vanwyrm Cryst
Paldeck #064B · Ice / Dark
 Pal page
Felbat
Paldeck #065 · Dark
 Pal page
Vaelet
Paldeck #066 · Grass
 Pal page
Beegarde
Paldeck #067 · Grass
 Pal page
Elizabee
Paldeck #068 · Grass
 Pal page
Lovander
Paldeck #069 · Dark
 Pal page
Grintale
Paldeck #070 · Neutral
 Pal page
Tarantriss
Paldeck #071 · Dark
 Pal page
Polapup
Paldeck #072 · Ice / Water
 Pal page
Polapup Terra
Paldeck #072B · Ice / Ground
 Pal page
Leezpunk
Paldeck #073 · Dark
 Pal page
Leezpunk Ignis
Paldeck #073B · Fire
 Pal page
Gorirat
Paldeck #074 · Neutral
 Pal page
Gorirat Terra
Paldeck #074B · Ground
 Pal page
Surfent
Paldeck #075 · Water
 Pal page
Surfent Terra
Paldeck #075B · Ground
 Pal page
Robinquill
Paldeck #076 · Grass
 Pal page
Robinquill Terra
Paldeck #076B · Grass / Ground
 Pal page
Flopie
Paldeck #077 · Grass
 Pal page
Wixen
Paldeck #078 · Fire
 Pal page
Wixen Noct
Paldeck #078B · Fire / Dark
 Pal page
Katress
Paldeck #079 · Dark
 Pal page
Katress Ignis
Paldeck #079B · Dark / Fire
 Pal page
Helzephyr
Paldeck #080 · Dark
 Pal page
Helzephyr Lux
Paldeck #080B · Dark / Electric
 Pal page
Elgrove
Paldeck #081 · Grass
 Pal page
Elgrove Cryst
Paldeck #081B · Ice
 Pal page
Lunaris
Paldeck #082 · Neutral
 Pal page
Fenglope
Paldeck #083 · Neutral
 Pal page
Fenglope Lux
Paldeck #083B · Electric
 Pal page
Dinossom
Paldeck #084 · Grass / Dragon
 Pal page
Dinossom Lux
Paldeck #084B · Electric / Dragon
 Pal page
Bushi
Paldeck #085 · Fire
 Pal page
Bushi Noct
Paldeck #085B · Fire / Dark
 Pal page
Munchill
Paldeck #086 · Ice / Water
 Pal page
Mammorest
Paldeck #087 · Grass / Ground
 Pal page
Mammorest Cryst
Paldeck #087B · Ice / Ground
 Pal page
Finsider
Paldeck #088 · Water
 Pal page
Finsider Ignis
Paldeck #088B · Water / Fire
 Pal page
Petallia
Paldeck #089 · Grass
 Pal page
Petallia Ignis
Paldeck #089B · Grass / Fire
 Pal page
Leafan
Paldeck #090 · Grass
 Pal page
Incineram
Paldeck #091 · Fire / Dark
 Pal page
Incineram Noct
Paldeck #091B · Dark
 Pal page
Dazzi
Paldeck #092 · Electric
 Pal page
Dazzi Noct
Paldeck #092B · Dark / Electric
 Pal page
Pyrin
Paldeck #093 · Fire
 Pal page
Pyrin Noct
Paldeck #093B · Fire / Dark
 Pal page
Relaxaurus
Paldeck #094 · Dragon / Water
 Pal page
Relaxaurus Lux
Paldeck #094B · Dragon / Electric
 Pal page
Foxcicle
Paldeck #095 · Ice
 Pal page
Beakon
Paldeck #096 · Electric
 Pal page
Beakon Cryst
Paldeck #096B · Ice
 Pal page
Ghangler
Paldeck #097 · Dark / Water
 Pal page
Ghangler Ignis
Paldeck #097B · Fire / Water
 Pal page
Rayhound
Paldeck #098 · Electric
 Pal page
Rayhound Cryst
Paldeck #098B · Ice
 Pal page
Menasting
Paldeck #099 · Dark / Ground
 Pal page
Menasting Terra
Paldeck #099B · Ground
 Pal page
Needoll
Paldeck #100 · Grass
 Pal page
Needoll Noct
Paldeck #100B · Dark / Grass
Paldeck 101 to 1500/75
 Pal page
Reindrix
Paldeck #101 · Ice
 Pal page
Mossanda
Paldeck #102 · Grass
 Pal page
Mossanda Lux
Paldeck #102B · Electric
 Pal page
Chillet
Paldeck #103 · Ice / Dragon
 Pal page
Chillet Ignis
Paldeck #103B · Fire / Dragon
 Pal page
Ragnahawk
Paldeck #104 · Fire
 Pal page
Moldron
Paldeck #105 · Fire / Ground
 Pal page
Moldron Cryst
Paldeck #105B · Ice / Ground
 Pal page
Palumba
Paldeck #106 · Grass
 Pal page
Digtoise
Paldeck #107 · Ground
 Pal page
Broncherry
Paldeck #108 · Grass
 Pal page
Broncherry Aqua
Paldeck #108B · Grass / Water
 Pal page
Dumud
Paldeck #109 · Ground / Water
 Pal page
Dumud Gild
Paldeck #109B · Ground / Water
 Pal page
Braloha
Paldeck #110 · Grass / Ground
 Pal page
Kitsun
Paldeck #111 · Fire
 Pal page
Kitsun Noct
Paldeck #111B · Dark
 Pal page
Blazehowl
Paldeck #112 · Fire
 Pal page
Blazehowl Noct
Paldeck #112B · Fire / Dark
 Pal page
Warsect
Paldeck #113 · Ground / Grass
 Pal page
Warsect Terra
Paldeck #113B · Ground
 Pal page
Frostplume
Paldeck #114 · Ice
 Pal page
Majex
Paldeck #115 · Dark / Fire
 Pal page
Sibelyx
Paldeck #116 · Ice
 Pal page
Sibelyx Primo
Paldeck #116B · Neutral
 Pal page
Maraith
Paldeck #117 · Dark
 Pal page
Shroomer
Paldeck #118 · Grass
 Pal page
Shroomer Noct
Paldeck #118B · Grass / Dark
 Pal page
Icelyn
Paldeck #119 · Ice
 Pal page
Gildra
Paldeck #120 · Dark / Ground
 Pal page
Jormuntide
Paldeck #121 · Dragon / Water
 Pal page
Jormuntide Ignis
Paldeck #121B · Dragon / Fire
 Pal page
Suzaku
Paldeck #122 · Fire
 Pal page
Suzaku Aqua
Paldeck #122B · Water
 Pal page
Dazemu
Paldeck #123 · Ground
 Pal page
Quivern
Paldeck #124 · Dragon
 Pal page
Quivern Botan
Paldeck #124B · Dragon / Grass
 Pal page
Lullu
Paldeck #125 · Grass
 Pal page
Kikit
Paldeck #126 · Ground
 Pal page
Yakumo
Paldeck #127 · Neutral
 Pal page
Skutlass
Paldeck #128 · Water
 Pal page
Skutlass Ignis
Paldeck #128B · Water / Fire
 Pal page
Reptyro
Paldeck #129 · Fire / Ground
 Pal page
Reptyro Cryst
Paldeck #129B · Ice / Ground
 Pal page
Starryon
Paldeck #130 · Dark
 Pal page
Starryon Primo
Paldeck #130B · Neutral
 Pal page
Pierdon
Paldeck #131 · Ground
 Pal page
Pierdon Cryst
Paldeck #131B · Ice
 Pal page
Cryolinx
Paldeck #132 · Ice
 Pal page
Cryolinx Terra
Paldeck #132B · Ground
 Pal page
Snugloo
Paldeck #133 · Ice
 Pal page
Wumpo
Paldeck #134 · Ice
 Pal page
Wumpo Botan
Paldeck #134B · Grass
 Pal page
Sootseer
Paldeck #135 · Dark / Fire
 Pal page
Carnibora
Paldeck #136 · Grass
 Pal page
Blazamut
Paldeck #137 · Fire
 Pal page
Blazamut Ryu
Paldeck #137B · Dragon / Fire
 Pal page
Dualith
Paldeck #138 · Ground / Grass
 Pal page
Dualith Noct
Paldeck #138B · Ground / Dark
 Pal page
Anubis
Paldeck #139 · Ground
 Pal page
Sekhmet
Paldeck #140 · Ground
 Pal page
Prixter
Paldeck #141 · Dark / Ground
 Pal page
Prixter Lux
Paldeck #141B · Electric / Ground
 Pal page
Tetroise
Paldeck #142 · Ground
 Pal page
Tetroise Primo
Paldeck #142B · Neutral
 Pal page
Nyafia
Paldeck #143 · Dark
 Pal page
Mimog
Paldeck #144 · Neutral
 Pal page
Xenovader
Paldeck #145 · Dark
 Pal page
Xenogard
Paldeck #146 · Dragon
 Pal page
Prunelia
Paldeck #147 · Grass / Dark
 Pal page
Nitemary
Paldeck #148 · Dark
 Pal page
Nitemary Botan
Paldeck #148B · Grass
 Pal page
Smokie
Paldeck #149 · Dark
 Pal page
Smokie Cryst
Paldeck #149B · Dark / Ice
 Pal page
Omascul
Paldeck #150 · Dark
Paldeck 151 to 2000/60
 Pal page
Whalaska
Paldeck #151 · Ice / Water
 Pal page
Whalaska Ignis
Paldeck #151B · Ice / Fire
 Pal page
Verdash
Paldeck #152 · Grass
 Pal page
Splatterina
Paldeck #153 · Dark
 Pal page
Gildane
Paldeck #154 · Ground
 Pal page
Dogen
Paldeck #155 · Neutral
 Pal page
Bulldosu
Paldeck #156 · Ground
 Pal page
Celesdir
Paldeck #157 · Neutral
 Pal page
Celesdir Noct
Paldeck #157B · Dark
 Pal page
Astegon
Paldeck #158 · Dragon / Dark
 Pal page
Knocklem
Paldeck #159 · Ground
 Pal page
Knocklem Ignis
Paldeck #159B · Fire
 Pal page
Silvegis
Paldeck #160 · Dragon
 Pal page
Azurmane
Paldeck #161 · Electric
 Pal page
Valentail
Paldeck #162 · Neutral
 Pal page
Snock
Paldeck #163 · Electric
 Pal page
Snock Terra
Paldeck #163B · Electric / Ground
 Pal page
Souffline
Paldeck #164 · Grass
 Pal page
Lapiron
Paldeck #165 · Ground
 Pal page
Hoodle
Paldeck #166 · Dark
 Pal page
Slowatt
Paldeck #167 · Electric
 Pal page
Bakemi
Paldeck #168 · Dark
 Pal page
Solmora
Paldeck #169 · Water
 Pal page
Solmora Lux
Paldeck #169B · Water / Electric
 Pal page
Lapure
Paldeck #170 · Neutral
 Pal page
Eidrolon
Paldeck #171 · Dragon / Dark
 Pal page
Eidrolon Ignis
Paldeck #171B · Dragon / Fire
 Pal page
Dynamoff
Paldeck #172 · Electric
 Pal page
Tropicaw
Paldeck #173 · Grass
 Pal page
Flaracle
Paldeck #174 · Fire
 Pal page
Ophydia
Paldeck #175 · Grass / Water
 Pal page
Dupin
Paldeck #176 · Fire
 Pal page
Roujay
Paldeck #177 · Dark
 Pal page
Venusa
Paldeck #178 · Dark
 Pal page
Mycora
Paldeck #179 · Grass
 Pal page
Loomen
Paldeck #180 · Dark / Fire
 Pal page
Wistella
Paldeck #181 · Dark
 Pal page
Solenne
Paldeck #182 · Dark / Neutral
 Pal page
Renjishi
Paldeck #183 · Fire
 Pal page
Aegidron
Paldeck #184 · Dragon / Ground
 Pal page
Grizzbolt
Paldeck #185 · Electric
 Pal page
Lyleen
Paldeck #186 · Grass
 Pal page
Lyleen Noct
Paldeck #186B · Dark
 Pal page
Orserk
Paldeck #187 · Dragon / Electric
 Pal page
Faleris
Paldeck #188 · Fire
 Pal page
Faleris Aqua
Paldeck #188B · Water
 Pal page
Shadowbeak
Paldeck #189 · Dark
 Pal page
Selyne
Paldeck #190 · Dark / Neutral
 Pal page
Bastigor
Paldeck #191 · Ice
 Pal page
Shaolong
Paldeck #192 · Dragon / Water
 Pal page
Silvance
Paldeck #193 · Grass
 Pal page
Dandilord
Paldeck #194 · Grass / Dark
 Pal page
Bellanoir
Paldeck #195 · Dark
 Pal page
Bellanoir Libero
Paldeck #195B · Dark
 Pal page
Xenolord
Paldeck #196 · Dark / Dragon
 Pal page
Hartalis
Paldeck #197 · Neutral
 Pal page
Paladius
Paldeck #198 · Neutral
 Pal page
Necromus
Paldeck #199 · Dark
 Pal page
Frostallion
Paldeck #200 · Ice
 Pal page
Frostallion Noct
Paldeck #200B · Dark


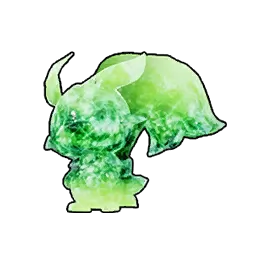 Lifmunk Effigies 0/407
Each one raises your Pal capture rate when offered at a Statue of Power. The ten per-Pal variants are in the same list.
Outlying Isles0/62
- On the map
Depresso Effigy #1: Azure Woodland
- On the map
Depresso Effigy #1: Crystalline Archipelago
- On the map
Depresso Effigy #1: Dragonmark Peak
- On the map
Depresso Effigy #1: Enchanted Firmament
- On the map
Depresso Effigy #1: Farcry Marsh
- On the map
Depresso Effigy #1: Waterlily Gorge
- On the map
Depresso Effigy #2: Azure Woodland
- On the map
Depresso Effigy #2: Crystalline Archipelago
- On the map
Depresso Effigy #2: Dragonmark Peak
- On the map
Depresso Effigy #2: Enchanted Firmament
- On the map
Depresso Effigy #2: Farcry Marsh
- On the map
Depresso Effigy #2: Waterlily Gorge
- On the map
Depresso Effigy #3: Azure Woodland
- On the map
Depresso Effigy #3: Dragonmark Peak
- On the map
Depresso Effigy #3: Enchanted Firmament
- On the map
Depresso Effigy #3: Farcry Marsh
- On the map
Depresso Effigy #3: Waterlily Gorge
- On the map
Depresso Effigy #4: Enchanted Firmament
- On the map
Depresso Effigy #4: Farcry Marsh
- On the map
Depresso Effigy #4: Waterlily Gorge
- On the map
Depresso Effigy #5: Enchanted Firmament
- On the map
Depresso Effigy #6: Enchanted Firmament
- On the map
Depresso Effigy #7: Enchanted Firmament
- On the map
Depresso Effigy #8: Enchanted Firmament
- On the map
Depresso Effigy #9: Enchanted Firmament
- On the map
Depresso Effigy #10: Enchanted Firmament
- On the map
Depresso Effigy #11: Enchanted Firmament
- On the map
Depresso Effigy #12: Enchanted Firmament
- On the map
Depresso Effigy #13: Enchanted Firmament
- On the map
Depresso Effigy #14: Enchanted Firmament
- On the map
Lifmunk Effigy #1: Azure Woodland
- On the map
Lifmunk Effigy #1: Crystalline Archipelago
- On the map
Lifmunk Effigy #1: Dragonmark Peak
- On the map
Lifmunk Effigy #1: Enchanted Firmament
- On the map
Lifmunk Effigy #1: Farcry Marsh
- On the map
Lifmunk Effigy #1: Flamepulse Islet
- On the map
Lifmunk Effigy #1: Isle of the Glacial Core
- On the map
Lifmunk Effigy #1: Islet of Circular Ruins
- On the map
Lifmunk Effigy #1: Oasis Isle
- On the map
Lifmunk Effigy #1: Phantom Isle
- On the map
Lifmunk Effigy #1: Waterlily Gorge
- On the map
Lifmunk Effigy #2: Azure Woodland
- On the map
Lifmunk Effigy #2: Crystalline Archipelago
- On the map
Lifmunk Effigy #2: Dragonmark Peak
- On the map
Lifmunk Effigy #2: Enchanted Firmament
- On the map
Lifmunk Effigy #2: Farcry Marsh
- On the map
Lifmunk Effigy #2: Isle of the Glacial Core
- On the map
Lifmunk Effigy #2: Waterlily Gorge
- On the map
Lifmunk Effigy #3: Azure Woodland
- On the map
Lifmunk Effigy #3: Enchanted Firmament
- On the map
Lifmunk Effigy #4: Enchanted Firmament
- On the map
Munchill Effigy #1: Isle of the Glacial Core
- On the map
Munchill Effigy #1: Scouring Islet
- On the map
Munchill Effigy #1: Suncrest Islet
- On the map
Munchill Effigy #2: Isle of the Glacial Core
- On the map
Munchill Effigy #3: Isle of the Glacial Core
- On the map
Pengullet Effigy #1: Flamepulse Islet
- On the map
Pengullet Effigy #1: Phantom Isle
- On the map
Pengullet Effigy #2: Phantom Isle
- On the map
Pengullet Effigy #3: Phantom Isle
- On the map
Rooby Effigy #1: Isle of the Glacial Core
- On the map
Yakumo Effigy #1: Enchanted Firmament
Feybreak0/49
- On the map
Lifmunk Effigy #1: Bicornis Islet
- On the map
Lifmunk Effigy #1: Crystalized Ancient Tree
- On the map
Lifmunk Effigy #1: Deserted Ash Plateau
- On the map
Lifmunk Effigy #1: Feybreak Shipwreck
- On the map
Lifmunk Effigy #1: Frozen Coral Hill
- On the map
Lifmunk Effigy #1: Glacial Memento Islet
- On the map
Lifmunk Effigy #1: Hidden Passage to the Oculus Gate
- On the map
Lifmunk Effigy #1: Scorched Hill
- On the map
Lifmunk Effigy #1: Stone Pillar Cave
- On the map
Lifmunk Effigy #1: The Oculus Gate, Tower in Sight
- On the map
Lifmunk Effigy #1: Withered Seaside
- On the map
Lifmunk Effigy #2: Frozen Coral Hill
- On the map
Lifmunk Effigy #2: Stone Pillar Cave
- On the map
Lifmunk Effigy #2: The Oculus Gate, Tower in Sight
- On the map
Lifmunk Effigy #2: Withered Seaside
- On the map
Lifmunk Effigy #3: Stone Pillar Cave
- On the map
Munchill Effigy #1: Sandstone Gate Islet
- On the map
Pengullet Effigy #1: Bicornis Islet
- On the map
Tanzee Effigy #1: Crystalized Ancient Tree
- On the map
Tanzee Effigy #1: Deserted Ash Plateau
- On the map
Tanzee Effigy #1: Emberstone Plateau
- On the map
Tanzee Effigy #1: Feybreak Shipwreck
- On the map
Tanzee Effigy #1: Frozen Coral Hill
- On the map
Tanzee Effigy #1: Hidden Passage to the Oculus Gate
- On the map
Tanzee Effigy #1: Loess Plains
- On the map
Tanzee Effigy #1: Sandstone Gate Islet
- On the map
Tanzee Effigy #1: Scorched Ashland
- On the map
Tanzee Effigy #1: Scorched Hill
- On the map
Tanzee Effigy #1: Stone Pillar Cave
- On the map
Tanzee Effigy #1: The Oculus Gate, Tower in Sight
- On the map
Tanzee Effigy #1: Withered Seaside
- On the map
Tanzee Effigy #2: Deserted Ash Plateau
- On the map
Tanzee Effigy #2: Feybreak Shipwreck
- On the map
Tanzee Effigy #2: Frozen Coral Hill
- On the map
Tanzee Effigy #2: Hidden Passage to the Oculus Gate
- On the map
Tanzee Effigy #2: Loess Plains
- On the map
Tanzee Effigy #2: Sandstone Gate Islet
- On the map
Tanzee Effigy #2: Scorched Ashland
- On the map
Tanzee Effigy #2: Scorched Hill
- On the map
Tanzee Effigy #2: The Oculus Gate, Tower in Sight
- On the map
Tanzee Effigy #3: Deserted Ash Plateau
- On the map
Tanzee Effigy #3: Frozen Coral Hill
- On the map
Tanzee Effigy #3: Hidden Passage to the Oculus Gate
- On the map
Tanzee Effigy #3: Scorched Ashland
- On the map
Tanzee Effigy #4: Frozen Coral Hill
- On the map
Tanzee Effigy #4: Scorched Ashland
- On the map
Tanzee Effigy #5: Frozen Coral Hill
- On the map
Tanzee Effigy #6: Frozen Coral Hill
- On the map
Yakumo Effigy #1: The Oculus Gate, Tower in Sight
Sakurajima0/47
- On the map
Herbil Effigy #1: Dancing Sakura Shrine
- On the map
Herbil Effigy #1: Sakurajima - Mushroom Wetlands
- On the map
Herbil Effigy #1: Sakurajima - Northern Rock Field
- On the map
Herbil Effigy #1: Sakurajima - Southern Sandbar
- On the map
Herbil Effigy #2: Dancing Sakura Shrine
- On the map
Herbil Effigy #2: Sakurajima - Mushroom Wetlands
- On the map
Herbil Effigy #2: Sakurajima - Northern Rock Field
- On the map
Herbil Effigy #2: Sakurajima - Southern Sandbar
- On the map
Herbil Effigy #3: Dancing Sakura Shrine
- On the map
Herbil Effigy #3: Sakurajima - Mushroom Wetlands
- On the map
Herbil Effigy #3: Sakurajima - Southern Sandbar
- On the map
Herbil Effigy #4: Dancing Sakura Shrine
- On the map
Herbil Effigy #4: Sakurajima - Mushroom Wetlands
- On the map
Herbil Effigy #4: Sakurajima - Southern Sandbar
- On the map
Herbil Effigy #5: Dancing Sakura Shrine
- On the map
Herbil Effigy #5: Sakurajima - Mushroom Wetlands
- On the map
Herbil Effigy #6: Dancing Sakura Shrine
- On the map
Herbil Effigy #6: Sakurajima - Mushroom Wetlands
- On the map
Herbil Effigy #7: Dancing Sakura Shrine
- On the map
Herbil Effigy #7: Sakurajima - Mushroom Wetlands
- On the map
Herbil Effigy #8: Sakurajima - Mushroom Wetlands
- On the map
Herbil Effigy #9: Sakurajima - Mushroom Wetlands
- On the map
Herbil Effigy #10: Sakurajima - Mushroom Wetlands
- On the map
Herbil Effigy #11: Sakurajima - Mushroom Wetlands
- On the map
Herbil Effigy #12: Sakurajima - Mushroom Wetlands
- On the map
Herbil Effigy #13: Sakurajima - Mushroom Wetlands
- On the map
Herbil Effigy #14: Sakurajima - Mushroom Wetlands
- On the map
Herbil Effigy #15: Sakurajima - Mushroom Wetlands
- On the map
Lifmunk Effigy #1: Dancing Sakura Shrine
- On the map
Lifmunk Effigy #1: Sakurajima - Mushroom Wetlands
- On the map
Lifmunk Effigy #1: Sakurajima - Northern Rock Field
- On the map
Lifmunk Effigy #1: Sakurajima - Southern Sandbar
- On the map
Lifmunk Effigy #2: Dancing Sakura Shrine
- On the map
Lifmunk Effigy #2: Sakurajima - Mushroom Wetlands
- On the map
Lifmunk Effigy #2: Sakurajima - Northern Rock Field
- On the map
Lifmunk Effigy #2: Sakurajima - Southern Sandbar
- On the map
Lifmunk Effigy #3: Dancing Sakura Shrine
- On the map
Lifmunk Effigy #3: Sakurajima - Northern Rock Field
- On the map
Lifmunk Effigy #3: Sakurajima - Southern Sandbar
- On the map
Lifmunk Effigy #4: Dancing Sakura Shrine
- On the map
Lifmunk Effigy #4: Sakurajima - Northern Rock Field
- On the map
Lifmunk Effigy #5: Dancing Sakura Shrine
- On the map
Lifmunk Effigy #6: Dancing Sakura Shrine
- On the map
Lifmunk Effigy #7: Dancing Sakura Shrine
- On the map
Relaxaurus Effigy #1: Dancing Sakura Shrine
- On the map
Rooby Effigy #1: Sakurajima - Mushroom Wetlands
- On the map
Rooby Effigy #1: Sakurajima - Northern Rock Field
Verdant Brook0/45
- On the map
Lamball Effigy #1: Ancient Ritual Site
- On the map
Lamball Effigy #1: Crescent Moon Shore
- On the map
Lamball Effigy #1: Frostbound Mountains
- On the map
Lamball Effigy #1: Gobfin's Turf
- On the map
Lamball Effigy #1: Scars of War
- On the map
Lamball Effigy #1: Verdant Brook
- On the map
Lamball Effigy #2: Ancient Ritual Site
- On the map
Lamball Effigy #2: Frostbound Mountains
- On the map
Lamball Effigy #2: Gobfin's Turf
- On the map
Lamball Effigy #2: Scars of War
- On the map
Lamball Effigy #3: Ancient Ritual Site
- On the map
Lamball Effigy #3: Frostbound Mountains
- On the map
Lamball Effigy #3: Gobfin's Turf
- On the map
Lamball Effigy #4: Ancient Ritual Site
- On the map
Lamball Effigy #4: Frostbound Mountains
- On the map
Lamball Effigy #5: Frostbound Mountains
- On the map
Lifmunk Effigy #1: Ancient Ritual Site
- On the map
Lifmunk Effigy #1: Crescent Moon Shore
- On the map
Lifmunk Effigy #1: Frostbound Mountains
- On the map
Lifmunk Effigy #1: Gobfin's Turf
- On the map
Lifmunk Effigy #1: Scars of War
- On the map
Lifmunk Effigy #1: Verdant Brook
- On the map
Lifmunk Effigy #2: Ancient Ritual Site
- On the map
Lifmunk Effigy #2: Crescent Moon Shore
- On the map
Lifmunk Effigy #2: Frostbound Mountains
- On the map
Lifmunk Effigy #2: Scars of War
- On the map
Lifmunk Effigy #2: Verdant Brook
- On the map
Lifmunk Effigy #3: Ancient Ritual Site
- On the map
Lifmunk Effigy #3: Crescent Moon Shore
- On the map
Lifmunk Effigy #3: Scars of War
- On the map
Lifmunk Effigy #3: Verdant Brook
- On the map
Lifmunk Effigy #4: Ancient Ritual Site
- On the map
Lifmunk Effigy #4: Crescent Moon Shore
- On the map
Lifmunk Effigy #4: Verdant Brook
- On the map
Lifmunk Effigy #5: Ancient Ritual Site
- On the map
Lifmunk Effigy #5: Verdant Brook
- On the map
Lifmunk Effigy #6: Ancient Ritual Site
- On the map
Lifmunk Effigy #6: Verdant Brook
- On the map
Lifmunk Effigy #7: Verdant Brook
- On the map
Lunaris Effigy #1: Frostbound Mountains
- On the map
Lunaris Effigy #1: Scars of War
- On the map
Munchill Effigy #1: Frostbound Mountains
- On the map
Munchill Effigy #1: Scars of War
- On the map
Munchill Effigy #2: Scars of War
- On the map
Munchill Effigy #3: Scars of War
Mt. Obsidian0/44
- On the map
Herbil Effigy #1: No. 2 Wildlife Sanctuary
- On the map
Lamball Effigy #1: Foot of the Volcano
- On the map
Lifmunk Effigy #1: Dry Sandy Beach
- On the map
Lifmunk Effigy #1: Fisherman's Point
- On the map
Lifmunk Effigy #1: Foot of the Volcano
- On the map
Lifmunk Effigy #1: Mount Obsidian
- On the map
Lifmunk Effigy #1: No. 2 Wildlife Sanctuary
- On the map
Lifmunk Effigy #1: Ruined Fortress City
- On the map
Lifmunk Effigy #2: Dry Sandy Beach
- On the map
Lifmunk Effigy #2: Fisherman's Point
- On the map
Lifmunk Effigy #2: Foot of the Volcano
- On the map
Lifmunk Effigy #2: Mount Obsidian
- On the map
Lifmunk Effigy #2: No. 2 Wildlife Sanctuary
- On the map
Lifmunk Effigy #2: Ruined Fortress City
- On the map
Lifmunk Effigy #3: Dry Sandy Beach
- On the map
Lifmunk Effigy #3: Fisherman's Point
- On the map
Lifmunk Effigy #3: Foot of the Volcano
- On the map
Lifmunk Effigy #3: Ruined Fortress City
- On the map
Lifmunk Effigy #4: Fisherman's Point
- On the map
Pengullet Effigy #1: Dry Sandy Beach
- On the map
Pengullet Effigy #1: Fisherman's Point
- On the map
Pengullet Effigy #1: Foot of the Volcano
- On the map
Pengullet Effigy #1: Mount Obsidian
- On the map
Pengullet Effigy #1: Ruined Fortress City
- On the map
Pengullet Effigy #2: Dry Sandy Beach
- On the map
Pengullet Effigy #2: Fisherman's Point
- On the map
Pengullet Effigy #2: Foot of the Volcano
- On the map
Pengullet Effigy #2: Mount Obsidian
- On the map
Pengullet Effigy #2: Ruined Fortress City
- On the map
Pengullet Effigy #3: Dry Sandy Beach
- On the map
Pengullet Effigy #3: Fisherman's Point
- On the map
Pengullet Effigy #3: Foot of the Volcano
- On the map
Pengullet Effigy #3: Mount Obsidian
- On the map
Pengullet Effigy #3: Ruined Fortress City
- On the map
Pengullet Effigy #4: Dry Sandy Beach
- On the map
Pengullet Effigy #4: Fisherman's Point
- On the map
Pengullet Effigy #4: Foot of the Volcano
- On the map
Pengullet Effigy #4: Mount Obsidian
- On the map
Pengullet Effigy #4: Ruined Fortress City
- On the map
Pengullet Effigy #5: Dry Sandy Beach
- On the map
Pengullet Effigy #5: Mount Obsidian
- On the map
Pengullet Effigy #5: Ruined Fortress City
- On the map
Pengullet Effigy #6: Ruined Fortress City
- On the map
Relaxaurus Effigy #1: Dry Sandy Beach
Astral Mountains0/39
- On the map
Lifmunk Effigy #1: Abandoned Ruins
- On the map
Lifmunk Effigy #1: Astral Mountains
- On the map
Lifmunk Effigy #1: Foot of the Astral Mountains
- On the map
Lifmunk Effigy #2: Abandoned Ruins
- On the map
Lifmunk Effigy #2: Astral Mountains
- On the map
Lifmunk Effigy #2: Foot of the Astral Mountains
- On the map
Lifmunk Effigy #3: Abandoned Ruins
- On the map
Lifmunk Effigy #3: Astral Mountains
- On the map
Lifmunk Effigy #3: Foot of the Astral Mountains
- On the map
Lifmunk Effigy #4: Astral Mountains
- On the map
Lifmunk Effigy #4: Foot of the Astral Mountains
- On the map
Lifmunk Effigy #5: Astral Mountains
- On the map
Lifmunk Effigy #6: Astral Mountains
- On the map
Relaxaurus Effigy #1: Astral Mountains
- On the map
Rooby Effigy #1: Abandoned Ruins
- On the map
Rooby Effigy #1: Astral Mountains
- On the map
Rooby Effigy #1: Foot of the Astral Mountains
- On the map
Rooby Effigy #2: Abandoned Ruins
- On the map
Rooby Effigy #2: Astral Mountains
- On the map
Rooby Effigy #2: Foot of the Astral Mountains
- On the map
Rooby Effigy #3: Abandoned Ruins
- On the map
Rooby Effigy #3: Astral Mountains
- On the map
Rooby Effigy #3: Foot of the Astral Mountains
- On the map
Rooby Effigy #4: Abandoned Ruins
- On the map
Rooby Effigy #4: Astral Mountains
- On the map
Rooby Effigy #4: Foot of the Astral Mountains
- On the map
Rooby Effigy #5: Abandoned Ruins
- On the map
Rooby Effigy #5: Astral Mountains
- On the map
Rooby Effigy #5: Foot of the Astral Mountains
- On the map
Rooby Effigy #6: Abandoned Ruins
- On the map
Rooby Effigy #6: Astral Mountains
- On the map
Rooby Effigy #6: Foot of the Astral Mountains
- On the map
Rooby Effigy #7: Astral Mountains
- On the map
Rooby Effigy #7: Foot of the Astral Mountains
- On the map
Rooby Effigy #8: Astral Mountains
- On the map
Rooby Effigy #8: Foot of the Astral Mountains
- On the map
Rooby Effigy #9: Astral Mountains
- On the map
Rooby Effigy #9: Foot of the Astral Mountains
- On the map
Rooby Effigy #10: Foot of the Astral Mountains
Twilight Dunes0/35
- On the map
Lamball Effigy #1: Twilight Dunes
- On the map
Lamball Effigy #2: Twilight Dunes
- On the map
Lamball Effigy #3: Twilight Dunes
- On the map
Lifmunk Effigy #1: Arena
- On the map
Lifmunk Effigy #1: Desiccated Dunes
- On the map
Lifmunk Effigy #1: Duneshelter
- On the map
Lifmunk Effigy #1: No. 3 Wildlife Sanctuary
- On the map
Lifmunk Effigy #2: Arena
- On the map
Lifmunk Effigy #2: Duneshelter
- On the map
Lifmunk Effigy #2: No. 3 Wildlife Sanctuary
- On the map
Lifmunk Effigy #3: Duneshelter
- On the map
Lunaris Effigy #1: Twilight Dunes
- On the map
Munchill Effigy #1: Arena
- On the map
Munchill Effigy #1: Desiccated Dunes
- On the map
Munchill Effigy #1: Duneshelter
- On the map
Munchill Effigy #1: No. 3 Wildlife Sanctuary
- On the map
Munchill Effigy #2: Arena
- On the map
Munchill Effigy #2: Desiccated Dunes
- On the map
Munchill Effigy #2: Duneshelter
- On the map
Munchill Effigy #2: No. 3 Wildlife Sanctuary
- On the map
Munchill Effigy #3: Arena
- On the map
Munchill Effigy #3: Desiccated Dunes
- On the map
Munchill Effigy #3: Duneshelter
- On the map
Munchill Effigy #4: Arena
- On the map
Munchill Effigy #4: Desiccated Dunes
- On the map
Munchill Effigy #4: Duneshelter
- On the map
Munchill Effigy #5: Arena
- On the map
Munchill Effigy #5: Desiccated Dunes
- On the map
Munchill Effigy #5: Duneshelter
- On the map
Munchill Effigy #6: Arena
- On the map
Munchill Effigy #6: Desiccated Dunes
- On the map
Munchill Effigy #6: Duneshelter
- On the map
Relaxaurus Effigy #1: Desiccated Dunes
- On the map
Rooby Effigy #1: Twilight Dunes
- On the map
Rooby Effigy #2: Twilight Dunes
Windswept Hills0/17
- On the map
Lamball Effigy #1: Autumn Rocks
- On the map
Lamball Effigy #1: Rayne Syndicate Test Drilling Rig
- On the map
Lifmunk Effigy #1: Autumn Rocks
- On the map
Lifmunk Effigy #1: Desolate Church
- On the map
Lifmunk Effigy #1: Flying Fish Coast
- On the map
Lifmunk Effigy #1: Fortress Ruins
- On the map
Lifmunk Effigy #1: Golden Hills
- On the map
Lifmunk Effigy #1: Small Settlement
- On the map
Lifmunk Effigy #1: Windswept Island
- On the map
Lifmunk Effigy #2: Desolate Church
- On the map
Lifmunk Effigy #2: Flying Fish Coast
- On the map
Lifmunk Effigy #2: Golden Hills
- On the map
Lifmunk Effigy #2: Small Settlement
- On the map
Lifmunk Effigy #2: Windswept Island
- On the map
Lifmunk Effigy #3: Flying Fish Coast
- On the map
Lifmunk Effigy #4: Flying Fish Coast
- On the map
Lunaris Effigy #1: Autumn Rocks
Bamboo Grove0/15
- On the map
Lamball Effigy #1: Bamboo Groves
- On the map
Lamball Effigy #1: Deep Bamboo Thicket
- On the map
Lamball Effigy #2: Bamboo Groves
- On the map
Lamball Effigy #2: Deep Bamboo Thicket
- On the map
Lamball Effigy #3: Bamboo Groves
- On the map
Lamball Effigy #3: Deep Bamboo Thicket
- On the map
Lifmunk Effigy #1: Bamboo Groves
- On the map
Lifmunk Effigy #1: Deep Bamboo Thicket
- On the map
Lifmunk Effigy #2: Bamboo Groves
- On the map
Lifmunk Effigy #2: Deep Bamboo Thicket
- On the map
Lifmunk Effigy #3: Bamboo Groves
- On the map
Lifmunk Effigy #4: Bamboo Groves
- On the map
Lifmunk Effigy #5: Bamboo Groves
- On the map
Lifmunk Effigy #6: Bamboo Groves
- On the map
Lifmunk Effigy #7: Bamboo Groves
Sea Breeze Archipelago0/4
- On the map
Lamball Effigy #1: Sea Breeze Archipelago
- On the map
Lamball Effigy #2: Sea Breeze Archipelago
- On the map
Lifmunk Effigy #1: Sea Breeze Archipelago Church
- On the map
Pengullet Effigy #1: Sea Breeze Archipelago
Marsh Island0/2
- On the map
Lifmunk Effigy #1: Marsh Island
- On the map
Lifmunk Effigy #2: Marsh Island
Isle of Silence0/1
- On the map
Herbil Effigy #1: Isle of Silence
World Tree0/47
- On the map
Cattiva Effigy #1: Abandoned Laboratory
- On the map
Cattiva Effigy #1: Alluvion Lakefront
- On the map
Cattiva Effigy #1: Boreal Summit
- On the map
Cattiva Effigy #1: Corroded Hollow
- On the map
Cattiva Effigy #1: Dusty Ravine
- On the map
Cattiva Effigy #1: Gilded City Ruins
- On the map
Cattiva Effigy #1: Lacrymal Shoal
- On the map
Cattiva Effigy #1: Remnant Riverside
- On the map
Cattiva Effigy #1: Shinespore Root
- On the map
Cattiva Effigy #1: Spore Cloister
- On the map
Cattiva Effigy #1: The Verdant Rootpath
- On the map
Cattiva Effigy #1: Whimsical Wisteria Grove
- On the map
Cattiva Effigy #1: Within the Seal
- On the map
Cattiva Effigy #2: Abandoned Laboratory
- On the map
Cattiva Effigy #2: Alluvion Lakefront
- On the map
Cattiva Effigy #2: Boreal Summit
- On the map
Cattiva Effigy #2: Corroded Hollow
- On the map
Cattiva Effigy #2: Dusty Ravine
- On the map
Cattiva Effigy #2: Gilded City Ruins
- On the map
Cattiva Effigy #2: Remnant Riverside
- On the map
Cattiva Effigy #2: Spore Cloister
- On the map
Cattiva Effigy #2: Within the Seal
- On the map
Cattiva Effigy #3: Abandoned Laboratory
- On the map
Cattiva Effigy #3: Alluvion Lakefront
- On the map
Cattiva Effigy #3: Boreal Summit
- On the map
Cattiva Effigy #3: Gilded City Ruins
- On the map
Cattiva Effigy #3: Remnant Riverside
- On the map
Cattiva Effigy #3: Within the Seal
- On the map
Cattiva Effigy #4: Alluvion Lakefront
- On the map
Cattiva Effigy #4: Within the Seal
- On the map
Lifmunk Effigy #1: Abandoned Laboratory
- On the map
Lifmunk Effigy #1: Alluvion Lakefront
- On the map
Lifmunk Effigy #1: Corroded Hollow
- On the map
Lifmunk Effigy #1: Dusty Ravine
- On the map
Lifmunk Effigy #1: Gilded City Ruins
- On the map
Lifmunk Effigy #1: Lacrymal Shoal
- On the map
Lifmunk Effigy #1: Remnant Riverside
- On the map
Lifmunk Effigy #1: Shinespore Root
- On the map
Lifmunk Effigy #1: Spore Cloister
- On the map
Lifmunk Effigy #1: The Verdant Rootpath
- On the map
Lifmunk Effigy #1: Whimsical Wisteria Grove
- On the map
Lifmunk Effigy #1: Within the Seal
- On the map
Lifmunk Effigy #2: Lacrymal Shoal
- On the map
Lifmunk Effigy #2: Spore Cloister
- On the map
Lifmunk Effigy #3: Spore Cloister
- On the map
Yakumo Effigy #1: Abandoned Laboratory
- On the map
Yakumo Effigy #1: Lacrymal Shoal
Alpha Pals 0/90
Boss-tier Pals standing at a fixed spot. Defeat or capture each one.
Feybreak0/22
- On the map
Alpha Azurmane: Frozen Coral Hill
Feybreak
- On the map
Alpha Celesdir: Crystalized Ancient Tree
Feybreak
- On the map
Alpha Cryolinx Terra: Deserted Ash Plateau
Feybreak
- On the map
Alpha Dazzi Noct: Sandstone Gate Islet
Feybreak
- On the map
Alpha Dualith Noct: Glacial Memento Islet
Feybreak
- On the map
Alpha Faleris Aqua: Frozen Coral Hill
Feybreak
- On the map
Alpha Fenglope Lux: Stone Pillar Cave
Feybreak
- On the map
Alpha Gildane: Loess Plains
Feybreak
- On the map
Alpha Kitsun Noct: Emberstone Plateau
Feybreak
- On the map
Alpha Loupmoon Cryst: The Oculus Gate, Tower in Sight
Feybreak
- On the map
Alpha Moldron: Bicornis Islet
Feybreak
- On the map
Alpha Nitemary: Stone Pillar Cave
Feybreak
- On the map
Alpha Nyafia: Scorched Ashland
Feybreak
- On the map
Alpha Omascul: Scorched Ashland
Feybreak
- On the map
Alpha Prixter Lux: Sandstone Gate Islet
Feybreak
- On the map
Alpha Prunelia: Deserted Ash Plateau
Feybreak
- On the map
Alpha Silvegis: Stone Pillar Cave
Feybreak
- On the map
Alpha Smokie: Loess Plains
Feybreak
- On the map
Alpha Splatterina: The Oculus Gate, Tower in Sight
Feybreak
- On the map
Alpha Starryon: Emberstone Plateau
Feybreak
- On the map
Alpha Tetroise Primo: Hidden Passage to the Oculus Gate
Feybreak
- On the map
Alpha Warsect Terra: Hidden Passage to the Oculus Gate
Feybreak
Outlying Isles0/13
- On the map
Alpha Dualith: Islet of Circular Ruins
Outlying Isles
- On the map
Alpha Dynamoff: Enchanted Firmament
Outlying Isles
- On the map
Alpha Eidrolon: Crystalline Archipelago
Outlying Isles
- On the map
Alpha Flaracle: Enchanted Firmament
Outlying Isles
- On the map
Alpha Jetragon: Dragonmark Peak
Outlying Isles
- On the map
Alpha Needoll: Scouring Islet
Outlying Isles
- On the map
Alpha Neptilius: Isle of the Glacial Core
Outlying Isles
- On the map
Alpha Ophydia: Waterlily Gorge
Outlying Isles
- On the map
Alpha Pierdon: Flamepulse Islet
Outlying Isles
- On the map
Alpha Slowatt: Azure Woodland
Outlying Isles
- On the map
Alpha Snock: Farcry Marsh
Outlying Isles
- On the map
Alpha Whalaska: Isle of the Glacial Core
Outlying Isles
- On the map
Alpha Wistella: Azure Woodland
Outlying Isles
Verdant Brook0/11
- On the map
Alpha Beakon: Frostbound Mountains
Verdant Brook
- On the map
Alpha Dinossom Lux: Frostbound Mountains
Verdant Brook
- On the map
Alpha Elizabee: Verdant Brook
Verdant Brook
- On the map
Alpha Elphidran: Ancient Ritual Site
Verdant Brook
- On the map
Alpha Jormuntide: Scars of War
Verdant Brook
- On the map
Alpha Lunaris: Verdant Brook
Verdant Brook
- On the map
Alpha Sibelyx: Frostbound Mountains
Verdant Brook
- On the map
Alpha Vaelet: Ancient Ritual Site
Verdant Brook
- On the map
Alpha Verdash: Verdant Brook
Verdant Brook
- On the map
Alpha Wixen: Gobfin's Turf
Verdant Brook
- On the map
Alpha Wumpo Botan: Scars of War
Verdant Brook
Windswept Hills0/7
- On the map
Alpha Arsox: Golden Hills
Windswept Hills
- On the map
Alpha Chillet: Fortress Ruins
Windswept Hills
- On the map
Alpha Foxcicle: Fortress Ruins
Windswept Hills
- On the map
Alpha Grizzbolt: No. 1 Wildlife Sanctuary
Windswept Hills
- On the map
Alpha Kingpaca: Golden Hills
Windswept Hills
- On the map
Alpha Mammorest: Flying Fish Coast
Windswept Hills
- On the map
Alpha Penking: Autumn Rocks
Windswept Hills
Mt. Obsidian0/6
- On the map
Alpha Astegon: No. 2 Wildlife Sanctuary
Mt. Obsidian
- On the map
Alpha Blazamut: Ruined Fortress City
Mt. Obsidian
- On the map
Alpha Fenglope: Foot of the Volcano
Mt. Obsidian
- On the map
Alpha Knocklem: Ruined Fortress City
Mt. Obsidian
- On the map
Alpha Reptyro: Mount Obsidian
Mt. Obsidian
- On the map
Alpha Tarantriss: Foot of the Volcano
Mt. Obsidian
Twilight Dunes0/6
- On the map
Alpha Anubis: Twilight Dunes
Twilight Dunes
- On the map
Alpha Frostallion Noct: No. 3 Wildlife Sanctuary
Twilight Dunes
- On the map
Alpha Menasting: Duneshelter
Twilight Dunes
- On the map
Alpha Paladius: No. 3 Wildlife Sanctuary
Twilight Dunes
- On the map
Alpha Suzaku: Duneshelter
Twilight Dunes
- On the map
Alpha Tetroise: Desiccated Dunes
Twilight Dunes
Sea Breeze Archipelago0/5
- On the map
Alpha Broncherry: Sea Breeze Archipelago
Sea Breeze Archipelago
- On the map
Alpha Caprity Noct: Sea Breeze Archipelago
Sea Breeze Archipelago
- On the map
Alpha Gumoss: Sea Breeze Archipelago
Sea Breeze Archipelago
- On the map
Alpha Sweepa: Sea Breeze Archipelago
Sea Breeze Archipelago
- On the map
Alpha Univolt: Sea Breeze Archipelago Church
Sea Breeze Archipelago
Bamboo Grove0/4
- On the map
Alpha Azurobe: Bamboo Groves
Bamboo Grove
- On the map
Alpha Blazehowl: Deep Bamboo Thicket
Bamboo Grove
- On the map
Alpha Bushi: Bamboo Groves
Bamboo Grove
- On the map
Alpha Nitewing: Deep Bamboo Thicket
Bamboo Grove
Sakurajima0/4
- On the map
Alpha Kingpaca Cryst: Sakurajima - Northern Rock Field
Sakurajima
- On the map
Alpha Lyleen: Dancing Sakura Shrine
Sakurajima
- On the map
Alpha Lyleen Noct: Dancing Sakura Shrine
Sakurajima
- On the map
Alpha Menasting Terra: Sakurajima - Northern Rock Field
Sakurajima
Astral Mountains0/2
- On the map
Alpha Dumud: Isle of Murmurs
Astral Mountains
- On the map
Alpha Frostallion: Astral Mountains
Astral Mountains
Eastern Wild Island0/1
- On the map
Alpha Mossanda Lux: Eastern Wild Island
Eastern Wild Island
Isle of Silence0/1
- On the map
Alpha Foxparks Cryst: Isle of Silence
Isle of Silence
Marsh Island0/1
- On the map
Alpha Grintale: Marsh Island Church Ruins
Marsh Island
World Tree0/7
- On the map
Alpha Aegidron: Lacrymal Shoal
Area not named
- On the map
Alpha Celesdir Noct: Within the Seal
Area not named
- On the map
Alpha Dualith: Alluvion Lakefront
Area not named
- On the map
Alpha Moldron Cryst: Abandoned Laboratory
Area not named
- On the map
Alpha Mycora: Spore Cloister
Area not named
- On the map
Alpha Renjishi: Corroded Hollow
Area not named
- On the map
Alpha Whalaska Ignis: Whimsical Wisteria Grove
Area not named
 Tower bosses 0/13
One faction leader per tower. Hard Mode is a separate clear in the game and not a separate row here.
Faction towers0/13
- On the map
Feybreak Tower
Feybreak
- On the map
Forbidden Laboratory Tower
World Tree
- On the map
Moonflower Tower
Sakurajima
- On the map
Panthalus Tower
Astral Mountains
- On the map
Rotmist Root Tower
World Tree
- On the map
Shinespore Root Tower
World Tree
- On the map
Tower of the Azure Covenant
Outlying Isles
- On the map
Tower of the Brothers of the Eternal Pyre
Mt. Obsidian
- On the map
Tower of the Free Pal Alliance
Windswept Hills
- On the map
Tower of the PAL Genetic Research Unit
Astral Mountains
- On the map
Tower of the PIDF
Twilight Dunes
- On the map
Tower of the Rayne Syndicate
Windswept Hills
- On the map
Within the Seal Tower
World Tree
 Dungeons 0/170
Every dungeon entrance on the Palpagos Islands, by type. Clear each one once.
Feybreak Cavern0/30
- On the map
Feybreak Cavern #1: Crystalized Ancient Tree
Feybreak
- On the map
Feybreak Cavern #1: Deserted Ash Plateau
Feybreak
- On the map
Feybreak Cavern #1: Emberstone Plateau
Feybreak
- On the map
Feybreak Cavern #1: Feybreak Shipwreck
Feybreak
- On the map
Feybreak Cavern #1: Frozen Coral Hill
Feybreak
- On the map
Feybreak Cavern #1: Hidden Passage to the Oculus Gate
Feybreak
- On the map
Feybreak Cavern #1: Loess Plains
Feybreak
- On the map
Feybreak Cavern #1: Sandstone Gate Islet
Feybreak
- On the map
Feybreak Cavern #1: Scorched Ashland
Feybreak
- On the map
Feybreak Cavern #1: Scorched Hill
Feybreak
- On the map
Feybreak Cavern #1: Stone Pillar Cave
Feybreak
- On the map
Feybreak Cavern #1: The Oculus Gate, Tower in Sight
Feybreak
- On the map
Feybreak Cavern #2: Deserted Ash Plateau
Feybreak
- On the map
Feybreak Cavern #2: Frozen Coral Hill
Feybreak
- On the map
Feybreak Cavern #2: Hidden Passage to the Oculus Gate
Feybreak
- On the map
Feybreak Cavern #2: Loess Plains
Feybreak
- On the map
Feybreak Cavern #2: Scorched Ashland
Feybreak
- On the map
Feybreak Cavern #2: Scorched Hill
Feybreak
- On the map
Feybreak Cavern #2: Stone Pillar Cave
Feybreak
- On the map
Feybreak Cavern #2: The Oculus Gate, Tower in Sight
Feybreak
- On the map
Feybreak Cavern #3: Hidden Passage to the Oculus Gate
Feybreak
- On the map
Feybreak Cavern #3: Loess Plains
Feybreak
- On the map
Feybreak Cavern #3: Scorched Hill
Feybreak
- On the map
Feybreak Cavern #3: Stone Pillar Cave
Feybreak
- On the map
Feybreak Cavern #3: The Oculus Gate, Tower in Sight
Feybreak
- On the map
Feybreak Cavern #4: Hidden Passage to the Oculus Gate
Feybreak
- On the map
Feybreak Cavern #4: Stone Pillar Cave
Feybreak
- On the map
Feybreak Cavern #4: The Oculus Gate, Tower in Sight
Feybreak
- On the map
Feybreak Cavern #5: Stone Pillar Cave
Feybreak
- On the map
Feybreak Cavern #5: The Oculus Gate, Tower in Sight
Feybreak
Mountain Stream Grotto0/30
- On the map
Mountain Stream Grotto #1: Ancient Ritual Site
Verdant Brook
- On the map
Mountain Stream Grotto #1: Autumn Rocks
Windswept Hills
- On the map
Mountain Stream Grotto #1: Crescent Moon Shore
Verdant Brook
- On the map
Mountain Stream Grotto #1: Frostbound Mountains
Verdant Brook
- On the map
Mountain Stream Grotto #1: Gobfin's Turf
Verdant Brook
- On the map
Mountain Stream Grotto #1: Scars of War
Verdant Brook
- On the map
Mountain Stream Grotto #1: Twilight Dunes
Twilight Dunes
- On the map
Mountain Stream Grotto #1: Verdant Brook
Verdant Brook
- On the map
Mountain Stream Grotto #2: Ancient Ritual Site
Verdant Brook
- On the map
Mountain Stream Grotto #2: Autumn Rocks
Windswept Hills
- On the map
Mountain Stream Grotto #2: Crescent Moon Shore
Verdant Brook
- On the map
Mountain Stream Grotto #2: Frostbound Mountains
Verdant Brook
- On the map
Mountain Stream Grotto #2: Gobfin's Turf
Verdant Brook
- On the map
Mountain Stream Grotto #2: Verdant Brook
Verdant Brook
- On the map
Mountain Stream Grotto #3: Ancient Ritual Site
Verdant Brook
- On the map
Mountain Stream Grotto #3: Crescent Moon Shore
Verdant Brook
- On the map
Mountain Stream Grotto #3: Frostbound Mountains
Verdant Brook
- On the map
Mountain Stream Grotto #3: Gobfin's Turf
Verdant Brook
- On the map
Mountain Stream Grotto #3: Verdant Brook
Verdant Brook
- On the map
Mountain Stream Grotto #4: Ancient Ritual Site
Verdant Brook
- On the map
Mountain Stream Grotto #4: Crescent Moon Shore
Verdant Brook
- On the map
Mountain Stream Grotto #4: Frostbound Mountains
Verdant Brook
- On the map
Mountain Stream Grotto #4: Gobfin's Turf
Verdant Brook
- On the map
Mountain Stream Grotto #4: Verdant Brook
Verdant Brook
- On the map
Mountain Stream Grotto #5: Crescent Moon Shore
Verdant Brook
- On the map
Mountain Stream Grotto #5: Gobfin's Turf
Verdant Brook
- On the map
Mountain Stream Grotto #6: Crescent Moon Shore
Verdant Brook
- On the map
Mountain Stream Grotto #6: Gobfin's Turf
Verdant Brook
- On the map
Mountain Stream Grotto #7: Crescent Moon Shore
Verdant Brook
- On the map
Mountain Stream Grotto #8: Crescent Moon Shore
Verdant Brook
Isolated Island Cavern0/18
- On the map
Isolated Island Cavern: Isle of Silence Church Ruins
Isle of Silence
- On the map
Isolated Island Cavern: Marsh Island Church Ruins
Marsh Island
- On the map
Isolated Island Cavern #1: Eastern Wild Island
Eastern Wild Island
- On the map
Isolated Island Cavern #1: Isle of Murmurs
Astral Mountains
- On the map
Isolated Island Cavern #1: Isle of Silence
Isle of Silence
- On the map
Isolated Island Cavern #1: Marsh Island
Marsh Island
- On the map
Isolated Island Cavern #1: Sea Breeze Archipelago
Sea Breeze Archipelago
- On the map
Isolated Island Cavern #2: Eastern Wild Island
Eastern Wild Island
- On the map
Isolated Island Cavern #2: Isle of Murmurs
Astral Mountains
- On the map
Isolated Island Cavern #2: Isle of Silence
Isle of Silence
- On the map
Isolated Island Cavern #2: Marsh Island
Marsh Island
- On the map
Isolated Island Cavern #2: Sea Breeze Archipelago
Sea Breeze Archipelago
- On the map
Isolated Island Cavern #3: Eastern Wild Island
Eastern Wild Island
- On the map
Isolated Island Cavern #3: Isle of Murmurs
Astral Mountains
- On the map
Isolated Island Cavern #3: Sea Breeze Archipelago
Sea Breeze Archipelago
- On the map
Isolated Island Cavern #4: Sea Breeze Archipelago
Sea Breeze Archipelago
- On the map
Isolated Island Cavern #5: Sea Breeze Archipelago
Sea Breeze Archipelago
- On the map
Isolated Island Cavern #6: Sea Breeze Archipelago
Sea Breeze Archipelago
Astral Mountains Cavern0/15
- On the map
Astral Mountains Cavern #1: Abandoned Ruins
Astral Mountains
- On the map
Astral Mountains Cavern #1: Astral Mountains
Astral Mountains
- On the map
Astral Mountains Cavern #1: Duneshelter
Twilight Dunes
- On the map
Astral Mountains Cavern #1: Foot of the Astral Mountains
Astral Mountains
- On the map
Astral Mountains Cavern #2: Abandoned Ruins
Astral Mountains
- On the map
Astral Mountains Cavern #2: Astral Mountains
Astral Mountains
- On the map
Astral Mountains Cavern #2: Foot of the Astral Mountains
Astral Mountains
- On the map
Astral Mountains Cavern #3: Abandoned Ruins
Astral Mountains
- On the map
Astral Mountains Cavern #3: Astral Mountains
Astral Mountains
- On the map
Astral Mountains Cavern #3: Foot of the Astral Mountains
Astral Mountains
- On the map
Astral Mountains Cavern #4: Astral Mountains
Astral Mountains
- On the map
Astral Mountains Cavern #4: Foot of the Astral Mountains
Astral Mountains
- On the map
Astral Mountains Cavern #5: Astral Mountains
Astral Mountains
- On the map
Astral Mountains Cavern #6: Astral Mountains
Astral Mountains
- On the map
Astral Mountains Cavern #7: Astral Mountains
Astral Mountains
Cavern of the Dunes0/15
- On the map
Cavern of the Dunes #1: Arena
Twilight Dunes
- On the map
Cavern of the Dunes #1: Desiccated Dunes
Twilight Dunes
- On the map
Cavern of the Dunes #1: Duneshelter
Twilight Dunes
- On the map
Cavern of the Dunes #1: Scars of War
Verdant Brook
- On the map
Cavern of the Dunes #2: Arena
Twilight Dunes
- On the map
Cavern of the Dunes #2: Desiccated Dunes
Twilight Dunes
- On the map
Cavern of the Dunes #2: Duneshelter
Twilight Dunes
- On the map
Cavern of the Dunes #3: Desiccated Dunes
Twilight Dunes
- On the map
Cavern of the Dunes #3: Duneshelter
Twilight Dunes
- On the map
Cavern of the Dunes #4: Desiccated Dunes
Twilight Dunes
- On the map
Cavern of the Dunes #4: Duneshelter
Twilight Dunes
- On the map
Cavern of the Dunes #5: Duneshelter
Twilight Dunes
- On the map
Cavern of the Dunes #6: Duneshelter
Twilight Dunes
- On the map
Cavern of the Dunes #7: Duneshelter
Twilight Dunes
- On the map
Cavern of the Dunes #8: Duneshelter
Twilight Dunes
Cherry Blossom Cave0/15
- On the map
Cherry Blossom Cave #1: Dancing Sakura Shrine
Sakurajima
- On the map
Cherry Blossom Cave #1: Sakurajima - Mushroom Wetlands
Sakurajima
- On the map
Cherry Blossom Cave #1: Sakurajima - Northern Rock Field
Sakurajima
- On the map
Cherry Blossom Cave #2: Dancing Sakura Shrine
Sakurajima
- On the map
Cherry Blossom Cave #2: Sakurajima - Mushroom Wetlands
Sakurajima
- On the map
Cherry Blossom Cave #3: Dancing Sakura Shrine
Sakurajima
- On the map
Cherry Blossom Cave #3: Sakurajima - Mushroom Wetlands
Sakurajima
- On the map
Cherry Blossom Cave #4: Dancing Sakura Shrine
Sakurajima
- On the map
Cherry Blossom Cave #4: Sakurajima - Mushroom Wetlands
Sakurajima
- On the map
Cherry Blossom Cave #5: Dancing Sakura Shrine
Sakurajima
- On the map
Cherry Blossom Cave #5: Sakurajima - Mushroom Wetlands
Sakurajima
- On the map
Cherry Blossom Cave #6: Dancing Sakura Shrine
Sakurajima
- On the map
Cherry Blossom Cave #7: Dancing Sakura Shrine
Sakurajima
- On the map
Cherry Blossom Cave #8: Dancing Sakura Shrine
Sakurajima
- On the map
Cherry Blossom Cave #9: Dancing Sakura Shrine
Sakurajima
Hillside Cavern0/15
- On the map
Hillside Cavern: Autumn Rocks
Windswept Hills
- On the map
Hillside Cavern: Flying Fish Coast
Windswept Hills
- On the map
Hillside Cavern: Windswept Island
Windswept Hills
- On the map
Hillside Cavern #1: Desolate Church
Windswept Hills
- On the map
Hillside Cavern #1: Fortress Ruins
Windswept Hills
- On the map
Hillside Cavern #1: Golden Hills
Windswept Hills
- On the map
Hillside Cavern #1: Small Settlement
Windswept Hills
- On the map
Hillside Cavern #2: Desolate Church
Windswept Hills
- On the map
Hillside Cavern #2: Fortress Ruins
Windswept Hills
- On the map
Hillside Cavern #2: Golden Hills
Windswept Hills
- On the map
Hillside Cavern #2: Small Settlement
Windswept Hills
- On the map
Hillside Cavern #3: Desolate Church
Windswept Hills
- On the map
Hillside Cavern #3: Golden Hills
Windswept Hills
- On the map
Hillside Cavern #3: Small Settlement
Windswept Hills
- On the map
Hillside Cavern #4: Golden Hills
Windswept Hills
Ravine Grotto0/15
- On the map
Ravine Grotto #1: Bamboo Groves
Bamboo Grove
- On the map
Ravine Grotto #1: Deep Bamboo Thicket
Bamboo Grove
- On the map
Ravine Grotto #1: Foot of the Volcano
Mt. Obsidian
- On the map
Ravine Grotto #1: Golden Hills
Windswept Hills
- On the map
Ravine Grotto #1: Twilight Dunes
Twilight Dunes
- On the map
Ravine Grotto #2: Bamboo Groves
Bamboo Grove
- On the map
Ravine Grotto #2: Deep Bamboo Thicket
Bamboo Grove
- On the map
Ravine Grotto #2: Golden Hills
Windswept Hills
- On the map
Ravine Grotto #3: Bamboo Groves
Bamboo Grove
- On the map
Ravine Grotto #3: Deep Bamboo Thicket
Bamboo Grove
- On the map
Ravine Grotto #4: Bamboo Groves
Bamboo Grove
- On the map
Ravine Grotto #5: Bamboo Groves
Bamboo Grove
- On the map
Ravine Grotto #6: Bamboo Groves
Bamboo Grove
- On the map
Ravine Grotto #7: Bamboo Groves
Bamboo Grove
- On the map
Ravine Grotto #8: Bamboo Groves
Bamboo Grove
Volcanic Cavern0/15
- On the map
Volcanic Cavern #1: Dry Sandy Beach
Mt. Obsidian
- On the map
Volcanic Cavern #1: Fisherman's Point
Mt. Obsidian
- On the map
Volcanic Cavern #1: Foot of the Volcano
Mt. Obsidian
- On the map
Volcanic Cavern #1: Mount Obsidian
Mt. Obsidian
- On the map
Volcanic Cavern #1: Phantom Isle
Outlying Isles
- On the map
Volcanic Cavern #1: Ruined Fortress City
Mt. Obsidian
- On the map
Volcanic Cavern #1: Sea Breeze Archipelago
Sea Breeze Archipelago
- On the map
Volcanic Cavern #2: Dry Sandy Beach
Mt. Obsidian
- On the map
Volcanic Cavern #2: Foot of the Volcano
Mt. Obsidian
- On the map
Volcanic Cavern #2: Mount Obsidian
Mt. Obsidian
- On the map
Volcanic Cavern #2: Ruined Fortress City
Mt. Obsidian
- On the map
Volcanic Cavern #3: Mount Obsidian
Mt. Obsidian
- On the map
Volcanic Cavern #3: Ruined Fortress City
Mt. Obsidian
- On the map
Volcanic Cavern #4: Mount Obsidian
Mt. Obsidian
- On the map
Volcanic Cavern #5: Mount Obsidian
Mt. Obsidian
Other dungeons0/1
- On the map
Dungeon: Isle of Eternal Summer
Outlying Isles
Sunreach Skies0/1
- On the map
Sunreach Skies: Sunreach Skies
Outlying Isles
 Fast travel statues 0/144
Activate every Great Eagle Statue so you can fly there from the map.
Feybreak0/26
- On the map
Amethyst Outcrop
- On the map
Azure Cliffs
- On the map
Bicornis Islet
- On the map
Crimson Cliffs
- On the map
Crimson Labyrinth
- On the map
Crystallized Great Tree
- On the map
Curved Redrock
- On the map
Deserted Ash Plateau
- On the map
Emberstone Plateau
- On the map
Exile's Cape
- On the map
Feybreak Shipwreck
- On the map
Glacial Memento Islet
- On the map
Hidden Passage to the Oculus Gate
- On the map
Hill Entrance
- On the map
Loess Plains
- On the map
Oilfield Overlook
- On the map
Sandstone Gate Islet
- On the map
Scarlet Outlook
- On the map
Scorched Ashland
- On the map
Scorched Hill
- On the map
Shady Mushroom Cliffs
- On the map
Shield Dragon Tunnel
- On the map
Silent Lake
- On the map
Stone Pillar Cave Entrance
- On the map
The Oculus Gate, Tower in Sight
- On the map
Wildlands Floodgate
Outlying Isles0/22
- On the map
Crystalline Archipelago
- On the map
Desiccated Coast
- On the map
Enchanted Firmament
- On the map
Farcry Marsh
- On the map
Flamepulse Islet
- On the map
Foot of the World Tree
- On the map
Frostbitten Isle
- On the map
Frozen Dune Cape
- On the map
Isle of Decayed Treasures
- On the map
Isle of the Glacial Core
- On the map
Islet of Circular Ruins
- On the map
Mount Obsidian Trail
- On the map
Oasis Isle
- On the map
Phantom Isle
- On the map
Scouring Islet
- On the map
Sealed Realm of Terraria: Fast Travel
- On the map
Seaward Passage
- On the map
Suncrest Islet
- On the map
Sunlit Isle
- On the map
Thawtide Cape
- On the map
The Azure Tapestry
- On the map
Waterlily Gorge
Verdant Brook0/15
- On the map
Altar of the Windcaller
- On the map
Ancient Ritual Site
- On the map
Bridge of the Twin Knights
- On the map
Cinnamoth Forest
- On the map
Dustview Coast
- On the map
Frostbound Mountains Summit
- On the map
Gobfin's Turf
- On the map
Lake Center
- On the map
Mossanda Forest
- On the map
Mount Flopie Summit
- On the map
Sand Dunes Entrance
- On the map
Sealed Realm of the Mystic: Fast Travel
- On the map
Sealed Realm of the Swift: Fast Travel
- On the map
Snowy Mountain Crossroads
- On the map
Verdant Stream
Mt. Obsidian0/10
- On the map
Ancient Civilization Ruins
- On the map
Beach of Everlasting Summer
- On the map
Dry Dunes
- On the map
Fisherman's Point
- On the map
Foot of the Volcano
- On the map
Heatwave Gate
- On the map
Mount Obsidian - Anubis Statue
- On the map
Mount Obsidian - Midpoint
- On the map
Mount Obsidian - Second Ascent
- On the map
Ruined Fortress City
Twilight Dunes0/10
- On the map
Anubis Dunes
- On the map
Arena Entrance
- On the map
Cold Shore
- On the map
Deep Sand Dunes
- On the map
Desert Backbone
- On the map
Duneshelter
- On the map
Sandbar of Solitude
- On the map
The Furthest Flats
- On the map
Thirst's End
- On the map
Windwatch Outlook
Windswept Hills0/10
- On the map
Desolate Church
- On the map
Fort Ruins
- On the map
Grassy Behemoth Hills
- On the map
Hill of Beginnings
- On the map
Hypocrite Hill
- On the map
Islandhopper Coast
- On the map
Ravine Entrance
- On the map
Sealed Realm of the Ardent: Fast Travel
- On the map
Sealed Realm of the Frozen Wings: Fast Travel
- On the map
Small Settlement
Bamboo Grove0/9
- On the map
Ascetic Falls
- On the map
Deep Bamboo Thicket
- On the map
Investigator's Fork
- On the map
Kelpsea Hill
- On the map
Sealed Realm of the Myriad Flames: Fast Travel
- On the map
Sealed Realm of the Swordmaster: Fast Travel
- On the map
Whisperwind Cliffs
- On the map
Whisperwind Hill
- On the map
Windscream Valley
Astral Mountains0/8
- On the map
Deserted Islet
- On the map
Garden Beneath the Cliffs
- On the map
Icy Weasel Hill
- On the map
Isle of Murmurs
- On the map
Isle of Murmurs Beach
- On the map
Land of Absolute Zero
- On the map
No Man's Trail
- On the map
Unthawable Lake
Sakurajima0/8
- On the map
Cherry Blossom Crossroads
- On the map
Garden Beneath the Astral Mountains
- On the map
Pristine Snow Field
- On the map
Sakurajima - Mushroom Wetlands
- On the map
Sakurajima - Northern Rock Field
- On the map
Sakurajima - Southern Sandbar
- On the map
Sakurajima: West Coast
- On the map
Secluded Cemetery
Marsh Island0/4
- On the map
Marsh Island
- On the map
Marsh Island Church Ruins
- On the map
Mossanda Inner Coast
- On the map
Natural Bridge
Sea Breeze Archipelago0/4
- On the map
Sea Breeze Archipelago - Castaway Beach
- On the map
Sea Breeze Archipelago Church
- On the map
Sea Breeze Coast
- On the map
Small Cove
Isle of Silence0/2
- On the map
Isle of Silence
- On the map
Isle of Silence Church Ruins
Eastern Wild Island0/1
- On the map
Eastern Wild Island
World Tree0/15
- On the map
Abandoned Laboratory
- On the map
Alluvion Lakefront
- On the map
Boreal Summit
- On the map
Corroded Hollow
- On the map
Dusty Ravine
- On the map
Forbidden Laboratory
- On the map
Gilded City Ruins
- On the map
Lacrymal Shoal
- On the map
Remnant Riverside
- On the map
Rotmist Root
- On the map
Shinespore Root
- On the map
Spore Cloister
- On the map
The Verdant Rootpath
- On the map
Whimsical Wisteria Grove
- On the map
Within the Seal (Sealed Sanctum)
 Skill fruit trees 0/43
Each tree gives one random Skill Fruit. Trees refill, so tick the ones you have visited.
Feybreak0/7
- On the map
Skill Fruit Tree: Crystalized Ancient Tree
Feybreak
- On the map
Skill Fruit Tree: Deserted Ash Plateau
Feybreak
- On the map
Skill Fruit Tree: Feybreak Shipwreck
Feybreak
- On the map
Skill Fruit Tree: Frozen Coral Hill
Feybreak
- On the map
Skill Fruit Tree: Loess Plains
Feybreak
- On the map
Skill Fruit Tree #1: Scorched Ashland
Feybreak
- On the map
Skill Fruit Tree #2: Scorched Ashland
Feybreak
Outlying Isles0/4
- On the map
Skill Fruit Tree: Dragonmark Peak
Outlying Isles
- On the map
Skill Fruit Tree: Waterlily Gorge
Outlying Isles
- On the map
Skill Fruit Tree #1: Farcry Marsh
Outlying Isles
- On the map
Skill Fruit Tree #2: Farcry Marsh
Outlying Isles
Sakurajima0/4
- On the map
Skill Fruit Tree: Dancing Sakura Shrine
Sakurajima
- On the map
Skill Fruit Tree: Sakurajima - Mushroom Wetlands
Sakurajima
- On the map
Skill Fruit Tree: Sakurajima - Northern Rock Field
Sakurajima
- On the map
Skill Fruit Tree: Sakurajima - Southern Sandbar
Sakurajima
Verdant Brook0/4
- On the map
Skill Fruit Tree: Crescent Moon Shore
Verdant Brook
- On the map
Skill Fruit Tree: Gobfin's Turf
Verdant Brook
- On the map
Skill Fruit Tree: Scars of War
Verdant Brook
- On the map
Skill Fruit Tree: Verdant Brook
Verdant Brook
Twilight Dunes0/3
- On the map
Skill Fruit Tree #1: Duneshelter
Twilight Dunes
- On the map
Skill Fruit Tree #2: Duneshelter
Twilight Dunes
- On the map
Skill Fruit Tree #3: Duneshelter
Twilight Dunes
Bamboo Grove0/2
- On the map
Skill Fruit Tree #1: Bamboo Groves
Bamboo Grove
- On the map
Skill Fruit Tree #2: Bamboo Groves
Bamboo Grove
Mt. Obsidian0/2
- On the map
Skill Fruit Tree: Dry Sandy Beach
Mt. Obsidian
- On the map
Skill Fruit Tree: Ruined Fortress City
Mt. Obsidian
Astral Mountains0/1
- On the map
Skill Fruit Tree: Astral Mountains
Astral Mountains
Isle of Silence0/1
- On the map
Skill Fruit Tree: Isle of Silence Church Ruins
Isle of Silence
Marsh Island0/1
- On the map
Skill Fruit Tree: Marsh Island
Marsh Island
Sea Breeze Archipelago0/1
- On the map
Skill Fruit Tree: Sea Breeze Archipelago
Sea Breeze Archipelago
Windswept Hills0/1
- On the map
Skill Fruit Tree: Windswept Island
Windswept Hills
World Tree0/12
- On the map
Skill Fruit Tree #1: Alluvion Lakefront
Area not named
- On the map
Skill Fruit Tree #1: Boreal Summit
Area not named
- On the map
Skill Fruit Tree #1: Corroded Hollow
Area not named
- On the map
Skill Fruit Tree #1: Forbidden Laboratory
Area not named
- On the map
Skill Fruit Tree #1: Gilded City Ruins
Area not named
- On the map
Skill Fruit Tree #1: Remnant Riverside
Area not named
- On the map
Skill Fruit Tree #1: Spore Cloister
Area not named
- On the map
Skill Fruit Tree #1: Within the Seal
Area not named
- On the map
Skill Fruit Tree #2: Alluvion Lakefront
Area not named
- On the map
Skill Fruit Tree #2: Boreal Summit
Area not named
- On the map
Skill Fruit Tree #2: Within the Seal
Area not named
- On the map
Skill Fruit Tree #3: Boreal Summit
Area not named
Journals and notes 0/64
Lore documents to pick up and read from the Journals menu. They give no XP and no items.
Windswept Hills0/12
- On the map
Castaway's Journal - Day 1-1
- On the map
Castaway's Journal - Day 1-2
- On the map
Castaway's Journal - Day 3
- On the map
Castaway's Journal - Day 8
- On the map
Castaway's Journal - Day 11
- On the map
Castaway's Journal - Day 18
- On the map
Castaway's Journal - Day XX
- On the map
Castaway's Journal Day 2
- On the map
Lily Everhart's Diary - 2
- On the map
Zoe Rayne's Diary - 1
- On the map
Zoe Rayne's Diary - 2
- On the map
Zoe Rayne's Diary - 3
Verdant Brook0/8
- On the map
Castaway's Journal - Day 10
- On the map
Castaway's Journal - Day 12-2
- On the map
Castaway's Journal - Day 12-3
- On the map
Castaway's Journal - Day 15
- On the map
Castaway's Journal - Day 22
- On the map
Castaway's Journal - Day 30
- On the map
Lily Everhart's Diary - 1
- On the map
Lily Everhart's Diary - 3
Outlying Isles0/7
- On the map
Auri's Diary - 1
- On the map
Auri's Diary - 2
- On the map
Auri's Diary - 3
- On the map
Auri's Diary - 4
- On the map
Auri's Diary - 5
- On the map
Auri's Diary - 6
- On the map
Castaway's Journal - Day 5
Bamboo Grove0/6
- On the map
A letter penned in crude handwriting:
- On the map
Castaway's Journal - Day 6
- On the map
Castaway's Journal - Day 12-1
- On the map
Castaway's Journal - Day 38
- On the map
Zoe Rayne's Diary - 4
- On the map
Zoe Rayne's Diary - 5
Feybreak0/5
- On the map
Bjorn Seligsson’s Diary - 1
- On the map
Bjorn Seligsson's Diary - 2
- On the map
Bjorn Seligsson’s Diary - 3
- On the map
Bjorn Seligsson’s Diary - 4
- On the map
Bjorn Seligsson’s Diary - 5
Mt. Obsidian0/5
- On the map
Axel Travers' Diary - 1
- On the map
Castaway's Journal - Day 0
- On the map
Castaway's Journal - Day 13
- On the map
Castaway's Journal - Day 25
- On the map
Castaway's Journal - Day 29
Sakurajima0/5
- On the map
Saya Kurosaki's Diary - 1
- On the map
Saya Kurosaki's Diary - 2
- On the map
Saya Kurosaki's Diary - 3
- On the map
Saya Kurosaki's Diary - 4
- On the map
Saya Kurosaki's Diary - 5
Twilight Dunes0/4
- On the map
Castaway's Journal - Day 32
- On the map
Marcus Dryden's Diary - 1
- On the map
Marcus Dryden's Diary - 2
- On the map
Marcus Dryden's Diary - 3
Astral Mountains0/3
- On the map
Victor Ashford's Diary - 1
- On the map
Victor Ashford's Diary - 2
- On the map
Victor Ashford's Diary - 3
World Tree0/9
- On the map
(A scorched piece of paper)
- On the map
Ancient Recorder
- On the map
Audio Recording from a Council Meeting
- On the map
Suppression Operation Comms Log
- On the map
Zenara's Diary - 1
- On the map
Zenara's Diary - 2
- On the map
Zenara's Diary - 3
- On the map
Zenara's Diary - 4
- On the map
Zenara's Diary - 5
Statues of Power 0/4
Where Lifmunk Effigies are offered.
Statues of Power0/4
- On the map
Statue of Power: Desolate Church
Windswept Hills
- On the map
Statue of Power: Isle of Silence Church Ruins
Isle of Silence
- On the map
Statue of Power: Marsh Island Church Ruins
Marsh Island
- On the map
Statue of Power: Sea Breeze Archipelago Church
Sea Breeze Archipelago
How this checklist works
Palworld has no completion meter of its own, so this page is one. Every row comes from our own game data: the Paldeck table and the pins on the Palworld interactive map. A row for a pin ticks the same "found" mark as the map, so the two always agree, on this device and on your account if you are signed in. The Paldeck rows are not pins, so they are kept on this device only.
Use "Hide done" to see only what is left, or pick one group. Each row links to its pin or its Pal page. For the details behind a group, see Lifmunk Effigy locations, the Alpha Pals, the tower bosses and the full Paldeck.
Wild egg nests, chests and resource nodes are not in the list: there are thousands of them and they refill, so they are things to farm, not to complete. They stay on the map.