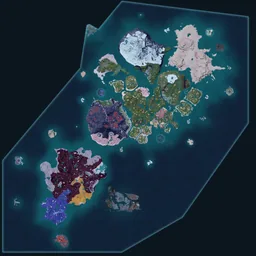
Fishing Spots in Palworld
All 500 fishing spots mapped across 13 regions of the Palpagos Islands. Most concentrated in Feybreak (116). A further 77 sit on the World Tree, which the game draws as a separate map — see them there.
Interactive fishing spots map
Showing 200 of 500 spots
View all on the map →Top regions for fishing
Fishing rods
- Beginner Fishing Rod (Chillet)Bar ×1 · Durability 120
The rod you start with. Standard catch bar, and it wears out fastest.
- Beginner Fishing Rod (Gumoss)Bar ×1.1 · Durability 180
Same tier, slightly wider bar and half again the durability.
- Intermediate Fishing Rod (Cattiva)Bar ×1.3 · Durability 240
The first real upgrade — a noticeably more forgiving catch bar.
- Intermediate Fishing Rod (Croajiro)Bar ×1.4 · Durability 360
Triple the starting rod's durability; the sensible mid-game workhorse.
- Advanced Fishing Rod (Pengullet)Bar ×1.8 · Durability 480
Nearly double the starting bar width — this is where expert catches stop fighting back.
- Advanced Fishing Rod (Depresso)Bar ×1.9 · Durability 720
The widest bar and 720 durability, which is what makes grand-master catches practical.
Water mounts that fish faster
 Surfent
Partner skill Swift Swimmer — lets you ride over water without depleting stamina. The default working-class fishing trip mount.
 Jormuntide
Late-game equivalent of Surfent — Stormbringer Sea Dragon partner skill, faster water traversal for long fishing routes.
 Jormuntide Ignis
Variant Jormuntide — same water-mount role, Stormbringer Lava Dragon partner skill. Pick whichever variant you can catch first.
 Penking
Brave Sailor partner skill. Mid-game alternative if Surfent isn't available yet — handles cross-island ferries between fishing regions.
 Azurobe
Waterwing Dance partner skill — covers shorter water hops. Useful early as an in-region fishing-spot hopper.
Distribution by region
- Feybreak116 · 23%
- Outlying Isles94 · 19%
- Verdant Brook60 · 12%
- Twilight Dunes48 · 10%
- Windswept Hills43 · 9%
- Mt. Obsidian38 · 8%
- Sakurajima34 · 7%
- Sea Breeze Archipelago23 · 5%
- Astral Mountains13 · 3%
- Marsh Island11 · 2%
- Isle of Silence8 · 2%
- Bamboo Grove7 · 1%
- Eastern Wild Island5 · 1%
Fishing spots by place
86 named places across both maps — among them the Rayne Syndicate oil rigs (5 spots), Sunreach's sky islands (11) and the World Tree (77). The level band for each area is in the guide's fishing tiers by player level.
| Place | Area | Spots | Rare | 1 h |
|---|---|---|---|---|
| Gilded City Ruins | World Tree | 27 | 3 | 1 |
| Frozen Coral Hill | Feybreak | 19 | 1 | 1 |
| Sea Breeze Archipelago | Sea Breeze Archipelago | 18 | 3 | – |
| Frostbound Mountains | Verdant Brook | 16 | 3 | – |
| Scars of War | Verdant Brook | 16 | 1 | – |
| Deserted Ash Plateau | Feybreak | 15 | 2 | 2 |
| Sandstone Gate Islet | Feybreak | 14 | 5 | 3 |
| Flying Fish Coast | Windswept Hills | 14 | 1 | – |
| Isle of the Glacial Core | Outlying Isles | 13 | 4 | 1 |
| Flamepulse Islet | Outlying Isles | 13 | 3 | 1 |
| Sakurajima - Mushroom Wetlands | Sakurajima | 13 | – | – |
| Alluvion Lakefront | World Tree | 12 | 4 | 3 |
| Arena | Twilight Dunes | 12 | 2 | – |
| Oasis Isle | Outlying Isles | 11 | 5 | 1 |
| Dry Sandy Beach | Mt. Obsidian | 11 | 2 | – |
| Marsh Island | Marsh Island | 11 | 2 | – |
| Verdant Brook | Verdant Brook | 10 | 5 | – |
| Duneshelter | Twilight Dunes | 10 | 1 | – |
| Phantom Isle | Outlying Isles | 10 | 1 | 1 |
| Ancient Ritual Site | Verdant Brook | 9 | 2 | – |
| Boreal Summit | World Tree | 9 | 2 | 1 |
| Dancing Sakura Shrine | Sakurajima | 9 | 2 | 2 |
| No. 3 Wildlife Sanctuary | Twilight Dunes | 9 | 2 | 2 |
| Twilight Dunes | Twilight Dunes | 9 | 2 | – |
| Scorched Ashland | Feybreak | 9 | – | – |
| Sunlit Isle | Outlying Isles | 8 | 2 | 1 |
| Desiccated Dunes | Twilight Dunes | 8 | 1 | – |
| Bicornis Islet | Feybreak | 7 | 2 | 2 |
| Glacial Memento Islet | Feybreak | 7 | 2 | 2 |
| Scorched Hill | Feybreak | 7 | 2 | 2 |
| Foot of the Astral Mountains | Astral Mountains | 7 | 1 | – |
| Feybreak Shipwreck | Feybreak | 7 | – | – |
| Fisherman's Point | Mt. Obsidian | 7 | – | – |
| Fortress Ruins | Windswept Hills | 7 | – | – |
| Isle of Silence | Isle of Silence | 7 | – | – |
| Sakurajima - Southern Sandbar | Sakurajima | 7 | – | – |
| Isle of Eternal Summer | Outlying Isles | 6 | 2 | 1 |
| Dusty Ravine | World Tree | 6 | 1 | – |
| Foot of the Volcano | Mt. Obsidian | 6 | 1 | – |
| Isle of Murmurs | Astral Mountains | 6 | 1 | – |
| Ruined Fortress City | Mt. Obsidian | 6 | 1 | – |
| Stone Pillar Cave | Feybreak | 6 | 1 | 1 |
| Waterlily Gorge | Sunreach | 6 | 1 | 1 |
| Autumn Rocks | Windswept Hills | 6 | – | – |
| Crescent Moon Shore | Verdant Brook | 6 | – | – |
| The Oculus Gate, Tower in Sight | Feybreak | 6 | – | – |
| Withered Seaside | Feybreak | 6 | – | – |
| No. 2 Wildlife Sanctuary | Mt. Obsidian | 5 | 3 | 3 |
| Loess Plains | Feybreak | 5 | 2 | 2 |
| Whimsical Wisteria Grove | World Tree | 5 | 2 | 2 |
| Islet of Circular Ruins | Outlying Isles | 5 | 1 | 1 |
| Eastern Wild Island | Eastern Wild Island | 5 | – | – |
| Sakurajima - Northern Rock Field | Sakurajima | 5 | – | – |
| Sea Breeze Archipelago Church | Sea Breeze Archipelago | 5 | – | – |
| Remnant Riverside | World Tree | 4 | 2 | 1 |
| Spore Cloister | World Tree | 4 | 2 | 2 |
| Golden Hills | Windswept Hills | 4 | 1 | – |
| Isle of Decayed Treasures | Outlying Isles | 4 | 1 | 1 |
| Scouring Islet | Outlying Isles | 4 | 1 | 1 |
| Suncrest Islet | Outlying Isles | 4 | 1 | 1 |
| Windswept Island | Windswept Hills | 4 | 1 | – |
| Bamboo Groves | Bamboo Grove | 4 | – | – |
| Corroded Hollow | World Tree | 3 | 1 | – |
| Crystalized Ancient Tree | Feybreak | 3 | 1 | 1 |
| Deep Bamboo Thicket | Bamboo Grove | 3 | 1 | – |
| Frostbitten Isle | Outlying Isles | 3 | 1 | 1 |
| Rayne Syndicate Test Drilling Rig | Windswept Hills | 3 | 1 | – |
| Gobfin's Turf | Verdant Brook | 3 | – | – |
| Mount Obsidian | Mt. Obsidian | 3 | – | – |
| No. 1 Wildlife Sanctuary | Windswept Hills | 2 | 2 | – |
| Rayne Syndicate Oil Rig | Outlying Isles | 2 | 2 | – |
| Rayne Syndicate Platform Oil Rig | Feybreak | 2 | 2 | 2 |
| Shinespore Root | World Tree | 2 | 2 | 2 |
| The Verdant Rootpath | World Tree | 2 | 2 | 1 |
| Emberstone Plateau | Feybreak | 2 | 1 | 1 |
| Desolate Church | Windswept Hills | 2 | – | – |
| Enchanted Firmament | Sunreach | 2 | – | – |
| Crystalline Archipelago | Sunreach | 1 | 1 | – |
| Isle of Silence Church Ruins | Isle of Silence | 1 | 1 | – |
| Small Settlement | Windswept Hills | 1 | 1 | – |
| Within the Seal | World Tree | 1 | 1 | 1 |
| Azure Woodland | Sunreach | 1 | – | – |
| Farcry Marsh | Sunreach | 1 | – | – |
| Hidden Passage to the Oculus Gate | Feybreak | 1 | – | – |
| Lacrymal Shoal | World Tree | 1 | – | – |
| Rotmist Root | World Tree | 1 | – | – |
All fishing spots by region
Every one of the 500 Palpagos spots with its map coordinates. Click a spot to open it on the map; 1 h marks the ones that take an hour to respawn.
Feybreak(116)
- Fishing Spot #5 — Bicornis Islet-1220, -1747
- Fishing Spot #6 — Frozen Coral Hill-1346, -1542
- Fishing Spot #1 — The Oculus Gate, Tower in Sight-1052, -1531
- Fishing Spot #7 — Frozen Coral Hill-1208, -1520
- Fishing Spot #1 — Loess Plains-956, -1500
- Fishing Spot #2 — Loess Plains-863, -1452
- Fishing Spot #3 — Feybreak Shipwreck-1344, -1451
- Fishing Spot #3 — Loess Plains-821, -1427
- Fishing Spot #2 — The Oculus Gate, Tower in Sight-1148, -1425
- Fishing Spot #1 — Frozen Coral Hill-1204, -1734
- Fishing Spot #3 — The Oculus Gate, Tower in Sight-1173, -1420
- Rare Fishing Spot #1 — Loess Plains1 h-934, -1411
- Fishing Spot #5 — Feybreak Shipwreck-1335, -1408
- Fishing Spot #6 — Feybreak Shipwreck-1293, -1402
- Rare Fishing Spot #2 — Loess Plains1 h-965, -1402
- Fishing Spot #4 — The Oculus Gate, Tower in Sight-1126, -1361
- Fishing Spot #1 — Deserted Ash Plateau-1272, -1332
- Fishing Spot #2 — Frozen Coral Hill-1181, -1718
- Fishing Spot #1 — Hidden Passage to the Oculus Gate-1090, -1310
- Rare Fishing Spot #1 — Emberstone Plateau1 h-835, -1308
- Fishing Spot #2 — Deserted Ash Plateau-1347, -1291
- Fishing Spot #1 — Emberstone Plateau-730, -1289
- Fishing Spot #1 — Crystalized Ancient Tree-960, -1259
- Fishing Spot #1 — Feybreak Shipwreck-1409, -1659
- Fishing Spot #2 — Crystalized Ancient Tree-970, -1257
- Rare Fishing Spot #1 — Deserted Ash Plateau1 h-1213, -1190
- Rare Fishing Spot #1 — Crystalized Ancient Tree1 h-988, -1183
- Fishing Spot #3 — Deserted Ash Plateau-1363, -1161
- Fishing Spot #2 — Withered Seaside-739, -1139
- Fishing Spot #1 — Stone Pillar Cave-930, -1118
- Fishing Spot #2 — Stone Pillar Cave-945, -1114
- Fishing Spot #3 — Frozen Coral Hill-1114, -1656
- Fishing Spot #1 — Scorched Hill-1131, -1079
- Fishing Spot #4 — Deserted Ash Plateau-1455, -1062
- Fishing Spot #2 — Scorched Hill-1114, -1050
- Fishing Spot #4 — Frozen Coral Hill-1106, -1624
- Rare Fishing Spot #1 — Stone Pillar Cave1 h-988, -1028
- Fishing Spot #1 — Scorched Ashland-843, -1017
- Fishing Spot #5 — Deserted Ash Plateau-1263, -1011
- Fishing Spot #3 — Stone Pillar Cave-984, -1006
- Fishing Spot #3 — Scorched Hill-1126, -974
- Fishing Spot #6 — Deserted Ash Plateau-1317, -970
- Fishing Spot #4 — Scorched Hill-1158, -968
- Rare Fishing Spot #2 — Scorched Hill1 h-1050, -966
- Fishing Spot #7 — Deserted Ash Plateau-1402, -943
- Fishing Spot #2 — Feybreak Shipwreck-1394, -1570
- Fishing Spot #4 — Stone Pillar Cave-1041, -906
- Fishing Spot #5 — Scorched Hill-1060, -896
- Fishing Spot #2 — Scorched Ashland-880, -848
- Fishing Spot #3 — Scorched Ashland-1059, -836
- Fishing Spot #4 — Scorched Ashland-827, -819
- Fishing Spot #5 — Frozen Coral Hill-1120, -1563
- Rare Fishing Spot #1 — Frozen Coral Hill1 h-1212, -1543
- Fishing Spot #5 — Scorched Ashland-778, -768
- Rare Fishing Spot #2 — Bicornis Islet1 h-1086, -1910
- Fishing Spot #15 — Frozen Coral Hill-1101, -1608
- Fishing Spot #14 — Frozen Coral Hill-1101, -1658
- Fishing Spot #6 — Sandstone Gate Islet-1104, -808
- Rare Fishing Spot #1 — Scorched Hill1 h-1119, -1076
- Fishing Spot #7 — Sandstone Gate Islet-1119, -801
- Fishing Spot #17 — Frozen Coral Hill-1126, -1580
- Fishing Spot #11 — Frozen Coral Hill-1128, -1685
- Fishing Spot #8 — Sandstone Gate Islet-1130, -798
- Fishing Spot #5 — The Oculus Gate, Tower in Sight-1144, -1440
- Fishing Spot #4 — Bicornis Islet-1147, -1861
- Fishing Spot #6 — The Oculus Gate, Tower in Sight-1156, -1439
- Fishing Spot #9 — Frozen Coral Hill-1175, -1704
- Rare Fishing Spot #1 — Bicornis Islet1 h-1185, -1987
- Fishing Spot #9 — Sandstone Gate Islet-1206, -778
- Fishing Spot #3 — Bicornis Islet-1213, -1865
- Fishing Spot #1 — Bicornis Islet-1218, -1955
- Fishing Spot #11 — Deserted Ash Plateau-1219, -1001
- Fishing Spot #12 — Deserted Ash Plateau-1219, -983
- Fishing Spot #2 — Bicornis Islet-1226, -1873
- Fishing Spot #13 — Deserted Ash Plateau-1230, -937
- Fishing Spot #2 — Sandstone Gate Islet-1234, -640
- Fishing Spot #18 — Frozen Coral Hill-1241, -1534
- Fishing Spot #8 — Frozen Coral Hill-1249, -1729
- Fishing Spot #5 — Sandstone Gate Islet-1251, -868
- Rare Fishing Spot #1 — Sandstone Gate Islet1 h-1256, -608
- Fishing Spot #10 — Deserted Ash Plateau-1268, -1040
- Rare Fishing Spot #2 — Deserted Ash Plateau1 h-1271, -1120
- Fishing Spot #10 — Frozen Coral Hill-1277, -1703
- Fishing Spot #4 — Sandstone Gate Islet-1280, -557
- Fishing Spot #3 — Sandstone Gate Islet-1289, -567
- Fishing Spot #1 — Sandstone Gate Islet-1308, -662
- Fishing Spot #12 — Frozen Coral Hill-1321, -1673
- Fishing Spot #16 — Frozen Coral Hill-1368, -1593
- Fishing Spot #8 — Deserted Ash Plateau-1374, -1148
- Fishing Spot #4 — Feybreak Shipwreck-1380, -1443
- Fishing Spot #9 — Deserted Ash Plateau-1386, -1117
- Fishing Spot #13 — Frozen Coral Hill-1389, -1669
- Fishing Spot #7 — Feybreak Shipwreck-1415, -1504
- Rare Fishing Spot #2 — Glacial Memento Islet1 h-1650, -913
- Fishing Spot #3 — Glacial Memento Islet-1659, -931
- Rare Fishing Spot #1 — Glacial Memento Islet1 h-1659, -989
- Fishing Spot #4 — Glacial Memento Islet-1686, -904
- Fishing Spot #1 — Glacial Memento Islet-1710, -998
- Fishing Spot #5 — Glacial Memento Islet-1717, -895
- Fishing Spot #2 — Glacial Memento Islet-1733, -937
- Fishing Spot #6 — Scorched Ashland-857, -1012
- Fishing Spot #5 — Stone Pillar Cave-881, -1091
- Fishing Spot #9 — Scorched Ashland-888, -818
- Rare Fishing Spot #3 — Sandstone Gate Islet1 h-969, -532
- Rare Fishing Spot #5 — Sandstone Gate Islet1 h-970, -520
- Rare Fishing Spot #4 — Sandstone Gate Islet-977, -520
- Fishing Spot #8 — Scorched Ashland-978, -820
- Rare Fishing Spot #2 — Sandstone Gate Islet-983, -538
- Fishing Spot #7 — Scorched Ashland-986, -822
- Rare Fishing Spot #1 — Rayne Syndicate Platform Oil Rig1 h-1731, -1462
- Fishing Spot #5 — Withered Seaside-609, -1012
- Fishing Spot #6 — Withered Seaside-645, -976
- Rare Fishing Spot #2 — Rayne Syndicate Platform Oil Rig1 h-1683, -1456
- Fishing Spot #1 — Withered Seaside-686, -1191
- Fishing Spot #3 — Withered Seaside-601, -1124
- Fishing Spot #4 — Withered Seaside-611, -1102
Outlying Isles(94)
- Rare Fishing Spot #3 — Isle of the Glacial Core222, 650
- Fishing Spot #6 — Isle of the Glacial Core255, 667
- Fishing Spot #5 — Isle of the Glacial Core319, 664
- Fishing Spot #8 — Isle of the Glacial Core368, 713
- Fishing Spot #3 — Sunlit Isle376, -458
- Fishing Spot #4 — Sunlit Isle380, -444
- Fishing Spot #2 — Scouring Islet393, -694
- Fishing Spot #5 — Sunlit Isle394, -443
- Rare Fishing Spot #1 — Sunlit Isle400, -472
- Fishing Spot #1 — Sunlit Isle401, -480
- Fishing Spot #2 — Sunlit Isle403, -478
- Fishing Spot #3 — Scouring Islet410, -676
- Rare Fishing Spot #1 — Scouring Islet1 h421, -716
- Rare Fishing Spot #2 — Sunlit Isle1 h425, -471
- Fishing Spot #1 — Scouring Islet468, -727
- Fishing Spot #4 — Flamepulse Islet647, 382
- Fishing Spot #8 — Flamepulse Islet650, 423
- Fishing Spot #6 — Flamepulse Islet653, 418
- Rare Fishing Spot #2 — Flamepulse Islet672, 433
- Fishing Spot #1 — Flamepulse Islet677, 321
- Fishing Spot #2 — Flamepulse Islet681, 321
- Fishing Spot #5 — Oasis Isle687, 239
- Fishing Spot #4 — Oasis Isle689, 235
- Rare Fishing Spot #1 — Flamepulse Islet749, 376
- Fishing Spot #9 — Flamepulse Islet750, 425
- Fishing Spot #10 — Flamepulse Islet762, 499
- Fishing Spot #7 — Flamepulse Islet787, 421
- Rare Fishing Spot #3 — Flamepulse Islet1 h791, 478
- Fishing Spot #2 — Oasis Isle803, 201
- Fishing Spot #5 — Flamepulse Islet833, 415
- Rare Fishing Spot #1 — Islet of Circular Ruins1 h860, -68
- Fishing Spot #4 — Islet of Circular Ruins884, -55
- Fishing Spot #1 — Islet of Circular Ruins894, -146
- Rare Fishing Spot #3 — Oasis Isle906, 195
- Rare Fishing Spot #2 — Oasis Isle913, 192
- Rare Fishing Spot #4 — Oasis Isle913, 195
- Fishing Spot #3 — Islet of Circular Ruins936, -56
- Fishing Spot #2 — Islet of Circular Ruins961, -94
- Fishing Spot #3 — Isle of Eternal Summer-442, -800
- Fishing Spot #5 — Phantom Isle-815, -307
- Fishing Spot #4 — Isle of Eternal Summer-437, -792
- Fishing Spot #2 — Enchanted Firmament-284, -1479
- Fishing Spot #1 — Azure Woodland-321, -1390
- Fishing Spot #1 — Enchanted Firmament-377, -1519
- Fishing Spot #1 — Farcry Marsh-402, -1392
- Fishing Spot #2 — Isle of Eternal Summer-422, -824
- Fishing Spot #1 — Isle of Eternal Summer-425, -826
- Rare Fishing Spot #2 — Isle of Eternal Summer-426, -820
- Rare Fishing Spot #1 — Crystalline Archipelago-504, -1515
- Fishing Spot #1 — Waterlily Gorge-518, -1533
- Fishing Spot #2 — Waterlily Gorge-523, -1520
- Fishing Spot #3 — Waterlily Gorge-553, -1503
- Fishing Spot #5 — Waterlily Gorge-557, -1488
- Fishing Spot #4 — Waterlily Gorge-565, -1498
- Rare Fishing Spot #1 — Waterlily Gorge1 h-575, -1487
- Fishing Spot #6 — Phantom Isle-797, -264
- Fishing Spot #4 — Phantom Isle-825, -318
- Fishing Spot #3 — Phantom Isle-839, -354
- Fishing Spot #1 — Phantom Isle-864, -456
- Fishing Spot #2 — Suncrest Islet-877, 100
- Fishing Spot #3 — Suncrest Islet-880, 149
- Fishing Spot #1 — Suncrest Islet-913, 78
- Rare Fishing Spot #1 — Suncrest Islet1 h-921, 127
- Rare Fishing Spot #1 — Frostbitten Isle1 h-77, -988
- Fishing Spot #1 — Frostbitten Isle-106, -961
- Fishing Spot #2 — Frostbitten Isle-89, -946
- Rare Fishing Spot #1 — Isle of Eternal Summer1 h-404, -826
- Fishing Spot #2 — Phantom Isle-842, -361
- Fishing Spot #7 — Phantom Isle-841, -220
- Fishing Spot #8 — Phantom Isle-889, -218
- Fishing Spot #9 — Phantom Isle-888, -209
- Rare Fishing Spot #1 — Phantom Isle1 h-933, -205
- Rare Fishing Spot #1 — Isle of Decayed Treasures1 h653, -163
- Fishing Spot #1 — Isle of Decayed Treasures608, -154
- Fishing Spot #2 — Isle of Decayed Treasures612, -143
- Rare Fishing Spot #1 — Oasis Isle795, 168
- Fishing Spot #1 — Oasis Isle882, 191
- Fishing Spot #3 — Oasis Isle884, 203
- Rare Fishing Spot #5 — Oasis Isle1 h923, 209
- Fishing Spot #6 — Oasis Isle731, 268
- Fishing Spot #3 — Flamepulse Islet706, 357
- Rare Fishing Spot #1 — Isle of the Glacial Core122, 454
- Fishing Spot #1 — Isle of the Glacial Core170, 546
- Fishing Spot #3 — Isle of the Glacial Core143, 634
- Rare Fishing Spot #2 — Isle of the Glacial Core241, 636
- Fishing Spot #4 — Isle of the Glacial Core161, 648
- Rare Fishing Spot #4 — Isle of the Glacial Core1 h134, 676
- Fishing Spot #7 — Isle of the Glacial Core312, 713
- Fishing Spot #9 — Isle of the Glacial Core396, 769
- Fishing Spot #3 — Isle of Decayed Treasures594, -135
- Fishing Spot #2 — Isle of the Glacial Core245, 600
- Rare Fishing Spot #1 — Rayne Syndicate Oil Rig595, -433
- Rare Fishing Spot #2 — Rayne Syndicate Oil Rig557, -424
- Fishing Spot #6 — Sunlit Isle374, -401
Verdant Brook(60)
- Fishing Spot #12 — Frostbound Mountains135, 226
- Fishing Spot #3 — Verdant Brook144, -18
- Rare Fishing Spot #3 — Verdant Brook149, -11
- Fishing Spot #13 — Frostbound Mountains167, 237
- Rare Fishing Spot #3 — Frostbound Mountains196, 69
- Fishing Spot #10 — Frostbound Mountains199, 221
- Fishing Spot #11 — Frostbound Mountains232, 221
- Fishing Spot #8 — Frostbound Mountains262, 193
- Fishing Spot #7 — Frostbound Mountains266, 191
- Fishing Spot #5 — Frostbound Mountains327, 160
- Fishing Spot #15 — Scars of War414, 153
- Fishing Spot #14 — Scars of War428, 137
- Fishing Spot #12 — Scars of War438, 72
- Fishing Spot #11 — Scars of War441, 68
- Fishing Spot #8 — Scars of War475, 14
- Fishing Spot #2 — Crescent Moon Shore13, -240
- Fishing Spot #7 — Ancient Ritual Site-111, -219
- Fishing Spot #3 — Crescent Moon Shore40, -183
- Fishing Spot #1 — Gobfin's Turf79, -180
- Fishing Spot #4 — Crescent Moon Shore-45, -146
- Fishing Spot #5 — Crescent Moon Shore-36, -138
- Fishing Spot #6 — Crescent Moon Shore51, -133
- Fishing Spot #5 — Ancient Ritual Site-11, -305
- Fishing Spot #2 — Gobfin's Turf55, -93
- Fishing Spot #3 — Gobfin's Turf55, -71
- Fishing Spot #1 — Verdant Brook137, -52
- Fishing Spot #2 — Verdant Brook50, -35
- Rare Fishing Spot #1 — Verdant Brook43, -32
- Rare Fishing Spot #2 — Verdant Brook158, -28
- Rare Fishing Spot #4 — Verdant Brook173, -10
- Rare Fishing Spot #1 — Ancient Ritual Site-43, -300
- Fishing Spot #6 — Ancient Ritual Site-123, -280
- Rare Fishing Spot #2 — Ancient Ritual Site-115, -246
- Fishing Spot #1 — Crescent Moon Shore18, -241
- Fishing Spot #1 — Ancient Ritual Site-44, -368
- Fishing Spot #2 — Ancient Ritual Site-70, -360
- Fishing Spot #1 — Scars of War322, -154
- Fishing Spot #2 — Scars of War298, -132
- Fishing Spot #3 — Scars of War366, -127
- Fishing Spot #4 — Scars of War358, -75
- Fishing Spot #5 — Scars of War302, -47
- Fishing Spot #6 — Scars of War460, -43
- Rare Fishing Spot #1 — Scars of War304, -31
- Fishing Spot #7 — Scars of War423, -9
- Rare Fishing Spot #5 — Verdant Brook181, 5
- Fishing Spot #9 — Scars of War470, 17
- Fishing Spot #4 — Verdant Brook285, 29
- Fishing Spot #5 — Verdant Brook270, 30
- Rare Fishing Spot #1 — Frostbound Mountains267, 46
- Rare Fishing Spot #2 — Frostbound Mountains201, 60
- Fishing Spot #10 — Scars of War371, 61
- Fishing Spot #1 — Frostbound Mountains204, 77
- Fishing Spot #13 — Scars of War383, 116
- Fishing Spot #2 — Frostbound Mountains290, 129
- Fishing Spot #4 — Frostbound Mountains242, 160
- Fishing Spot #3 — Frostbound Mountains160, 159
- Fishing Spot #6 — Frostbound Mountains100, 180
- Fishing Spot #9 — Frostbound Mountains150, 221
- Fishing Spot #3 — Ancient Ritual Site-2, -358
- Fishing Spot #4 — Ancient Ritual Site-30, -314
Twilight Dunes(48)
- Fishing Spot #5 — Duneshelter218, 373
- Fishing Spot #6 — Duneshelter219, 378
- Fishing Spot #8 — Duneshelter261, 438
- Fishing Spot #1 — Duneshelter379, 186
- Fishing Spot #6 — Desiccated Dunes397, 579
- Fishing Spot #3 — Duneshelter414, 191
- Fishing Spot #2 — Duneshelter418, 189
- Fishing Spot #7 — Desiccated Dunes421, 613
- Fishing Spot #7 — No. 3 Wildlife Sanctuary432, 730
- Fishing Spot #5 — No. 3 Wildlife Sanctuary512, 646
- Fishing Spot #3 — No. 3 Wildlife Sanctuary517, 616
- Fishing Spot #4 — Desiccated Dunes518, 475
- Fishing Spot #5 — Desiccated Dunes519, 480
- Fishing Spot #2 — No. 3 Wildlife Sanctuary545, 534
- Fishing Spot #5 — Arena589, 66
- Fishing Spot #6 — Arena614, 90
- Rare Fishing Spot #2 — No. 3 Wildlife Sanctuary1 h632, 599
- Fishing Spot #7 — Arena657, 99
- Fishing Spot #9 — Arena663, 103
- Rare Fishing Spot #1 — No. 3 Wildlife Sanctuary1 h680, 597
- Fishing Spot #3 — Arena690, 50
- Fishing Spot #8 — Arena709, 99
- Fishing Spot #4 — Arena738, 54
- Fishing Spot #1 — Twilight Dunes-105, -195
- Rare Fishing Spot #1 — Twilight Dunes-32, -101
- Rare Fishing Spot #2 — Twilight Dunes-13, -86
- Fishing Spot #2 — Twilight Dunes-101, -85
- Fishing Spot #3 — Twilight Dunes-137, -54
- Fishing Spot #4 — Twilight Dunes-75, -25
- Fishing Spot #5 — Twilight Dunes-7, -11
- Fishing Spot #6 — Twilight Dunes10, 4
- Fishing Spot #7 — Twilight Dunes-83, 13
- Rare Fishing Spot #1 — Arena672, -69
- Fishing Spot #1 — Arena643, 20
- Fishing Spot #10 — Arena709, 150
- Rare Fishing Spot #2 — Arena620, 182
- Fishing Spot #4 — Duneshelter162, 332
- Fishing Spot #7 — Duneshelter121, 383
- Fishing Spot #4 — No. 3 Wildlife Sanctuary557, 626
- Fishing Spot #6 — No. 3 Wildlife Sanctuary475, 716
- Fishing Spot #2 — Arena552, 33
- Rare Fishing Spot #1 — Duneshelter312, 186
- Fishing Spot #1 — Desiccated Dunes454, 292
- Fishing Spot #2 — Desiccated Dunes440, 301
- Fishing Spot #3 — Desiccated Dunes566, 429
- Fishing Spot #9 — Duneshelter234, 457
- Fishing Spot #1 — No. 3 Wildlife Sanctuary586, 494
- Rare Fishing Spot #1 — Desiccated Dunes411, 597
Windswept Hills(43)
- Fishing Spot #2 — Flying Fish Coast108, -594
- Rare Fishing Spot #1 — Flying Fish Coast123, -532
- Fishing Spot #11 — Flying Fish Coast135, -537
- Fishing Spot #12 — Flying Fish Coast150, -529
- Fishing Spot #10 — Flying Fish Coast155, -539
- Fishing Spot #13 — Flying Fish Coast168, -528
- Fishing Spot #9 — Flying Fish Coast177, -540
- Fishing Spot #4 — Flying Fish Coast177, -570
- Fishing Spot #5 — Flying Fish Coast185, -559
- Fishing Spot #6 — Fortress Ruins206, -336
- Fishing Spot #2 — Fortress Ruins219, -354
- Fishing Spot #3 — Fortress Ruins257, -353
- Fishing Spot #4 — Fortress Ruins266, -346
- Rare Fishing Spot #2 — No. 1 Wildlife Sanctuary56, -633
- Rare Fishing Spot #1 — No. 1 Wildlife Sanctuary83, -639
- Fishing Spot #6 — Flying Fish Coast90, -554
- Rare Fishing Spot #1 — Rayne Syndicate Test Drilling Rig166, -305
- Fishing Spot #6 — Autumn Rocks122, -271
- Fishing Spot #8 — Flying Fish Coast198, -547
- Fishing Spot #5 — Fortress Ruins186, -344
- Fishing Spot #7 — Fortress Ruins234, -306
- Fishing Spot #1 — Rayne Syndicate Test Drilling Rig241, -276
- Fishing Spot #2 — Rayne Syndicate Test Drilling Rig198, -272
- Fishing Spot #1 — Fortress Ruins226, -443
- Rare Fishing Spot #1 — Small Settlement75, -469
- Fishing Spot #2 — Windswept Island118, -454
- Fishing Spot #3 — Windswept Island111, -447
- Rare Fishing Spot #1 — Golden Hills-5, -444
- Fishing Spot #3 — Golden Hills7, -441
- Fishing Spot #1 — Desolate Church92, -417
- Rare Fishing Spot #1 — Windswept Island132, -414
- Fishing Spot #2 — Desolate Church93, -413
- Fishing Spot #1 — Autumn Rocks18, -350
- Fishing Spot #1 — Flying Fish Coast162, -599
- Fishing Spot #2 — Autumn Rocks25, -348
- Fishing Spot #3 — Autumn Rocks138, -345
- Fishing Spot #4 — Autumn Rocks140, -339
- Fishing Spot #5 — Autumn Rocks35, -327
- Fishing Spot #3 — Flying Fish Coast82, -578
- Fishing Spot #7 — Flying Fish Coast163, -550
- Fishing Spot #1 — Golden Hills37, -548
- Fishing Spot #2 — Golden Hills29, -516
- Fishing Spot #1 — Windswept Island138, -497
Mt. Obsidian(38)
- Fishing Spot #1 — Foot of the Volcano-341, -391
- Fishing Spot #3 — Foot of the Volcano-314, -356
- Rare Fishing Spot #1 — Foot of the Volcano-336, -315
- Fishing Spot #2 — No. 2 Wildlife Sanctuary-616, -19
- Fishing Spot #5 — Dry Sandy Beach-570, -700
- Fishing Spot #6 — Fisherman's Point-359, -679
- Fishing Spot #6 — Dry Sandy Beach-552, -669
- Rare Fishing Spot #1 — Dry Sandy Beach-539, -667
- Fishing Spot #7 — Dry Sandy Beach-697, -642
- Fishing Spot #8 — Dry Sandy Beach-811, -634
- Rare Fishing Spot #2 — Dry Sandy Beach-707, -626
- Fishing Spot #9 — Dry Sandy Beach-810, -607
- Fishing Spot #2 — Foot of the Volcano-364, -388
- Fishing Spot #4 — Foot of the Volcano-376, -282
- Fishing Spot #5 — Foot of the Volcano-396, -254
- Fishing Spot #1 — Ruined Fortress City-575, -235
- Rare Fishing Spot #1 — Ruined Fortress City-597, -229
- Fishing Spot #2 — Ruined Fortress City-635, -216
- Fishing Spot #3 — Ruined Fortress City-586, -216
- Fishing Spot #4 — Ruined Fortress City-459, -205
- Fishing Spot #1 — No. 2 Wildlife Sanctuary-754, -190
- Fishing Spot #2 — Fisherman's Point-472, -759
- Fishing Spot #3 — Fisherman's Point-483, -758
- Fishing Spot #4 — Fisherman's Point-479, -757
- Fishing Spot #2 — Dry Sandy Beach-586, -726
- Fishing Spot #3 — Dry Sandy Beach-579, -725
- Fishing Spot #4 — Dry Sandy Beach-559, -705
- Fishing Spot #7 — Fisherman's Point-344, -673
- Fishing Spot #5 — Fisherman's Point-415, -693
- Rare Fishing Spot #3 — No. 2 Wildlife Sanctuary1 h-608, -16
- Rare Fishing Spot #1 — No. 2 Wildlife Sanctuary1 h-634, -112
- Rare Fishing Spot #2 — No. 2 Wildlife Sanctuary1 h-638, -97
- Fishing Spot #2 — Mount Obsidian-844, -494
- Fishing Spot #1 — Fisherman's Point-582, -831
- Fishing Spot #1 — Dry Sandy Beach-663, -827
- Fishing Spot #1 — Mount Obsidian-839, -543
- Fishing Spot #3 — Mount Obsidian-855, -475
- Fishing Spot #5 — Ruined Fortress City-605, -169
Sakurajima(34)
- Fishing Spot #3 — Sakurajima - Southern Sandbar-598, 60
- Fishing Spot #1 — Sakurajima - Mushroom Wetlands-422, 95
- Fishing Spot #3 — Sakurajima - Mushroom Wetlands-344, 116
- Fishing Spot #4 — Sakurajima - Mushroom Wetlands-384, 125
- Fishing Spot #10 — Sakurajima - Mushroom Wetlands-423, 152
- Fishing Spot #11 — Sakurajima - Mushroom Wetlands-424, 187
- Fishing Spot #8 — Sakurajima - Mushroom Wetlands-451, 146
- Fishing Spot #2 — Sakurajima - Northern Rock Field-498, 300
- Fishing Spot #7 — Sakurajima - Mushroom Wetlands-515, 140
- Fishing Spot #2 — Sakurajima - Mushroom Wetlands-527, 115
- Fishing Spot #3 — Sakurajima - Northern Rock Field-577, 366
- Fishing Spot #4 — Sakurajima - Southern Sandbar-647, 70
- Fishing Spot #2 — Sakurajima - Southern Sandbar-679, 55
- Fishing Spot #6 — Dancing Sakura Shrine-710, 288
- Fishing Spot #1 — Sakurajima - Southern Sandbar-710, 40
- Fishing Spot #6 — Sakurajima - Southern Sandbar-729, 122
- Fishing Spot #7 — Sakurajima - Southern Sandbar-740, 188
- Fishing Spot #3 — Dancing Sakura Shrine-741, 251
- Fishing Spot #5 — Sakurajima - Southern Sandbar-624, 102
- Fishing Spot #12 — Sakurajima - Mushroom Wetlands-404, 199
- Fishing Spot #2 — Dancing Sakura Shrine-689, 225
- Fishing Spot #13 — Sakurajima - Mushroom Wetlands-458, 232
- Fishing Spot #4 — Dancing Sakura Shrine-684, 261
- Rare Fishing Spot #2 — Dancing Sakura Shrine1 h-626, 268
- Fishing Spot #5 — Dancing Sakura Shrine-629, 282
- Fishing Spot #1 — Sakurajima - Northern Rock Field-494, 297
- Fishing Spot #7 — Dancing Sakura Shrine-666, 330
- Fishing Spot #4 — Sakurajima - Northern Rock Field-494, 375
- Fishing Spot #5 — Sakurajima - Northern Rock Field-582, 376
- Fishing Spot #5 — Sakurajima - Mushroom Wetlands-461, 126
- Fishing Spot #6 — Sakurajima - Mushroom Wetlands-529, 130
- Fishing Spot #9 — Sakurajima - Mushroom Wetlands-364, 149
- Fishing Spot #1 — Dancing Sakura Shrine-657, 179
- Rare Fishing Spot #1 — Dancing Sakura Shrine1 h-684, 197
Sea Breeze Archipelago(23)
- Fishing Spot #2 — Sea Breeze Archipelago-95, -698
- Fishing Spot #9 — Sea Breeze Archipelago-317, -583
- Fishing Spot #1 — Sea Breeze Archipelago Church-53, -582
- Rare Fishing Spot #3 — Sea Breeze Archipelago-118, -567
- Fishing Spot #10 — Sea Breeze Archipelago-187, -564
- Fishing Spot #11 — Sea Breeze Archipelago-243, -546
- Fishing Spot #12 — Sea Breeze Archipelago-268, -525
- Fishing Spot #2 — Sea Breeze Archipelago Church-39, -522
- Fishing Spot #3 — Sea Breeze Archipelago Church-103, -514
- Fishing Spot #13 — Sea Breeze Archipelago-176, -513
- Fishing Spot #14 — Sea Breeze Archipelago-198, -505
- Fishing Spot #3 — Sea Breeze Archipelago-230, -697
- Fishing Spot #4 — Sea Breeze Archipelago Church-85, -501
- Fishing Spot #15 — Sea Breeze Archipelago-139, -498
- Fishing Spot #5 — Sea Breeze Archipelago Church-90, -483
- Fishing Spot #4 — Sea Breeze Archipelago-263, -687
- Fishing Spot #5 — Sea Breeze Archipelago-344, -654
- Rare Fishing Spot #1 — Sea Breeze Archipelago-305, -644
- Fishing Spot #6 — Sea Breeze Archipelago-329, -636
- Fishing Spot #7 — Sea Breeze Archipelago-296, -621
- Fishing Spot #8 — Sea Breeze Archipelago-183, -613
- Rare Fishing Spot #2 — Sea Breeze Archipelago-275, -589
- Fishing Spot #1 — Sea Breeze Archipelago-165, -741
Astral Mountains(13)
- Fishing Spot #2 — Isle of Murmurs-190, 11
- Rare Fishing Spot #1 — Isle of Murmurs-374, -27
- Fishing Spot #1 — Isle of Murmurs-382, 9
- Fishing Spot #3 — Isle of Murmurs-377, 40
- Fishing Spot #6 — Foot of the Astral Mountains98, 326
- Fishing Spot #5 — Isle of Murmurs-321, 103
- Rare Fishing Spot #1 — Foot of the Astral Mountains-116, 146
- Fishing Spot #5 — Foot of the Astral Mountains-217, 167
- Fishing Spot #1 — Foot of the Astral Mountains-10, 54
- Fishing Spot #2 — Foot of the Astral Mountains-111, 59
- Fishing Spot #4 — Isle of Murmurs-254, 79
- Fishing Spot #3 — Foot of the Astral Mountains-170, 81
- Fishing Spot #4 — Foot of the Astral Mountains26, 91
Marsh Island(11)
- Fishing Spot #5 — Marsh Island272, -328
- Fishing Spot #2 — Marsh Island292, -357
- Fishing Spot #3 — Marsh Island435, -356
- Fishing Spot #4 — Marsh Island433, -331
- Rare Fishing Spot #1 — Marsh Island362, -329
- Fishing Spot #6 — Marsh Island463, -299
- Fishing Spot #7 — Marsh Island336, -278
- Rare Fishing Spot #2 — Marsh Island263, -240
- Fishing Spot #8 — Marsh Island272, -214
- Fishing Spot #9 — Marsh Island350, -204
- Fishing Spot #1 — Marsh Island315, -403
Isle of Silence(8)
- Fishing Spot #6 — Isle of Silence-420, 41
- Rare Fishing Spot #1 — Isle of Silence Church Ruins-459, -28
- Fishing Spot #4 — Isle of Silence-527, -23
- Fishing Spot #5 — Isle of Silence-495, 24
- Fishing Spot #7 — Isle of Silence-510, 93
- Fishing Spot #1 — Isle of Silence-468, -153
- Fishing Spot #2 — Isle of Silence-505, -109
- Fishing Spot #3 — Isle of Silence-508, -104
Bamboo Grove(7)
- Fishing Spot #3 — Bamboo Groves-126, -307
- Fishing Spot #1 — Deep Bamboo Thicket-289, -138
- Rare Fishing Spot #1 — Deep Bamboo Thicket-222, -133
- Fishing Spot #4 — Bamboo Groves-277, -264
- Fishing Spot #1 — Bamboo Groves-233, -429
- Fishing Spot #2 — Bamboo Groves-204, -421
- Fishing Spot #2 — Deep Bamboo Thicket-407, -74
Eastern Wild Island(5)
On the World Tree (77)
Palworld 1.0 draws the World Tree as its own map rather than a corner of the Palpagos Islands, so these 77 fishing spots have no Palpagos region and are listed on their own.
- Rare Fishing Spot #1 — Shinespore Root-1934, 1190
- Rare Fishing Spot #2 — Shinespore Root-1903, 1202
- Rare Fishing Spot #1 — Spore Cloister-1833, 1262
- Fishing Spot #1 — Lacrymal Shoal-1950, 1297
- Fishing Spot #1 — Alluvion Lakefront-1715, 1332
- Fishing Spot #2 — Alluvion Lakefront-1614, 1332
- Fishing Spot #3 — Alluvion Lakefront-1702, 1336
- Rare Fishing Spot #1 — Alluvion Lakefront-1672, 1340
- Fishing Spot #4 — Alluvion Lakefront-1722, 1343
- Fishing Spot #1 — Spore Cloister-1857, 1346
- Rare Fishing Spot #2 — Alluvion Lakefront-1675, 1348
- Fishing Spot #5 — Alluvion Lakefront-1708, 1351
- Fishing Spot #2 — Spore Cloister-1831, 1354
- Rare Fishing Spot #3 — Alluvion Lakefront-1584, 1355
- Rare Fishing Spot #2 — Spore Cloister-1864, 1356
- Fishing Spot #1 — Gilded City Ruins-1842, 1362
- Rare Fishing Spot #1 — Within the Seal-1926, 1364
- Fishing Spot #6 — Alluvion Lakefront-1699, 1367
- Fishing Spot #7 — Alluvion Lakefront-1691, 1369
- Fishing Spot #8 — Alluvion Lakefront-1718, 1373
- Fishing Spot #2 — Gilded City Ruins-1799, 1377
- Fishing Spot #3 — Gilded City Ruins-1737, 1379
- Fishing Spot #4 — Gilded City Ruins-1810, 1386
- Rare Fishing Spot #1 — The Verdant Rootpath-1493, 1390
- Fishing Spot #5 — Gilded City Ruins-1797, 1396
- Fishing Spot #6 — Gilded City Ruins-1759, 1398
- Fishing Spot #7 — Gilded City Ruins-1793, 1399
- Fishing Spot #8 — Gilded City Ruins-1744, 1401
- Fishing Spot #9 — Gilded City Ruins-1802, 1408
- Fishing Spot #10 — Gilded City Ruins-1760, 1409
Strategy tips
- Casts only register at named spots — you can't fish freely along any shoreline or river.
- Most spots come back 15 minutes after you fish them out, but 38 of the 500 on Palpagos take a full hour. Check the marker before you build a loop around one.
- The hour-long spots are concentrated, not scattered: 19 on Feybreak, 12 on Outlying Isles, 3 on Mt. Obsidian, 2 on Sakurajima and 2 on Twilight Dunes.
- Higher rod tiers widen the catch bar, which makes the minigame more forgiving — the rod table above lists each rod's bar and durability.
- A catch lands the Pal itself: fill the gauge in the minigame and it is yours, with no sphere throw. Spots named “Rare Fishing Spot” draw from the rare table — a scarcer roster, not a harder catch.
- Spot positions come from paldb.cc's map data, extracted from the game files — the same source the interactive map uses.