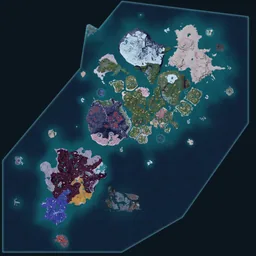
Wild Pal Spawns in Palworld
409 spawn locations on the Palpagos Islands, covering 101 species Most concentrated in Windswept Hills (72).
409 mapped101 speciesEnemies
wild pal spawns spawn map
Showing 200 of 409 markers
View all on the map →Best regions to hunt
Top 12 of 101 species
 Leezpunk×20Dark
 Depresso×13Dark
 Cattiva×13Neutral
 Xenovader×13Dark
 Pengullet×11Water · Ice
 Chikipi×10Neutral
 Helzephyr×10Dark
 Hoocrates×9Dark
 Lifmunk×9Grass
 Wixen×8Fire
 Cawgnito×8Dark
 Caprity×8Grass
Distribution by region
- Windswept Hills72 · 18%
- Feybreak48 · 12%
- Verdant Brook45 · 11%
- Twilight Dunes41 · 10%
- Astral Mountains41 · 10%
- Mt. Obsidian40 · 10%
- Sea Breeze Archipelago32 · 8%
- Outlying Isles30 · 7%
- Bamboo Grove25 · 6%
- Marsh Island16 · 4%
- Isle of Silence9 · 2%
- Eastern Wild Island6 · 1%
- Sakurajima4 · 1%
All locations by region
Windswept Hills(72)
 Teafant (Lv. 14)100, -364
 Gumoss (Lv. 14) #1 — Golden Hills12, -447
- Chikipi (Lv. 5)157, -466
 Incineram Noct (Lv. 16)159, -286
- Leezpunk (Lv. 16)162, -280
 Nitewing (Lv. 16)167, -276
 Dumud (Lv. 20)171, -281
 Grintale (Lv. 20)175, -317
 Arsox (Lv. 16)176, -308
 Fuddler (Lv. 16)177, -295
- Depresso (Lv. 16)177, -299
 Digtoise (Lv. 19)183, -286
- Cawgnito (Lv. 43)41, -403
- Hoocrates (Lv. 19)60, -324
- Chikipi (Lv. 12)70, -482
- Gumoss (Lv. 14) #1 — Small Settlement71, -482
 Mozzarina (Lv. 13)71, -484
- Caprity (Lv. 16)71, -485
 Vixy (Lv. 16)72, -478
- Mozzarina (Lv. 12)72, -483
- Mozzarina (Lv. 15)72, -484
- Chikipi (Lv. 11)72, -485
 Tanzee (Lv. 14)74, -476
 Sparkit (Lv. 14)76, -474
 Cremis (Lv. 14)76, -476
 Rooby (Lv. 16)76, -477
- Lifmunk (Lv. 15)77, -481
- Depresso (Lv. 9)78, -481
- Pengullet (Lv. 10)79, -478
- Tanzee (Lv. 12)80, -477
Feybreak(48)
 Katress Ignis (Lv. 62)-1022, -929
 Vanwyrm (Lv. 61)-1026, -932
 Nox (Lv. 48)-1026, -932
 Katress (Lv. 61) #1 — Stone Pillar Cave-1033, -936
 Ribbuny (Lv. 62)-1047, -1249
 Celesdir (Lv. 61)-1048, -1357
 Mau (Lv. 64)-1063, -1427
 Pyrin (Lv. 57)-1080, -904
- Katress (Lv. 61) #1 — Hidden Passage to the Oculus Gate-1083, -1287
 Omascul (Lv. 59)-1237, -1182
- Fuddler (Lv. 64)-1396, -1051
- Leezpunk (Lv. 56) #1 — Rayne Syndicate Platform Oil Rig-1687, -1472
- Leezpunk (Lv. 56) #2 — Rayne Syndicate Platform Oil Rig-1691, -1466
- Leezpunk (Lv. 56) #6 — Rayne Syndicate Platform Oil Rig-1692, -1459
- Leezpunk (Lv. 56) #3 — Rayne Syndicate Platform Oil Rig-1692, -1465
- Xenovader (Lv. 56) #5 — Rayne Syndicate Platform Oil Rig-1700, -1466
 Knocklem (Lv. 58)-1708, -1464
- Leezpunk (Lv. 56) #4 — Rayne Syndicate Platform Oil Rig-1712, -1463
- Incineram Noct (Lv. 57) #3 — Rayne Syndicate Platform Oil Rig-1714, -1456
- Xenovader (Lv. 56) #2 — Rayne Syndicate Platform Oil Rig-1715, -1481
- Xenovader (Lv. 56) #1 — Rayne Syndicate Platform Oil Rig-1715, -1487
- Xenovader (Lv. 58) #1 — Rayne Syndicate Platform Oil Rig-1721, -1421
- Xenovader (Lv. 58) #2 — Rayne Syndicate Platform Oil Rig-1722, -1418
- Incineram Noct (Lv. 57) #2 — Rayne Syndicate Platform Oil Rig-1723, -1461
- Helzephyr (Lv. 57) #2 — Rayne Syndicate Platform Oil Rig-1724, -1421
- Leezpunk (Lv. 56) #8 — Rayne Syndicate Platform Oil Rig-1729, -1451
- Xenovader (Lv. 56) #9 — Rayne Syndicate Platform Oil Rig-1729, -1456
- Leezpunk (Lv. 56) #7 — Rayne Syndicate Platform Oil Rig-1730, -1453
- Xenovader (Lv. 56) #6 — Rayne Syndicate Platform Oil Rig-1731, -1464
- Xenovader (Lv. 56) #7 — Rayne Syndicate Platform Oil Rig-1732, -1461
Verdant Brook(45)
- Depresso (Lv. 21)21, -230
 Incineram (Lv. 23)261, -218
 Surfent Terra (Lv. 45)283, 165
- Wild Caprity — Crescent Moon Shore30, -150
 Wild Tocotoco — Frostbound Mountains164, 240
 Wild Cinnamoth — Crescent Moon Shore9, -220
- Wild Cinnamoth #1 — Ancient Ritual Site-54, -330
- Wild Cinnamoth #2 — Ancient Ritual Site4, -324
 Wild Galeclaw — Crescent Moon Shore-70, -220
- Wild Galeclaw #1 — Ancient Ritual Site-109, -329
- Wild Galeclaw #2 — Ancient Ritual Site4, -324
 Wild Flopie — Crescent Moon Shore9, -220
- Wild Flopie #1 — Ancient Ritual Site0, -240
- Wild Flopie #2 — Ancient Ritual Site0, -240
- Wild Wixen — Scars of War355, -11
- Wild Helzephyr — Crescent Moon Shore33, -188
- Wild Helzephyr #1 — Ancient Ritual Site-54, -330
- Wild Helzephyr — Verdant Brook256, -89
- Wild Helzephyr — Frostbound Mountains91, 88
- Wild Helzephyr #2 — Ancient Ritual Site4, -324
 Wild Reindrix #1 — Frostbound Mountains16, 34
- Wild Reindrix #2 — Frostbound Mountains205, 43
 Wild Foxcicle #1 — Frostbound Mountains168, 32
- Wild Foxcicle #2 — Frostbound Mountains205, 43
- Wild Foxcicle #3 — Frostbound Mountains168, 68
 Wild Flambelle — Scars of War355, -11
 Wild Bristla — Crescent Moon Shore9, -220
- Wild Bristla #1 — Ancient Ritual Site-54, -330
- Wild Bristla #2 — Ancient Ritual Site4, -324
 Wild Swee #1 — Frostbound Mountains205, 43
Twilight Dunes(41)
 Robinquill Terra (Lv. 40)320, 370
- Nitewing (Lv. 45)340, 360
- Vanwyrm (Lv. 43)340, 363
 Jolthog (Lv. 41)341, 351
- Vixy (Lv. 40)342, 352
- Wixen (Lv. 48)342, 352
- Mau (Lv. 42)342, 357
- Wixen (Lv. 43)343, 368
- Fuddler (Lv. 43)344, 350
 Direhowl (Lv. 44)344, 367
- Cattiva (Lv. 41)344, 368
- Robinquill Terra (Lv. 31)346, 353
- Helzephyr (Lv. 54)525, 333
 Wild Shadowbeak656, 626
- Wild Tocotoco — Twilight Dunes-149, -96
- Wild Tocotoco634, 206
- Wild Tocotoco — Duneshelter406, 282
- Wild Fuddler — Twilight Dunes-149, -96
- Wild Fuddler439, 598
- Wild Fuddler — Desiccated Dunes457, 517
- Wild Cawgnito532, 410
- Wild Cawgnito — Desiccated Dunes419, 339
 Wild Faleris656, 626
 Wild Lyleen656, 626
- Wild Leezpunk439, 598
- Wild Leezpunk — Desiccated Dunes457, 517
- Wild Swee — Twilight Dunes-184, -184
- Wild Pengullet — Twilight Dunes-120, 0
 Wild Dazzi360, 240
- Wild Dazzi — Duneshelter360, 240
Astral Mountains(41)
 Mau Cryst (Lv. 41)-100, 304
 Sibelyx (Lv. 43)-195, 481
- Hoocrates (Lv. 40)-45, 89
- Wild Mau Cryst — Astral Mountains-259, 367
- Wild Mau Cryst — Abandoned Ruins-90, 300
- Wild Mau Cryst — Foot of the Astral Mountains0, 90
- Wild Caprity — Isle of Murmurs-246, -5
- Wild Caprity — Forgotten Island-331, 10
- Wild Caprity #2 — Foot of the Astral Mountains-161, 173
- Wild Caprity #1 — Foot of the Astral Mountains-92, 126
 Wild Vanwyrm Cryst47, 358
- Wild Vanwyrm Cryst — Astral Mountains-259, 367
- Wild Vanwyrm Cryst — Abandoned Ruins-24, 337
- Wild Vanwyrm Cryst — Foot of the Astral Mountains0, 90
- Wild Lifmunk — Isle of Murmurs-300, -30
- Wild Rooby — Isle of Murmurs-300, -30
- Wild Arsox #2 — Foot of the Astral Mountains-161, 173
- Wild Arsox #1 — Foot of the Astral Mountains0, 90
- Wild Teafant — Forgotten Island-371, -13
 Wild Mammorest Cryst47, 358
- Wild Mammorest Cryst — Astral Mountains-330, 330
- Wild Mammorest Cryst — Abandoned Ruins-24, 337
- Wild Reindrix #2 — Foot of the Astral Mountains-161, 173
- Wild Reindrix #1 — Foot of the Astral Mountains-15, 137
- Wild Tanzee — Forgotten Island-331, 10
- Wild Nox #1 — Isle of Murmurs-269, -9
- Wild Nox — Isle of Murmurs-300, 30
- Wild Nox #2 — Isle of Murmurs-279, 69
- Wild Pengullet #2 — Foot of the Astral Mountains-161, 173
- Wild Pengullet #1 — Foot of the Astral Mountains-33, 144
Mt. Obsidian(40)
 Rayhound (Lv. 36)-466, -741
- Sparkit (Lv. 32)-468, -742
- Leezpunk (Lv. 28)-469, -746
- Mau (Lv. 25)-474, -749
- Fuddler (Lv. 26)-474, -758
- Cawgnito (Lv. 32)-475, -750
- Wixen (Lv. 40)-477, -539
- Pengullet (Lv. 28)-477, -745
- Pengullet (Lv. 26)-477, -745
- Katress (Lv. 37)-477, -746
 Fuack (Lv. 31)-477, -747
- Flambelle (Lv. 26)-477, -752
- Dumud (Lv. 24) #2 — Fisherman's Point-477, -752
- Galeclaw (Lv. 38)-478, -750
- Cattiva (Lv. 30)-478, -751
- Cattiva (Lv. 31)-478, -751
- Dumud (Lv. 24) #1 — Fisherman's Point-478, -752
- Chikipi (Lv. 28)-482, -751
- Cattiva (Lv. 29)-482, -751
- Depresso (Lv. 26)-483, -752
- Rayhound (Lv. 42)-485, -750
- Wixen (Lv. 39)-592, -235
- Wild Incineram — Mount Obsidian-540, -450
- Wild Incineram-780, -390
 Wild Pyrin Noct — Mount Obsidian-577, -490
- Wild Pyrin — Foot of the Volcano-486, -384
- Wild Arsox — Foot of the Volcano-360, -360
 Wild Celaray-318, -334
- Wild Wixen — Foot of the Volcano-480, -300
 Wild Kelpsea Ignis — Foot of the Volcano-480, -300
Sea Breeze Archipelago(32)
- Direhowl (Lv. 15)-290, -622
 Wild Melpaca — Sea Breeze Archipelago-125, -534
- Wild Melpaca-204, -652
- Wild Fuack — Sea Breeze Archipelago-133, -542
- Wild Fuack-204, -652
 Wild Rushoar — Sea Breeze Archipelago-197, -604
- Wild Rushoar-204, -652
- Wild Lifmunk — Sea Breeze Archipelago-143, -594
- Wild Lifmunk-204, -652
 Wild Tombat-60, -510
 Wild Eikthyrdeer — Sea Breeze Archipelago-210, -540
- Wild Eikthyrdeer-210, -540
 Wild Daedream — Sea Breeze Archipelago-236, -583
- Wild Sparkit — Sea Breeze Archipelago Church-60, -510
- Wild Rooby — Sea Breeze Archipelago-180, -660
- Wild Rooby-204, -652
- Wild Celaray — Sea Breeze Archipelago-144, -579
- Wild Teafant — Sea Breeze Archipelago-180, -600
- Wild Teafant-187, -602
- Wild Tanzee — Sea Breeze Archipelago-180, -660
- Wild Depresso — Sea Breeze Archipelago-193, -565
- Wild Depresso-210, -540
- Wild Pengullet — Sea Breeze Archipelago-174, -635
- Wild Pengullet-187, -602
- Wild Cattiva — Sea Breeze Archipelago-197, -604
- Wild Cattiva-204, -652
 Wild Lamball — Sea Breeze Archipelago-193, -561
- Wild Lamball-204, -652
- Wild Hoocrates — Sea Breeze Archipelago-159, -547
- Wild Hoocrates-198, -635
Outlying Isles(30)
- Pyrin (Lv. 55)540, -419
- Depresso (Lv. 55)552, -434
- Tombat (Lv. 55)556, -436
 Leezpunk Ignis (Lv. 55)559, -443
- Leezpunk (Lv. 55) #2 — Rayne Syndicate Oil Rig567, -429
 Relaxaurus Lux (Lv. 55)568, -427
- Leezpunk (Lv. 55) #1 — Rayne Syndicate Oil Rig573, -432
 Ragnahawk (Lv. 55)578, -434
 Gobfin (Lv. 55)584, -453
 Menasting (Lv. 55)588, -406
- Dumud (Lv. 55)596, -434
 Gobfin Ignis (Lv. 55)597, -425
- Robinquill Terra (Lv. 55)598, -431
 Blazehowl Noct (Lv. 55)600, -428
 Jormuntide Ignis (Lv. 55) #1 — Rayne Syndicate Oil Rig603, -430
- Jormuntide Ignis (Lv. 55) #2 — Rayne Syndicate Oil Rig604, -419
- Vanwyrm (Lv. 55)607, -420
- Wixen (Lv. 55) #2 — Rayne Syndicate Oil Rig607, -427
- Incineram Noct (Lv. 55)613, -430
- Tocotoco (Lv. 55)614, -426
- Wixen (Lv. 55) #1 — Rayne Syndicate Oil Rig615, -430
 Puffolt (Lv. 71)-334, -1384
 Dynamoff (Lv. 70)-337, -1394
 Lapure (Lv. 72)-340, -1389
- Wild Mau Cryst — Isle of the Glacial Core90, 420
- Wild Mau Cryst90, 420
- Wild Pyrin Noct-835, -433
- Wild Gobfin Ignis-835, -433
 Wild Cryolinx90, 420
- Wild Cryolinx — Isle of the Glacial Core90, 420
Bamboo Grove(25)
 Herbil (Lv. 19)-220, -135
- Lifmunk (Lv. 18)-224, -138
 Loupmoon (Lv. 47)-293, -186
- Wild Lifmunk #1 — Deep Bamboo Thicket-300, -60
- Wild Lifmunk #2 — Deep Bamboo Thicket-360, -60
- Wild Cawgnito #2 — Bamboo Groves-247, -205
- Wild Cawgnito #1 — Bamboo Groves-181, -399
- Wild Cawgnito — Deep Bamboo Thicket-363, -204
- Wild Galeclaw — Deep Bamboo Thicket-363, -204
- Wild Arsox #1 — Deep Bamboo Thicket-293, -211
- Wild Arsox #2 — Deep Bamboo Thicket-363, -204
- Wild Celaray — Deep Bamboo Thicket-330, -103
 Wild Kelpsea-411, -142
- Wild Swee — Bamboo Groves-150, -300
- Wild Depresso #2 — Deep Bamboo Thicket-289, -141
- Wild Depresso — Bamboo Groves-210, -330
- Wild Depresso #1 — Deep Bamboo Thicket-363, -204
 Wild Surfent — Bamboo Groves-138, -460
 Wild Woolipop — Bamboo Groves-125, -404
- Wild Loupmoon — Bamboo Groves-164, -390
- Wild Loupmoon — Deep Bamboo Thicket-363, -204
- Wild Hoocrates #1 — Deep Bamboo Thicket-300, -216
- Wild Hoocrates — Bamboo Groves-210, -330
- Wild Hoocrates #2 — Deep Bamboo Thicket-363, -204
- Wild Hoocrates — Deep Bamboo Thicket-360, -210
Marsh Island(16)
- Wild Melpaca — Marsh Island335, -311
- Wild Fuack — Marsh Island340, -306
- Wild Rushoar — Marsh Island Church Ruins389, -249
- Wild Lifmunk — Marsh Island332, -311
- Wild Tombat — Marsh Island330, -300
- Wild Tombat — Marsh Island Church Ruins379, -258
- Wild Chikipi — Marsh Island Church Ruins373, -273
- Wild Mozzarina — Marsh Island330, -300
- Wild Eikthyrdeer — Marsh Island330, -300
- Wild Eikthyrdeer — Marsh Island Church Ruins379, -258
- Wild Rooby — Marsh Island341, -278
- Wild Celaray — Marsh Island352, -263
- Wild Depresso — Marsh Island Church Ruins376, -259
- Wild Pengullet — Marsh Island300, -360
- Wild Lamball — Marsh Island Church Ruins370, -274
- Wild Cremis — Marsh Island335, -311
Isle of Silence(9)
- Wild Fuack — Forgotten Island-464, -20
- Wild Celaray — Forgotten Island-437, -55
- Wild Teafant — Isle of Silence-510, -30
- Wild Tanzee — Isle of Silence Church Ruins-450, -30
- Wild Nox — Forgotten Island-412, -8
- Wild Nox — Isle of Silence-510, -30
- Wild Pengullet — Forgotten Island-439, -53
- Wild Cattiva — Forgotten Island-412, -8
- Wild Cremis — Forgotten Island-464, -20
Eastern Wild Island(6)


Strategy tips
- Read the name before you travel. 155 of the 409 markers here print a level — those are single placed Pals at a fixed spot and a fixed level, not spawn points, so the number is that one Pal's and says nothing about where the species spawns in the wild. The other 254 are spawn areas and carry no level.
- 82 of the placed Pals stand beside someone — a bounty target, a merchant, a settlement resident, and 65 of them the Pal a Rayne Syndicate oil-rig guard has out across the 3 rigs. Each marker's description names who, and those carry the guard's own level, so a rig Pal is as strong as the guard beside it.
- A spawn-area marker is a cluster centroid, not a doorway: its coordinate is the middle of the recorded spawn points for that species in that place, so expect to sweep the surroundings rather than find one Pal standing on the pin.
- Use the Pals list above to see which species this layer covers — 71 of them have spawn areas and 67 appear as placements. If your target is in neither list, its habitat is on the region pages (/palworld/region/[slug]).
- Match Pal Sphere tier to the level the marker prints: Mega for early-game, Hyper for mid, Ultra for endgame catches.
Frequently asked questions
What are Wild Pal markers in Palworld?
Two kinds of place, on one layer. 254 of the 409 are spawn areas — points extracted from the game's spawn tables, reduced to one marker per region a species inhabits, so the coordinate is the middle of where that species is recorded appearing. The other 155 are placed Pals: a single Pal the game puts on one exact spot at one exact level, which is why those markers print "(Lv. N)" and the spawn areas do not.
What does the level in a Wild Pal marker's name mean?
It is that one Pal's own level, and it is exact. 155 markers on this layer carry one, running from Lv 5 to Lv 72. It is not the range the species spawns at in the wild — for most of these the nearest wild spawner of the same species is a long way off, so the two numbers describe different things in different places. For the species' wild level band, open the Pal's own page.
Do Wild Pal markers respawn after capture?
The 254 spawn areas keep producing their species — that is what a spawn table is, and the marker stands for the whole cluster of points rather than one of them. The 155 placed Pals are single placements, and we have no sourced respawn timer for either, so treat "how long until it is back" as unanswered here rather than take a number from us. What the data does say is that the placement itself is fixed — the species and the level are written into that spot — so a placed Pal that returns returns as the same Pal.
How do I find the best place to catch a particular Pal?
Open the Featured Pals list above — it is sorted by how many markers exist for each species, and clicking a Pal opens its own page with biome notes, stats and breeding parents. Then use All locations by region below: a marker whose name starts "Wild" is somewhere the species spawns, and one printing a level is a single Pal you can walk to and fight at exactly that level.
Related deep dives
- Oil Rig Guard Locations →The garrisons the 65 rig Pals stand with — every posted guard on the 3 Rayne Syndicate rigs, with levels.
- Palworld Combat Tier List →Catch priorities — which Pals are worth grinding for combat power.
- Best Working Pals (Tier List) →Want a Pal for your base instead of combat? See which of these carry the strongest work suitability.